
With this Bean Stitch Crochet Purse Pattern and video tutorial you’ll learn how to create a strap for a bag as well as learning how to do the bean stitch in the round.
You can find more things like this under the category Bags and Purses
Other patterns that use this stitch are:
Bean Stitch – In Rows – Crochet Stitch
Be sure to sign up for my newsletter so you can always be update date with the free patterns I release as they come out! https://www.meladorascreations.com/sign-up-for-newsletter/
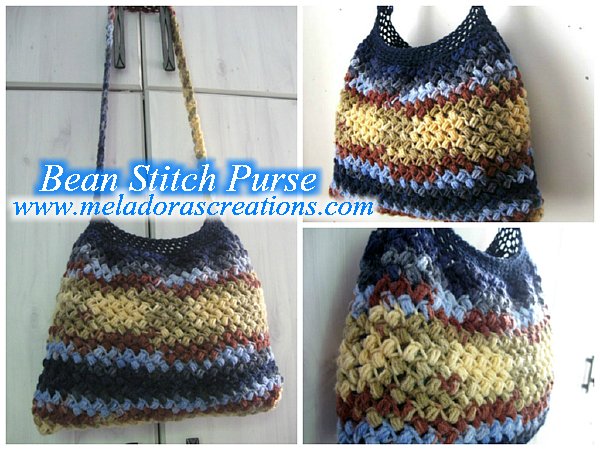
Bean Stitch Purse – Free Crochet Pattern and Video Tutorial
This page contains affiliate links
For this project you will need:
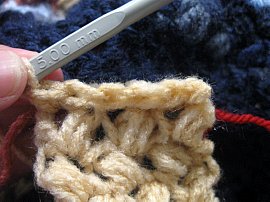
HOOK: 5 mm hook or size H hook for the US
YARN: 2 skeins of worsted weight yarn, 4 ply US, 10 ply AU but it seems a bit thicker this yarn. So I am placing a gauge for you.
Each Skein was – 100 grams / 3.5. oz or 240 meters / 262 yards
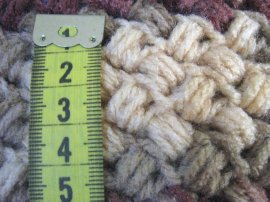
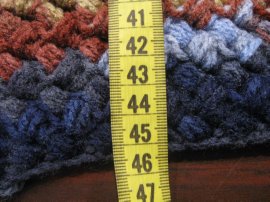
This is in cms, but 2.54 cms = 1 inch so you have 2 bean sts per inch.
At least 2 stitch markers
ABBREVIATIONS
ch = Chain
sl st = Slip Stitch
YO = Yarn Over
THE TUTORIALS:
RIGHT HANDED VERSION
LEFT HANDED VERSION
If you haven’t yet, take a moment to subscribe to my videos on YouTube to have easy access to all my videos and playlist @meladora1 on YouTube
To start:
ch 45
Round 1
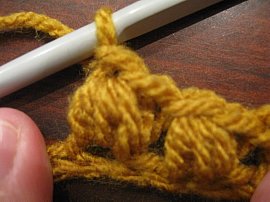
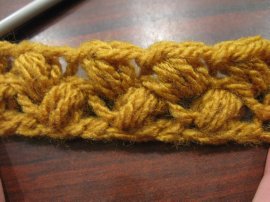
Insert your hook into the 3rd chain from the hook pull up a loop, YO and insert hook into same stitch, repeat 1 more time, 6 loops on hook, YO and pull through all 6 loops, ch 1. This is how you will make every bean stitch. To start the next bean stitch you just skip a st and insert your hook into next stitch and pull up a loop, YO and insert hook into same stitch and repeat 1 more time, 6 loops on hook, YO and pull through all 6 loops, ch 1.

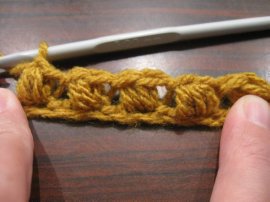
Sk a st and in the next stitch repeat the bean stitch. Repeat for rest for row. At end ch 2 and turn your work.
Round 2
Every bean stitch has two sts on it, you will always favor the left one. So beginning in the left stitch repeat your bean stitch by inserting your hook and YO and pull up a loop 3 times total, 6 loops on hook. YO and pull through all loops. Ch 1 and sk a st. Repeat. When you get to the end ch 2 and turn your work.
Repeat round 3 until round 52 or until your bag reaches 45 cms/ 18 inches in length and 35 cms/ 14 inches wide

SIDES OF BAG
Fold your project in half and mark out 2 rows of bean sts on the side, and you should still have a row of bean stitches for the bottom of a total of 5 rows, place a marker here. This will be where you make your T stitch later.
Now to sew your sides together, insert your hook through the top stitch and the opposite stitch on the other side and sc them together. Do this down the side, single crocheting your sides together. Until you reach your marker.
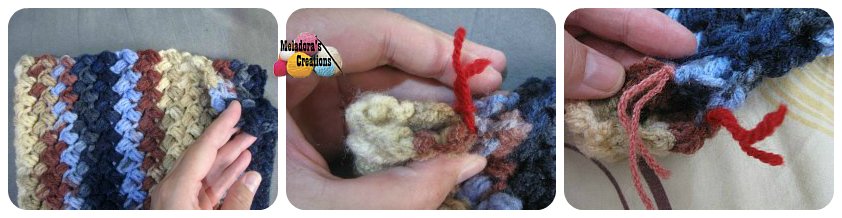
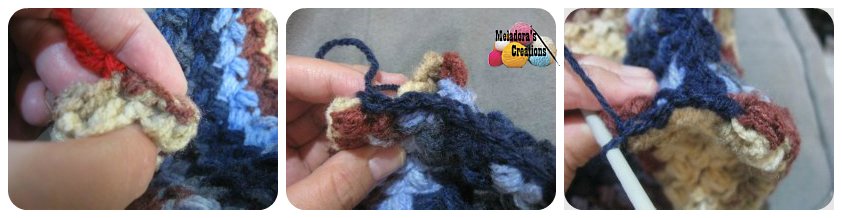
Fold your marker in a T shape and sc it closed on one side, ch 1 and sc into first stitch, then into center of T and start single crocheting the other side closed. Ch 1 and cut yarn, repeat for other side as well.
Turn your bag inside out, because this is going to be the good side now, so the sc’s won’t show.
Round 1
sc attach your yarn and sc in each stitch around, place marker to mark first stitch. (81 sts) if your off a st or two it’s okay you can fix it next round. Working in one continuous round.
Round 2
sc 1, sc dec in all sts around. (54 – 60 sts) if you have more back up and do more decreases that you need, if you have less then decrease less but as long as your in between 60 to 54 sts your fine.
Rounds 3 – 5
sc in all stitches around (54 – 60 sts)

When your ready to make your handles, choose your color you want for the strap and leave yourself a long enough tail before you make your slip knot, so you can work it in later with a tapestry needle.
Insert your hook into the first marked stitch and pull up a loop, YO and go into the same stitch and pull up a loop, repeat one more time for 6 loops on your hook, YO pull through all 6 loops. We are doing the bean stitch again. So skip a st and repeat until you reach your marker, you should have 3 bean stitches. Ch 2 and turn, repeat until you have 59 rows or the length of the strap you like. 59 rows will make it a shoulder strap. Just end on an odd number of rows.

CONNECTING THE STRAPS
Turn your bag inside out and line your strap up with the markers on the opposite side of the bag, and insert your hook through the stitch on the strap, the the stitch on the bag and sc , continue to do this for all stitch to sew your strap on. Cut your yarn leaving a long enough tail to be worked in with a tapestry needle.
This pattern is brought to you by www.meladorascreations.com
You can sell any item made from this pattern and link back to my page or videos, but you do not have permission to copy and paste my pattern anywhere online. ©Copyright 2015, All Rights Reserved
~~~~~~~~~PLEASE READ BELOW!~~~~~~~~~~
If you’d like to see my channel stay and grow, please consider becoming a patron.
Or you could make a one time donation through PayPal. Thank you so much for your support! God Bless!