
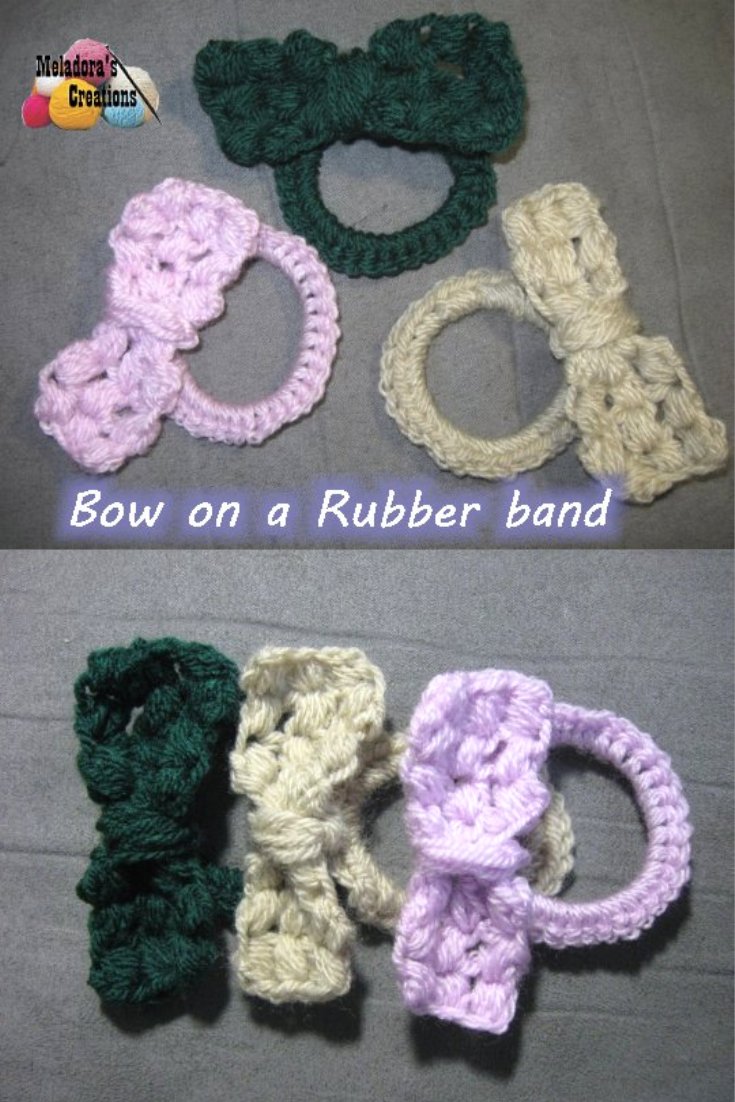
Crochet Bow Hair Tie pattern and tutorial
Sprucing up your hair ties with crochet is so much fun! You can choose your colors and style your rubber band ties just how you want.
This crochet pattern will teach you method of adding yarn to a rubber band and attaching a cute textured bow onto it.
Find more crochet stitches here on the category Hair Accessories
Be sure to sign up for my newsletter so you can always be update date with the free patterns I release as they come out! https://www.meladorascreations.com/sign-up-for-newsletter/
Crochet Bow Hair Tie – Free Crochet Pattern
This page contains affiliate links
For this Bow on a Rubber band project you will need
HOOK: a 4.5mm/ F hook
YARN: a bit of worsted weight yarn, 4 ply US, 10ply AU
Another yarn brand with color options
- a rubber band
- tapestry needle
ABBREVIATIONS
ch = Chain
YO = Yarn Over
st = Stitch
sl st = Slip Stitch
SC = Single Crochet
PS = Puff stitch
The Puff Stitch is done as follows.
YO, go in through stitch and pull up a loop, (3 loops on hook)
YO, go in through stitch and pull up a loop, (5 loops on hook)
YO, go in through stitch and pull up a loop, YO and pull through all 7 loops on your hook. Then chain one to secure puff stitch.
THE TUTORIALS:
RIGHT HANDED VERSION
LEFT HANDED VERSION
If you haven’t yet, take a moment to subscribe to my videos on YouTube to have easy access to all my videos and playlist
![]()
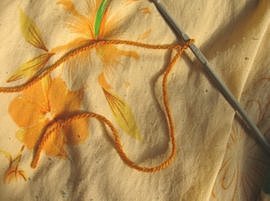
To Start:
Leave yourself a long tail before you make your slip knot like shown above.
Ch 4
Row 1
Puff stitch in 2nd chain from hook and next 2 sts, ch 1 and turn
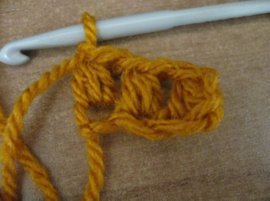
Rows 2 – 7 (6 rows)
Do three puff stitches working in the tops of the puff stitches from the previous row, ch 1 and turn.

On last row ch 1 and cut leaving yourself a long tail, this will be what we use to wrap the center of the bow.

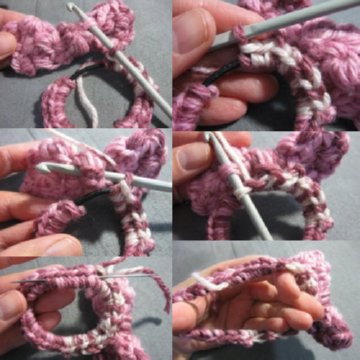
With your tapestry needle, work both your tails to the middle row.
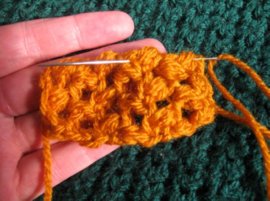
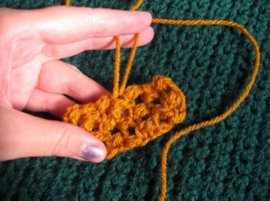
Wrap the yarn around the center row. Make sure you don’t wrap all of it, you will need some tail to sew onto your project. Insert you hook underneath the wrapped yarn as show below.
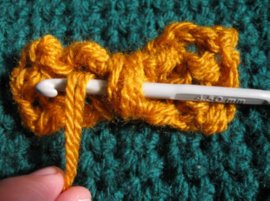
Then pull underneath
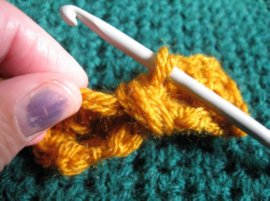
Forming a loop on the other side. Then pull your tail through this loop to secure.
Like shown below.
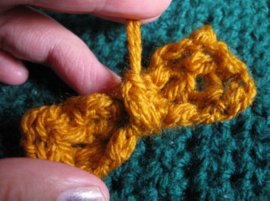
Sew it onto whatever you wish or you can finish hiding your tails and attach to a rubber band.
Do a sc connection to attach to rubber band.

Then sc your way around until you have all but a half of a inch left.
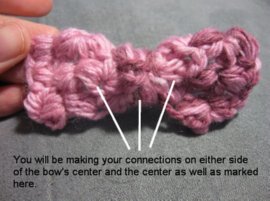
- Slip your hook underneath first section and slip stitch to connect.
- Then sc two on your rubber band.
- Then slip your hook underneath the center section and slip stitch.
- Then sc two onto your rubber band.
- Then slip your hook underneath last secton and slip stitch.
- Then sc to finish covering your rubber band. Sl st into beginning sc and ch 1, cut yarn, leaving yourself a bit of tail to be worked in. Feed your tail through the stitches of the rubber band.
- Then stretch out your rubber band to hide tail.
- Then cut the rest of your tail off and it’s ready for use!
This pattern is brought to you by www.meladorascreations.com
You can sell any item made from this pattern and link back to my page or videos, but you do not have permission to copy and paste my pattern anywhere online. ©Copyright 2021, All Rights Reserved
~~~~~~~~~PLEASE READ BELOW!~~~~~~~~~~
If you’d like to see my channel stay and grow, please consider becoming a patron.
Or you could make a one time donation through PayPal. Thank you so much for your support! God Bless!