
Crochet Cluster Granny Square Afghan pattern has gotten an upgrade! I decided to redo the design and film it in HD. This time around I added some retro style to it and at the same time I got the measurements for baby to king size bed just encase you wanted to make a full size blanket!
I just love how the holes in the granny square leave this diamond pattern running through it and because it’s almost solid clusters it’s very warm. But because it’s granny squares, you can make this blanket any time of the year. Really hope you like it. Happy Crocheting
You can find more things like this under the category Granny Squares
Cluster Granny Square Afghan – Free Crochet Pattern
Please don’t forget to Pin this onto your favorite crochet boards!
This page contains affiliate links

For this project you’ll need:
- HOOK: 5 mm hook or size H hook for the US
- YARN: medium 4 worsted weight yarn \ Aran 10 ply
Each skein is 100grams / 250 meters or 273 yards
It took 1 skein to make 2 squares. So for example, I used 6 white squares to complete the baby size so I used 3 skeins of white. I recommend getting an extra white skein though, because you’ll also be using the white in the color squares for one row, also to create the border around the afghan.
ABBREVIATIONS
(click on link to find tutorials)
ch = Chain
sl st = Slip Stitch
st = Stitch
sk = Skip
beg = beginning
YO = Yarn Over
SC = Single Crochet
DC = Double Crochet
incomplete dc \ DC decrease – is when you pull through your first 2 loops then without yarning over to complete the stitch, instead just leave your last loop on your hook.
Repeat what’s in between * for rest of round.
Each square measures 26 cms by 26 cms or 10 by 10 inches
Sizing:
- Baby – 3 squares wide \ 4 squares long
- Twin – 5 squares wide \ 8 squares long
- Full – 6 squares wide \ 8 squares long
- Queen – 7 squares wide \ 8 squares long
- King – 8 squares wide \ 8 squares long
PDF Pattern with Pictures
You can find the PDF version of my pattern with over 40 pictures on Ravlery Or my shop on Etsy. Thank you very much for all you do to support my channel.
THE VIDEO TUTORIALS:
All my Video Tutorials
If you haven’t yet, take a moment to subscribe to my videos on YouTube to have easy access to all my videos and playlist @meladora1 on YouTube
To Start:
ch 5, sl st in beginning ch to form a ring
Round 1
ch 2, now working in ring, dc, ch 2
Dc 2, ch 2 to create next section. Repeat dc 2, ch 2.
For last section dc 2, ch 1 only and sl st into top of beginning ch 2.
Round 2
ch 2, then do a incomplete dc in same stitch, without pulling through any loops, continue to the next stitch and do two incomplete dc’s in your next stitch. You should have 5 loops on the hook. YO and pull through all 5 loops. Ch 1.
Then you are now at the corner. All corners in this project will be worked the same through out. And how you do them is crochet 3 incomplete dc’s worked into the ch 2 space, YO, pull through all 4 loops, ch 2, crochet 3 incomplete dc’s into same corner space, YO and pull through all 4 loops. Ch 1.
Now work two incomplete dc’s in the the next two stitches, be careful, the first stitch after the corner is somewhat hidden, push stitches aside. 5 loops on the hook, YO pull through all 5 loops, ch 1. Then repeat corner and middle sections the same until you reach beginning stitch.
To End Row: No need to ch 1 after last cluster of round, just sl st in the top of the first cluster, not the ch 2. Just skip the ch 2 like it wasn’t there.
Round 3
We are now working in the tops of the clusters from last round.
Ch 2 and do a incomplete dc’s into the same beginning st, crochet two incomplete dc’s into next stitch of the cluster, (5 loops on hook ) YO and pull through all 5 loops, ch 1.
Crochet a incomplete dc twice in next stitch two stitches. You should have 5 loops on your hook, YO and pull through all 5 loops. You will be working all your individual center clusters this way.
And when you reach a corner, they are worked as shown before. By doing 3 incomplete dc’s, ch 2, 3 incomplete dc’s, ch 1. When you end a row you don’t need to chain after the last cluster, you only need to pull through all 5 loops and sl st to beginning st.
QUICK TIPS!
When you start your 1st cluster on this side of the corner, be sure not to skip the first stitch, it tries to hide. If you mess up and skip it, then it throws your square out of wack.
At the end of the row, be make sure to crochet your last cluster in the cluster right before the end. It can be hard to see. Check out picture below to get an idea of what I mean.
Row 4
Ch 2 and do a incomplete dc’s into the same beginning st, crochet two incomplete dc’s into next stitch of the cluster. Pull through all 4 loops and ch 1.
Now you have 2 more individual clusters to do before the corner. Continue with the pattern as before. Note that you now have 5 individual clusters in the middle of the rows before reaching a corner space. When you reach the end of this row you will need to change colors.
Row 5 (Change color!)
You will continue to repeat the pattern as before, but for this row change your color to white, unless you started with white then switch to a color for this row.
Switch back to original color and repeat pattern.
For rows 6 – 8 you will continue the pattern with the same color.
When you get done with all 8 rows of your granny square, sl st in beginning ch 2. Ch 1 and cut your yarn.
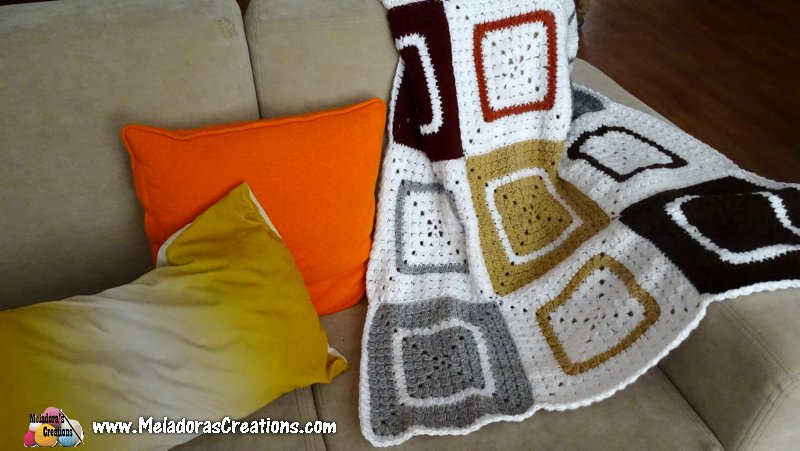
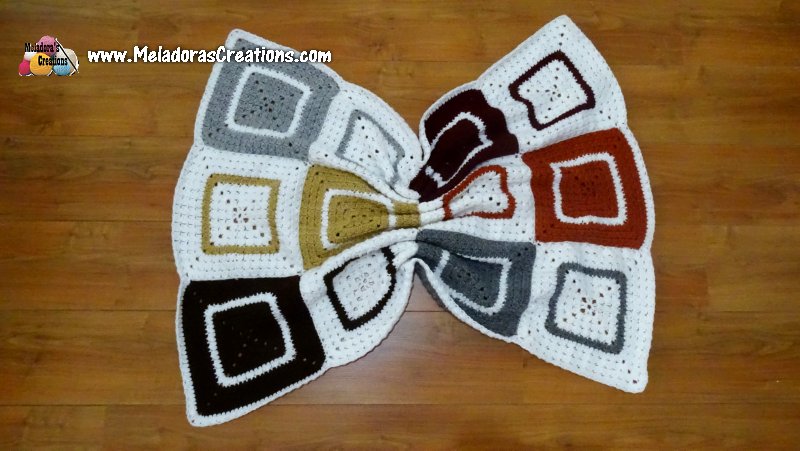
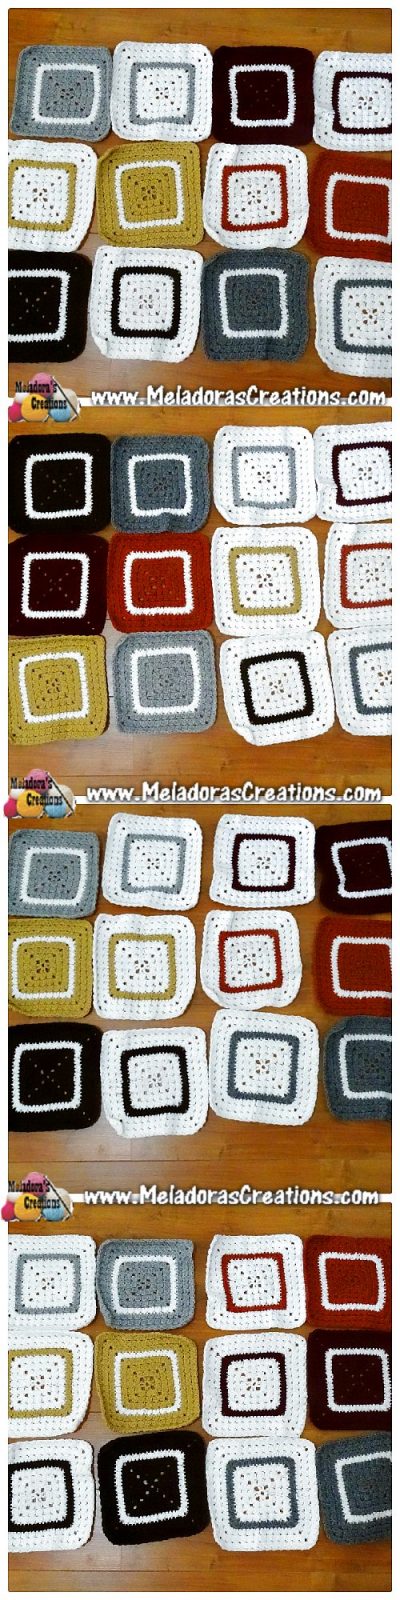
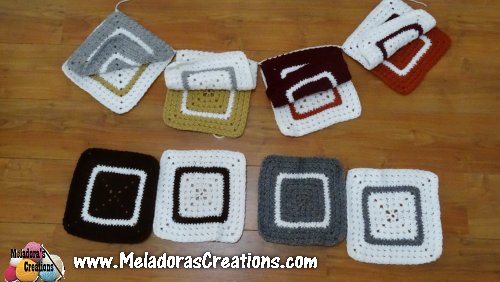
You can sew your squares together in different patterns. See picture below for other options I looked at. This is Baby size shown in the pictures.
Once you’ve decided how you want your squares sewn together take the first two rows and sew them together going the long way.
Make sure the front sides are facing each other and attach your white yarn in the very corner using a single crochet. Make sure to go through both squares.
Slip Stitch going through the back loops only (blo)
It will give you a tighter sew and also on the other side of the afghan it will leave the remaining loop which creates a nice border.
Once you reach the corner of the square single crochet. You will always single in the corner before attaching the next square.
Single crochet to the next two squares that will be sewn together next. Then continue to sewn the next squares together the same way. Until you have all of the row done.
Then grab the next row, and remember to have both the front side of the square facing one another.
Once you finish sewing all your rows on one by one you’ll still need to sew going the other way as well.
You’ll attach and sew the same way as before. The only difference is when you come to a connection spot. Just find a slip stitch that is as close as you can get to the middle and single crochet there.
Once you have all your squares together It’s up to you what kind of border you want to do. I used white again and created a border around the afghan as though it was one big granny cluster granny square.
Attach your yarn in the corner like you did before and continue your row all the way around. When you get to a section between squares, you will do a dc dec in one corner and a dc dec in the corner of the next square, then complete your dc dec as normal.
Create the corners of this row the same as before.
This pattern is brought to you by www.meladorascreations.com
You can sell any item made from this pattern and link back to my page or videos, but you do not have permission to copy and paste my pattern anywhere online. ©Copyright 2024, All Rights Reserved
PLEASE READ BELOW!
If you’d like to see my channel stay and grow, please consider becoming a patron.
Or you could make a one time donation through PayPal. Thank you so much for your support! God Bless!
Or you could make a one time donation through PayPal. Thank you so much for your support! God Bless!
https://paypal.me/MeladorasCreations or try: