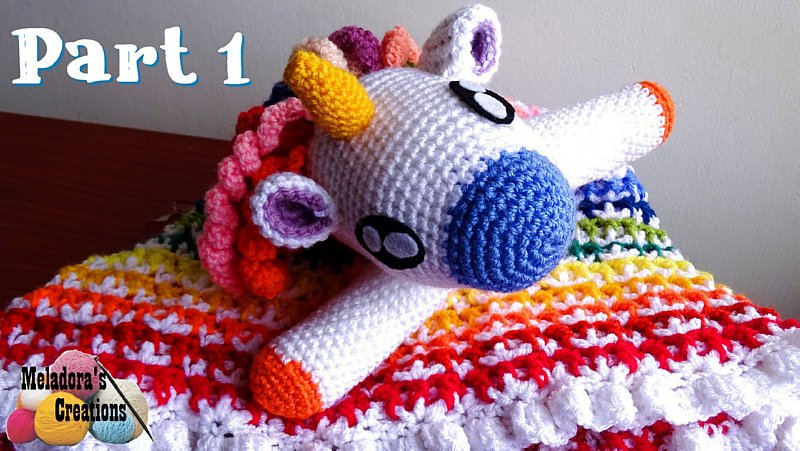
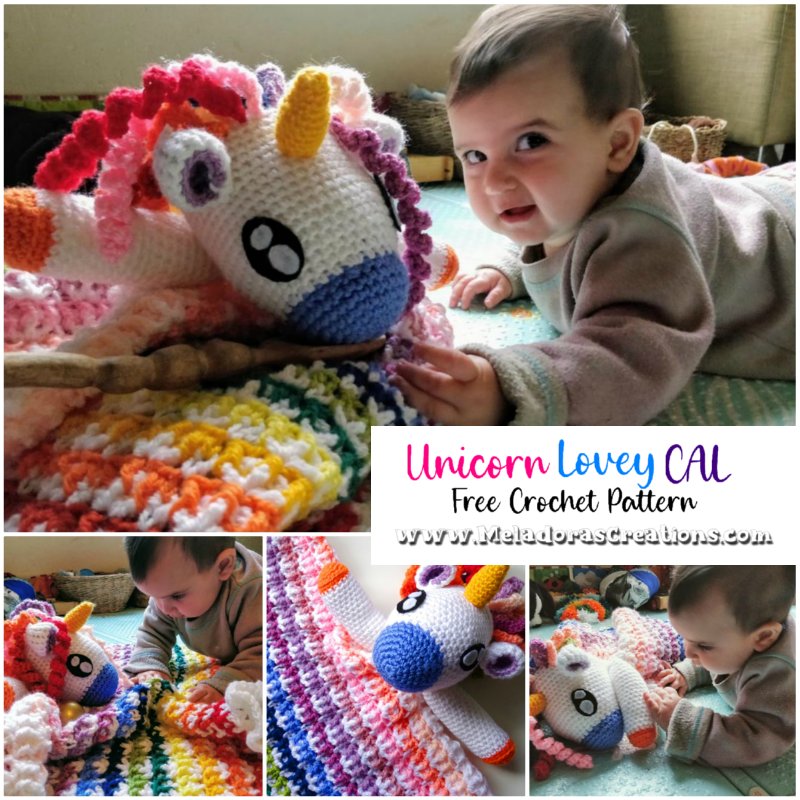
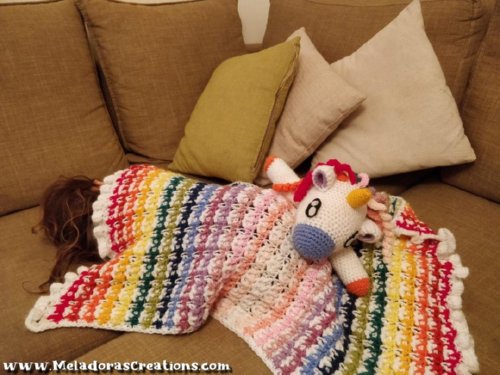
This Crochet Unicorn lovey is a great gift for a baby and is easy to make. The crochet stitch I used for the blanket is the Starfish stitch. I altered in two rows of color. White and one of the colors of the rainbow. This could make a great scrap yarn project or is you have lots of skeins of different colors that you bought on a whim. This design gives you lots of room for color choices so feel free to mix and match colors how ever you wish. This lovey was made for my little niece.
Find more Motifs patterns here on the category CALS
UPDATE! I got pictures!
Find more crochet stitches here on the category Crochet Afghans and Baby Blankets
Other Patterns that use this stitch:
Crochet Unicorn Lovey – CAL Part 1 – Free Crochet Pattern
Please don’t forget to Pin this onto your favorite crochet boards!
This page contains affiliate links

For this project you will need:
- HOOK: 5 mm hook or size H hook for the Afghan and a 3 mm or size C hook for doll
- YARN: I used 16 different colors to make the rainbow. This includes white. All the skeins were worsted weight yarn, 4 ply US, 10 ply AU
100 grams / 3.5. oz
240 meters / 262 yards
You will need 2 full skeins of white and half a skein (probably less) of all the other colors. I used scrap yarn I had.
- Tapestry Needle
- You’ll also need a hot glue gun or strong glue to attach the fleece eyes to the yarn.
ABBREVIATIONS
(click on link to find tutorials)
ch = Chain
sl st = Slip Stitch
st = Stitch
sk = Skip
dec = decrease
beg = beginning
YO = Yarn Over
FPDC = Front Post Double Crochet
BPDC = Back Post Double Crochet
SC = Single Crochet
DC = Double Crochet
HDC = Half Double Crochet
BLO = Back Loop Only
SCFS = Single Crochet foundation stitch
Sc dec = single crochet decrease
DC dec = Double Crochet decrease
* = Repeat what’s in between * for rest of round/row
THE VIDEO TUTORIALS:
All my Video Tutorials
If you haven’t yet, take a moment to subscribe to my videos on YouTube to have easy access to all my videos and playlist @meladora1 on YouTube
PDF Pattern with Pictures
You can buy the ad free PDF version of my pattern with pictures on Ravelry or Etsy to support this channel. Either way thank you for being here and for all you do to support my channel.
Starting with the blanket first. I used what I call “The Starfish Stitch” but I only did this stitch in variegated or solid colors. I had to see what this looked like with 2 colors so I set out to try it. I grabbed some white and a bunch of colors and started my rainbow.
I used white to make the first part of the stitch, then the next row would be the color. I did try it with the color first, then the white for the second row, but I didn’t like it. It made the white row stand out more, and I really wanted my rainbow to stand out more. I really like how it turned out. I hope you do too and you can make one for someone you love.
SIZES:
If you want to a larger afghan with this stitch then Single Crochet Foundation Stitch:
- Twin – 151
- Full – 187
- Queen – 205
- King – 247
SIZE of this Afghan
- 57 centimeters wide and 71 centimeters long
- 22 inches wide and 28 inches long
MY GAUGE:
These sizes are measured using my gauge of 1 cm per stitch or 5 sts per 2 inches which is 2 ½ sts per inch.
Multiples of this stitch
6 + 1 (or 6 + 2 if your chaining, make sure your chain isn’t to tight)
Let’s Begin! Using your 5 mm \ H hook
Row 1 (With white)
Single Crochet Foundation Stitch 91 for this baby size lovey. Ch 1 and turn
Row 2 (With white)
sc in 1st sc. * Sk 2 sts, DC 5 in next st, sk 2 sts, sc in next st. * repeat for row. Ch 1 and cut yarn leaving a tail OR you can carry your white yarn up for next time you need white.
(Had to scale down pictures to save space on site, but PDF has larger pictures and more of them.)
Row 3 (With color)
sc in 1st sc, * FPDC onto the first DC of the shell. (Shell is the 5 DC’s) BPDC on the 2nd DC of shell, alternate, FPDC, BPDC, ending with a FPDC onto the final DC of shell. Sc into sc * repeat for row. Ch 1 and cut yarn leaving a tail.
Row 4
Attach your white color by doing a single crochet attachment or by finishing the last stitch of the row with your new color.
Sc into the first sc of row. * skip 2 sts and DC 5 into next stitch. Sk 2 sts and sc into next st * repeat for row. End your row by single crocheting in the last st.
Repeat rows 3 & 4. You can use whatever colors you wish, but here is a list of what I used by shade of color. I used scrap yarn and didn’t have any papers on these.
Red, Dark Orange, Medium Orange, Medium Yellow, Bright Yellow, Dark Green, Medium Green, Dark Blue, Medium Blue, Medium Purple, Pastel Purple, Medium Pink, Bright Pink, Dark Peach, Light Peach.
Then do a double row of white for the center stripe. Then do the colors again only backwards, starting with the Light Peach first.
THE BORDER
After the last stitch of your row, attach your white yarn back again and do a row od single crochets. Then ch 2 and DC 2 into the first stitch. Then DC 3 in all sts to create the ruffle.
Once you reach the last stitch of the row, continue down the side of the afghan and do 1 single crochet in each side stitch. Take your time here and make sure you don’t have any big gaps between each stitch if you have to, add another single crochet to even out the row if it’s pulling to tightly.
I got 2 to 3 stitches in each color\white section. Mainly I just did 1 stitch per colored row. I didn’t have to correct to much. Just don’t crochet tightly here.
When you reach the top section, repeat what you did for the bottom section corner ch 1 and put 2 DC’s in the first stitch of the corner, then continue to put 3 DC’s in each stitch just like you did for the top part.
Continue down the final side with your single crochet’s to finish your border.
This pattern is brought to you by www.meladorascreations.com
You can sell any item made from this pattern and link back to my page or videos, but you do not have permission to copy and paste my pattern anywhere online. ©Copyright 2024, All Rights Reserved
PLEASE READ BELOW!
If you’d like to see my channel stay and grow, please consider becoming a patron.
Or you could make a one time donation through PayPal. Thank you so much for your support! God Bless!