
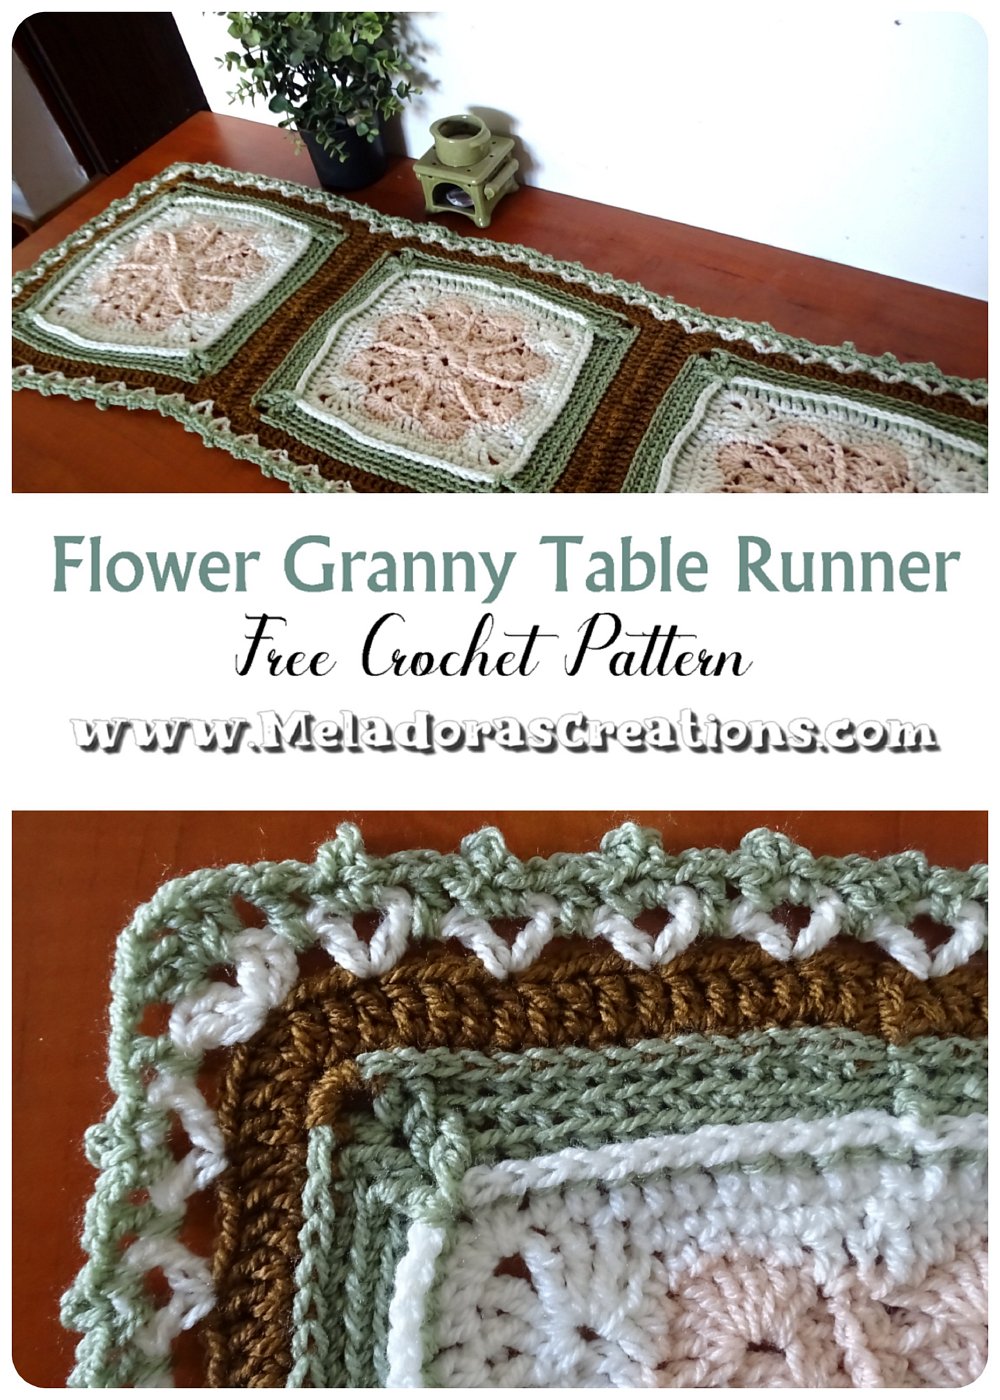
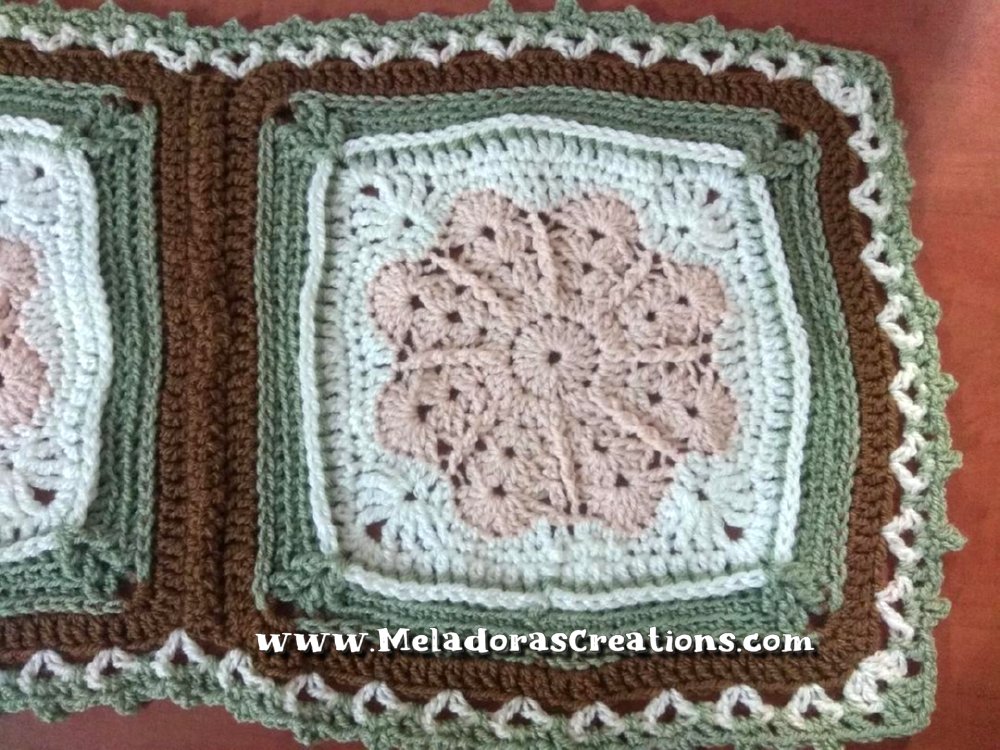
After making the Flower Granny Square I was left with these 3 beautiful squares but no more yarn to make it into an afghan. So I decided to turn it into a the Flower Granny Square crocheted Table runner by sewing my 3 grannies together and adding a border.
This pattern is to show you how I did it.
Here is the pattern and Video Tutorials for the Square
Flower Granny Crochet Table runner – Free crochet pattern
Please don’t forget to Pin this onto your favorite crochet boards!
This page contains affiliate links
For this project you’ll need:
- HOOK: 6 mm hook or size J hook for the US
- YARN: Worsted weight yarn, 4 ply US, 10 ply AU
I used 4 colors for this square. I only had a half a skein of the pink and I was able to make 3 grannies with it, so I’m guessing you could make 6 squares per skein as long as you use 4 colors or more.
I had Full skeins of the brown and green and I barely used any of it, so you’d need even less of it. The flower seems to take the most yarn.
Size of Table Runner
43.5 inches / 110 cms by 13.5 Inches / 35 cms
ABBREVIATIONS
(click on link to find tutorials)
ch = Chain
sl st = Slip Stitch
sk 2 sts = Skip two stitch
sts = Stitches
DC = Double Crochet
beg = beginning
Repeat what’s in between * for rest of row.

You can find the pattern and Tutorial for the FLOWER GRANNY SQUARE here
Once you have your three 12 inch grannies made. I sewed them together using the same color as I used for my border.
Attach your color to one corner of one granny. Ch 1 and sl st into the
corner of the 2nd granny. Ch 1 and moving down a stitch on the 1st granny and sl st into it. The ch 1 and do the same for the 2nd granny.
Ch 1 and work your way back and forth until you’ve reached the corners again. Ch 1 and cut your yarn. Repeat to connect the other granny.
This is where I hid my tails and grabbed my White yarn. The same color I used for the color around the middle flower of my granny.
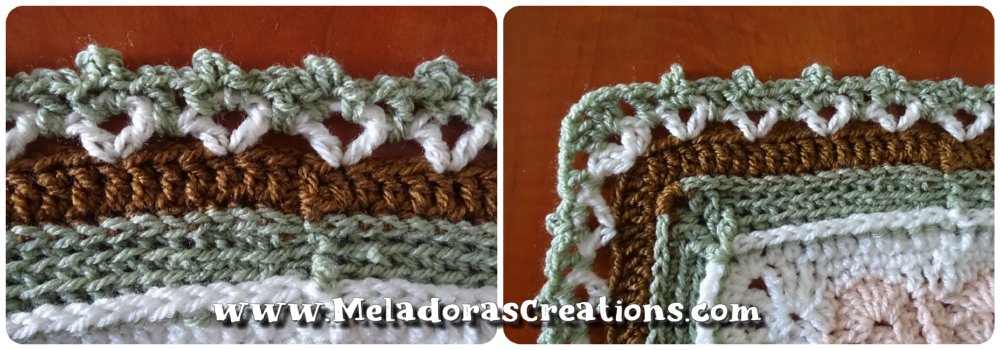
The Border
This is the same border I used for the Duo Diamond Afghan so you can use the BORDER TUTORIAL here for help with it. This link is shared at the moment the Border tutorial starts for easy access. https://youtu.be/s-QEsBbmZ-E?t=1576
Round 1
Attach your color to a corner and ch 2, or DC attach. DC into the same corner. This creates HALF of this corner. You will finish this corner at the end of your round.
*Skip 3 stitches. DC, ch 2, DC into same stitch * repeat for round. In corners DC 2, ch 1, DC 2. If you come to the corner and you only have 2 DC’s before the corner, just skip 2 and do the corner.
At the end, finish your corner by DC 2, sl st in beg DC. Ch 1 and cut your yarn.
Round 2
I used green for the last row.
Attach your color to a corner and ch 2, or DC attach. DC into the same corner. This creates HALF of this corner. You will finish this corner at the end of your round.
*Ch 1 and DC into the space between v stitches. Ch 1 and in the ch 2 of the V stitch SC, ch 3 and sl st in the 1st ch to create your picot, the SC into the same ch 2 of the V stitch. * repeat for round. In corners DC 2, ch 1, DC 2.
At the end, finish your corner by DC 2, sl st in beg DC. Ch 1 and cut your yarn.
This pattern is brought to you by www.meladorascreations.com
You can sell any item made from this pattern and link back to my page or videos, but you do not have permission to copy and paste my pattern anywhere online. ©Copyright 2022, All Rights Reserved
PLEASE READ BELOW!
If you’d like to see my channel stay and grow, please consider becoming a patron.
Or you could make a one time donation through PayPal. Thank you so much for your support! God Bless!