
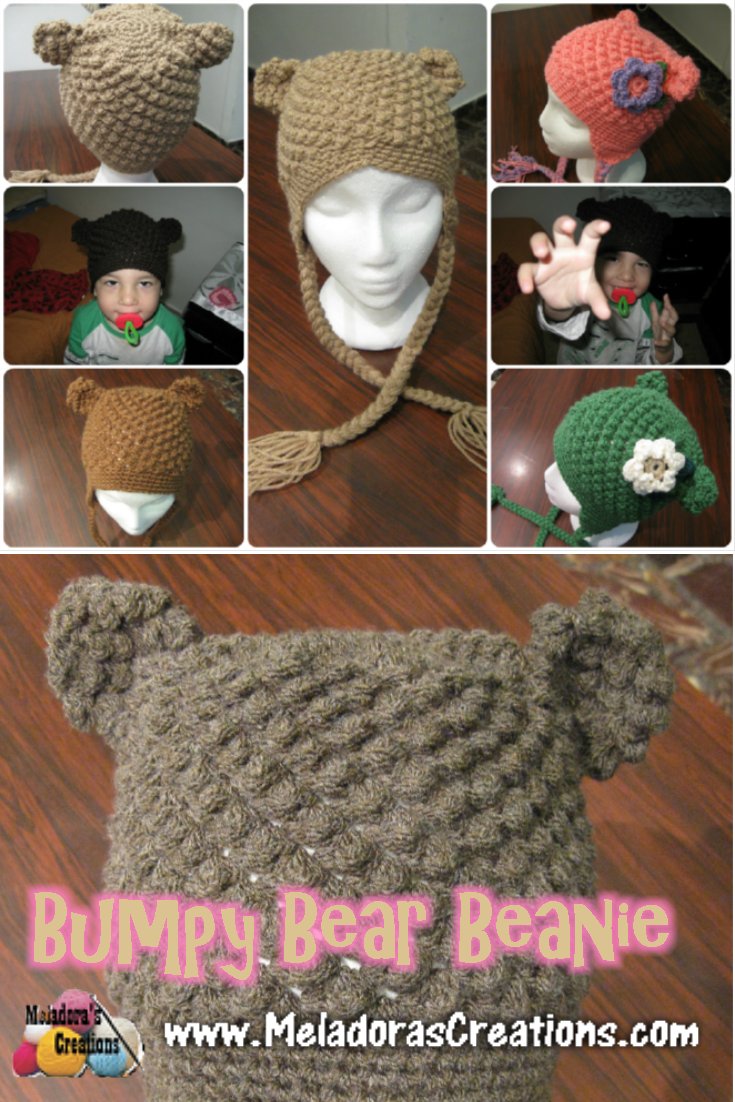
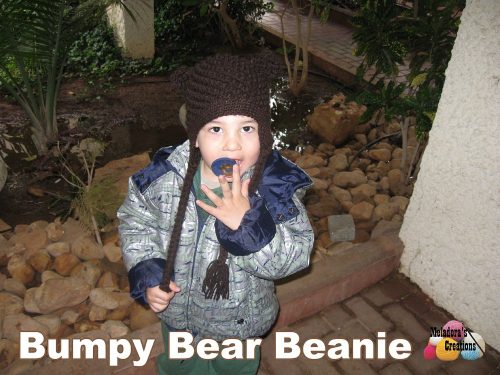
This Bumpy Bear Crochet Beanie pattern teaches you how to Crochet The Raspberry Stitch and then how to use it to make this very textured Bear beanie. I set out to design this stitch so we crocheter’s could have a version that looked just as good as the knitted Raspberry Stitch. I think it makes the bear hat look more pelt like and gives it a great texture!
Find more crochet stitches here on the category Crochet Stitches.
Be sure to sign up for my email so you can always be update date with the free patterns I release as they come out! https://www.meladorascreations.com/sign-up-for-newsletter/
Other patterns that use this stitch are:
Raspberry Stitch Finger Less Gloves
Bumpy Bear Beanie – Free Crochet Pattern
Please don’t forget to Pin this onto your favorite crochet boards!
This page contains affiliate links
For this Bumpy Bear Beanie project you will need
HOOK: 4.5mm hook , US size G
YARN: one skein of worsted weight 4ply US, 10ply AU.
- A tapestry needle
- two stitch markers of some kind.
ABBREVIATIONS
(click on link to find tutorials)
ch = Chain
sl st = Slip Stitch
st = Stitch
sk = Skip
SC = Single Crochet
DC = Double Crochet
Sc dec = single crochet decrease
Repeat what’s in between * for rest of round.
Note: Because your adding earflaps, alter your raspberry beanies to be shorter. 13 rounds for newborns and 15 rounds for all other sizes.
THE VIDEO TUTORIALS:
RIGHT HANDED VERSION
LEFT HANDED VERSION
If you haven’t yet, take a moment to subscribe to my videos on YouTube to have easy access to all my videos and playlist @meladora1 on YouTube
Come visit me over on my Facebook Group where I share free pattern links Daily!
PDF Pattern with Pictures
You can find the PDF version of my pattern with pictures on Ravlery. Thank you very much for all you do to support my channel.
Come visit me over on my Facebook Group where I share free pattern links Daily!
Remember to sign up for my email so you can always be update date with the free patterns I release as they come out! https://www.meladorascreations.com/sign-up-for-newsletter/
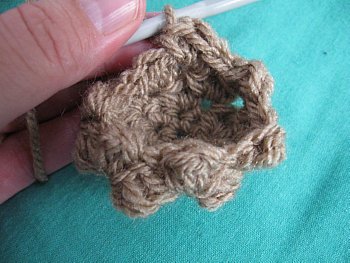
MAKING THE EARS
Round 1
Ch 2, and work 6 sc’s into second chain from hook. (6)
Round 2
Do 2 single crochets in each st around (12)
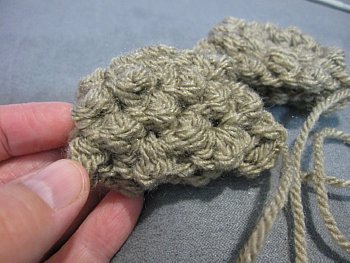
Round 3
sl st into next st and ch 1, turn your project, back side facing you. Sc, dc, sc all in same stitch as ch 1,
*sk 1 st, and sc, dc, sc into next stitch*, repeat is in between *’s for rest of round

Rounds 4-6 (for 3 rounds)
sl st into beginning sc of round then, sc, dc, sc, in the same st *then sk 2 sts, sc, dc, sc in next stitch, repeat what is in between *’s

If your making the ears for an adult size hat and you want bigger ears just add more rows here.
Sl st into next st and ch 1, Cut tail, leave long tail to sew onto hat. Sew ears on before making earflaps.
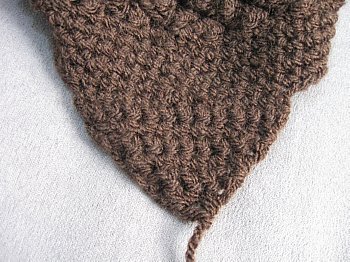
MAKING THE EARS FLAPS
Flatten hat so your ears are straight. Making sure your flaps are going to be even, count from corner, over 6 sts on each side and mark for a total of 12 stitches. (If your making a baby hat, mark 10, if adult mark 14.)


Round 1
Attach your yarn where the right side of the hat is facing you and work 1 sc in each of the 12 sts.
Round 2
ch 1 and turn, work 1 sc in all 12 sts
Round 3
ch 1 and turn, scdec, sc 8, scdec
Round 4
ch 1 and turn, scdec, sc 6, scdec
Round 5
ch 1 and turn, scdec, sc 4, scdec
Round 6
ch 1 and turn, scdec, sc 2, scdec
Round 7
ch 1 and turn, scdec, scdec, ch 1 and cut yarn, leaving enough of a tail to be worked in with your tapestry needle.
Lay your hat flat again and recount out 12 sts on other side, attach your yarn with right side facing you and repeat earflap.

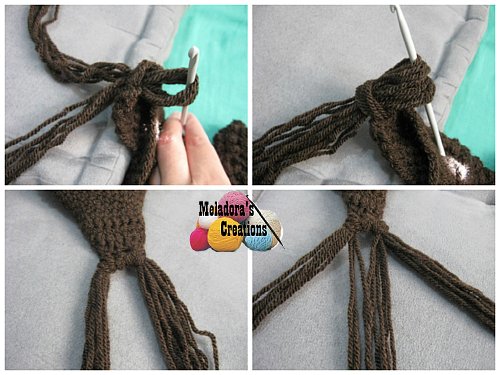
Cut several long pieces of yarn, about 28 or so, depending on how thick you want your braids to be, and separate then into two sets of 14.

Fold in half and attach one of the 14 strands to the right side of the flap by pulling up a loop, then pulling the tail through. Tighten, do the same for other 14 strands.
Separate into 3 even strands and braid. When braid is at desired length tie at least 3 knots with the braids to secure. Cut excess tails, leaving a small pom pom at end. Repeat for other flap.
Make sure to check to see if the second braid is even with the first before tying your knots.
This pattern is brought to you by www.meladorascreations.com
You can sell any item made from this pattern and link back to my page or videos, but you do not have permission to copy and paste my pattern anywhere online. ©Copyright 2023, All Rights Reserved
PLEASE READ BELOW!
If you’d like to see my channel stay and grow, please consider becoming a patron.
Or you could make a one time donation through PayPal. Thank you so much for your support! God Bless!