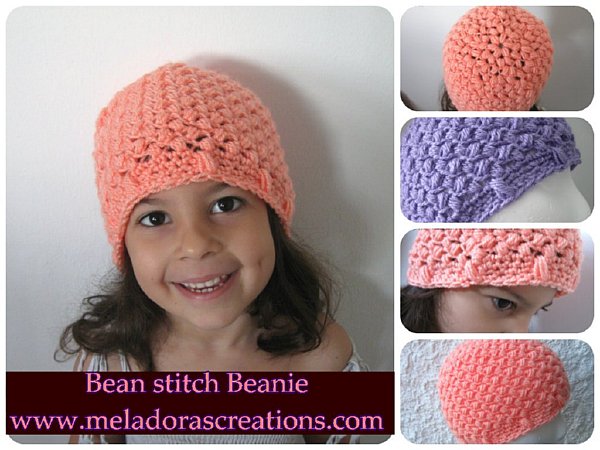
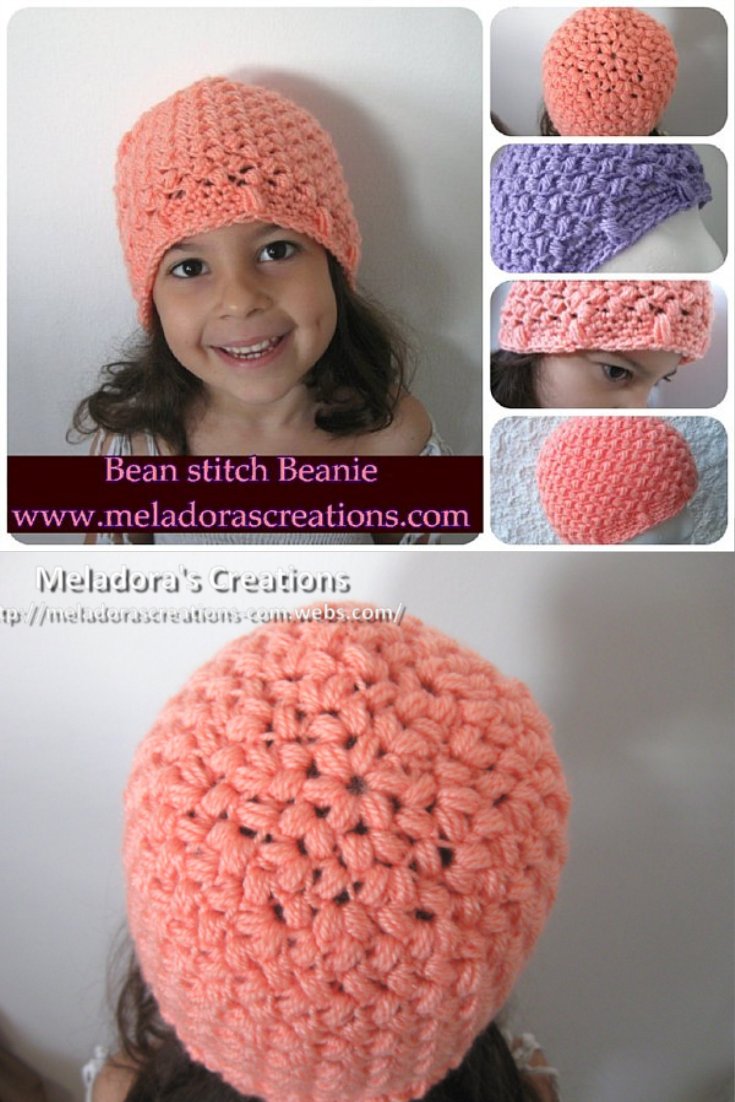
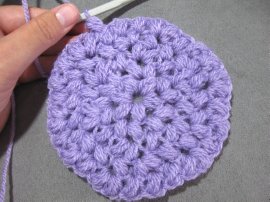
The Bean Stitch Crochet Beanie stays with the bean stitch through out. I teach you with a free crochet pattern and video tutorial on how to increase with the Bean Stitch so that you have your full hat using it. The top of the hat looks like a flower to me. I really like this design and always enjoyed seeing my daughter wear it.
This hat looks great in variegated colors too, plus I added a special brim to this hat that I think adds a lot more style to it!
The Bean Stitch Beanie pattern comes in sizes from Baby to Adult so that you can make one for the whole family.
For more Beanie patterns click here Crochet Beanies
Other patterns that use this stitch are:
Bean Stitch Crochet Beanie – Free Crochet Pattern and Video tutorial
Please don’t forget to Pin this onto your favorite crochet boards!
This page contains affiliate links
For this project you will need:
- HOOK: 5 mm hook or size H hook for the US
- YARN: worsted weight yarn, 4 ply US, 10 ply AU – 100 grams / 3.5. oz – 240 meters / 262 yards
ABBREVIATIONS
(click on link to find tutorials)
ch = Chain
sl st = Slip Stitch
st = Stitch
sk = Skip
YO = Yarn Over
sk a st = Skip a stitch
Sc dec = single crochet decrease
* = Repeat what’s in between * for rest of row
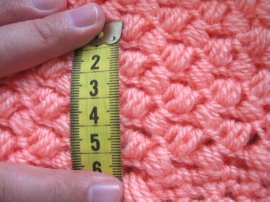
Gauge is
5 cms / 2 inches = 7 total BS
Sizing:
- Baby – inc to row 3 – 18 beans then 8 more rows of BS’s before rim 3 – 8months
- Toddler – inc to row 4 – 24 beans then 14 more rows of BS’s before rim 9 months to 2 years old
- Child – using a 4mm / G hook – inc to row 5 – 30 beans then 14 rows of BS’s before rim 3 years to 8 years
- Adult – inc to row 5 – 30 beans then 14 rows of BS’s before rim
NOTE: As you can see the pattern for Child and Adult are the same only difference is the size of hook used. All hats use 5mm / H hook except for Child size, it uses 4mm / G hook
THE VIDEO TUTORIALS:
All my Video Tutorials
If you haven’t yet, take a moment to subscribe to my videos on YouTube to have easy access to all my videos and playlist @meladora1 on YouTube
PDF Pattern with Pictures
You can find the PDF version of my pattern with pictures on Ravlery. Thank you very much for all you do to support my channel.
To start
Ch 5 and sl st into beginning ch to form a ring, ch 1
Round 1
BS 6 into center of ring, sl st into beginning st to end round, ch 1 and Turn your work (6 BS’s)
Round 2
(NOTE: Work your BS’s into the stitch to the left of each BS from the previous round. You will always put your first BS of the round in the same st that you slip stitched into to end the previous round.)
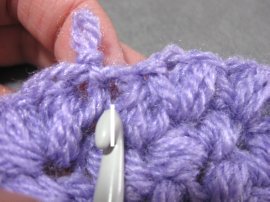
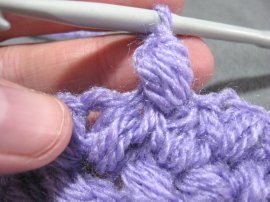
*BS 2 into all spaces in between each BS from round 1*, No need to ch 1 after the last bean stitch of the round, just sl st into beginning st to end round, ch 1 and urn your work (12 BS’s)
Round 3 – Baby Size stop increasing here
*BS 1. BS 2 into the next*, repeat, No need to ch 1 after the last bean stitch of the round, just sl st into beginning st to end round, ch 1 and turn your work (18 BS’s) ( see Baby size Below )
Round 4 – Toddler size stop increasing here
*BS 1 into the next two stitches. BS 2 into the next*, repeat, No need to ch 1 after the last bean stitch of the round, just sl st into beginning st to end round, ch 1 and turn your work (24 BS’s) ( see Toddler size below )
Round 5 – Child / Adult size
*BS 1 into the next three stitches. BS 2 into the next*, repeat, No need to ch 1 after the last bean stitch of the round, just sl st into beginning st to end round, ch 1 and turn your work (30 BS’s) ( see child / adult size below )
BABY SIZE
Rounds 4 – 11 ( 8 rounds)
BS 1 into each stitch around, No need to ch 1 after the last bean stitch of the round, just sl st into beginning st to end round, ch 1 and turn your work.
TODDLER SIZE
5 – 19 ( 14 rounds )
BS 1 into each stitch around, No need to ch 1 after the last bean stitch of the round, just sl st into beginning st to end round, ch 1 and turn your work.
CHILD / ADULT SIZE
Rounds 6 – 20 ( 14 rounds)
BS 1 into each stitch around, No need to ch 1 after the last bean stitch of the round, just sl st into beginning st to end round, ch 1 and turn your work.
—THE RIM—-
BABY SIZE
Round 12
sc in all sts around, there are two stitches for each BS so you have 18 BS’s, so you should have 36 sts total. Sc in all 36 sts.
Round 13
*scdec, sc in next 5 sts * repeat. Stop when you have 4 sts left of the round, scdec twice using these last 4 sts (30 sts)
Round 14
sc in all sts around, you should have 30 sts total
Round 15
sl st into beginning st, then do a elongated BS using the space next to the BS’s on round 11. sc into next 4 sts, count over 3 BS over on row 11, and put your next elongated BS. Sc 4 and repeat. Make sure that you have your elongated BS’s after every 3rd BS on round 11. SL st into beginning st and ch 1, cut yarn leaving a long tail to be worked in with a tapestry needle.


TODDLER SIZE
Round 20
sc in all sts around, there are two stitches for each BS so you have 24 BS’s, so you should have 48 sts total. Sc in all 48 sts.
Round 21
*scdec, sc in next 5 sts * repeat. Stop when you have 4 sts left of the round, scdec twice using these last 4 sts (40 sts) (if you need to back up to do more decreasing to get your 40 sts, then do so.)
Round 22
sc in all 40 sts around.
Round 23
sl st into beginning st, then do a elongated BS using the space next to the BS’s on round 19. sc into next 4 sts, count over 3 BS over on row 19, and put your next elongated BS. Sc 4 and repeat. Make sure that you have your elongated BS’s after every 3rd BS on round 19. SL st into beginning st and ch 1, cut yarn leaving a long tail to be worked in with a tapestry needle.
CHILD / ADULT SIZE
Round 21
sc in all sts around, there are two stitches for each BS so you have 30 BS’s, so you should have 60 sts total. Sc in all 60 sts.
Round 22
*scdec, sc in next 5 sts * repeat. Stop when you have 4 sts left of the round, scdec twice using these last 4 sts (53 sts)
Round 23
*scdec, sc in next 5 sts * repeat. (43 sts)
Round 24
sl st into beginning st, then do a elongated BS using the space next to the BS’s on round 20. sc into next 4 sts, count over 3 BS over on row 20, and put your next elongated BS. Sc 4 and repeat. Make sure that you have your elongated BS’s after every 3rd BS on round 20. SL st into beginning st and ch 1, cut yarn leaving a long tail to be worked in with a tapestry needle.
This pattern is brought to you by www.meladorascreations.com
You can sell any item made from this pattern and link back to my page or videos, but you do not have permission to copy and paste my pattern anywhere online. ©Copyright 2024, All Rights Reserved
PLEASE READ BELOW!
If you’d like to see my channel stay and grow, please consider becoming a patron.
Or you could make a one time donation through PayPal. Thank you so much for your support! God Bless!
You’re very welcome, thanks so much for watching! 😀
I love your designs. Enjoy the video clips just as much. Thanks a million!