
This Celtic Weave Crochet Hat is done in the style of a Square Crochet Beanie. I really think it came out beautifully. It’s still one of my favorite hats that I’ve designed so far. I really dig the two pompom look. This Crochet tutorial takes you step by step on how to create this beanie.
It’s still one of my favorite hats that I’ve designed so far. I really dig the two pompom look.
This pattern comes with helpful pictures and a crochet tutorials that takes you step by step on how to create this beanie.
For more Beanie patterns click here Crochet Beanies
You can learn how to do this stitch in rows here
Celtic Weave Crochet Hat – Free Crochet pattern and video tutorial
Please don’t forget to Pin this onto your favorite crochet boards!
This page contains affiliate links

For this project you will need:
- HOOK: 5 mm hook or size H hook for the US
- YARN: 2 Skeins of worsted weight yarn. I used 230 yards / 100 gram skeins. And total yarn used I estimate about 300 grams total.
- Tapestry Needle
You will also need a pom pom maker, or make yourself one like I did. See how with this video. “How to make a Pom Pom Maker”
ABBREVIATIONS
(click on link to find tutorials)
ch = Chain
sl st = Slip Stitch
st = Stitch
sk = Skip
beg st= beginning stitch
sk 2 sts = Skip Two Stitches
SC = Single Crochet
DC = Double Crochet
TRC = Triple Crochet
FPDC = Front Post Double Crochet
BPDC = Back Post Double Crochet
Sc dec = single crochet decrease
* = Repeat what’s in between * for rest of row
PDF Pattern with Pictures
You can buy the ad free PDF version of my pattern with pictures on Ravelry or Etsy to support this channel. Either way thank you for being here and for all you do to support my channel.
THE VIDEO TUTORIALS:
All my Video Tutorials
If you haven’t yet, take a moment to subscribe to my videos on YouTube to have easy access to all my videos and playlist @meladora1 on YouTube
The Multiples of the stitch
This stitch is done in multiples of 4
To Start:
Using your 5 mm / H hook
ch 68, sl st in beg ch to form a ring.
Round 1
ch 2 and in next stitch do a Dc, then Dc in all sts around. ( 68 sts )
Rounds 2 – 5 (For 4 rounds)
ch 2, on post of first Dc , do a FPDC. Next stitch on the post, do a BPDC. Then repeat alternating, * FPDC on post of next stitch then, BPDC on post of next stitch * When you reach your beginning ch 2, just sl st into the top of it.
Round 6: Switch to your 6 mm / J hook
ch 2 and Dc in all stitches around.
Round 7
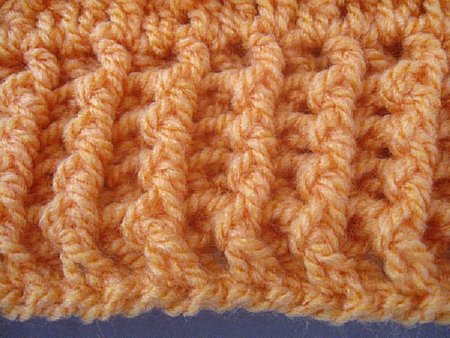
ch 3, and FPTRC on the post of the first and second Dc. Then going in from behind the FPTRC’s that you just did, back up and do FPTRC in the two dc’s that you skipped. Do this by pulling the stitch upward before working your stitch on it. Use pictures below to help you understand
Repeat for rest of round, sl st into top of the beg ch 3.
Round 8
Ch 3 and FPTRC on the post of the next two TRC’s, then back up and TRC on the two TRC’s. Do this by pulling the Stitches forward. Continue around and sl st in the top of the beg ch 3.
Round 9
Repeat round 7 only you’ll be using the TRC’s instead of the DC’s. Look at the picture under round 7 to help.
Repeat this all the way around until your hat reaches from rim to last row worked 25 cms or 10 inches. When you reach this length, sl st in the beg st.

Then time to reduce! Change back to your 5mm / H hook
For the next two rounds * sc , then sc dec * repeat for two rounds total.
Then turn your hat inside out and slip stitch loosely, watch your tension and using the back stitches only, slip stitch your hat closed. Then chain one and cut your tail and hide it.
Make two pom poms using the recommended video above. The home made ones I made using a 8 centimeter / 3 inch circle.
This pattern is brought to you by www.meladorascreations.com
You can sell any item made from this pattern and link back to my page or videos, but you do not have permission to copy and paste my pattern anywhere online. ©Copyright 2024, All Rights Reserved
PLEASE READ BELOW!
If you’d like to see my channel stay and grow, please consider becoming a patron.
Or you could make a one time donation through PayPal. Thank you so much for your support! God Bless!
Thanks so much for letting me know 🙂
Thank you 🙂
http://unirazi.com/post/crocheting-is-such-a-wonderful-skill-it-is-not-to/23920
I saw a post on Pinterest linked to your photo for the interweave cable stitch. Thought you should know. The photo used is yours but their site is listed on Pinterest.
Best wishes,
Amy