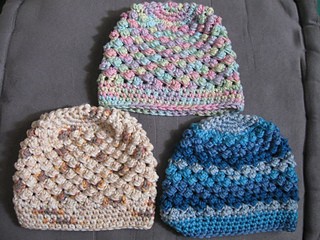
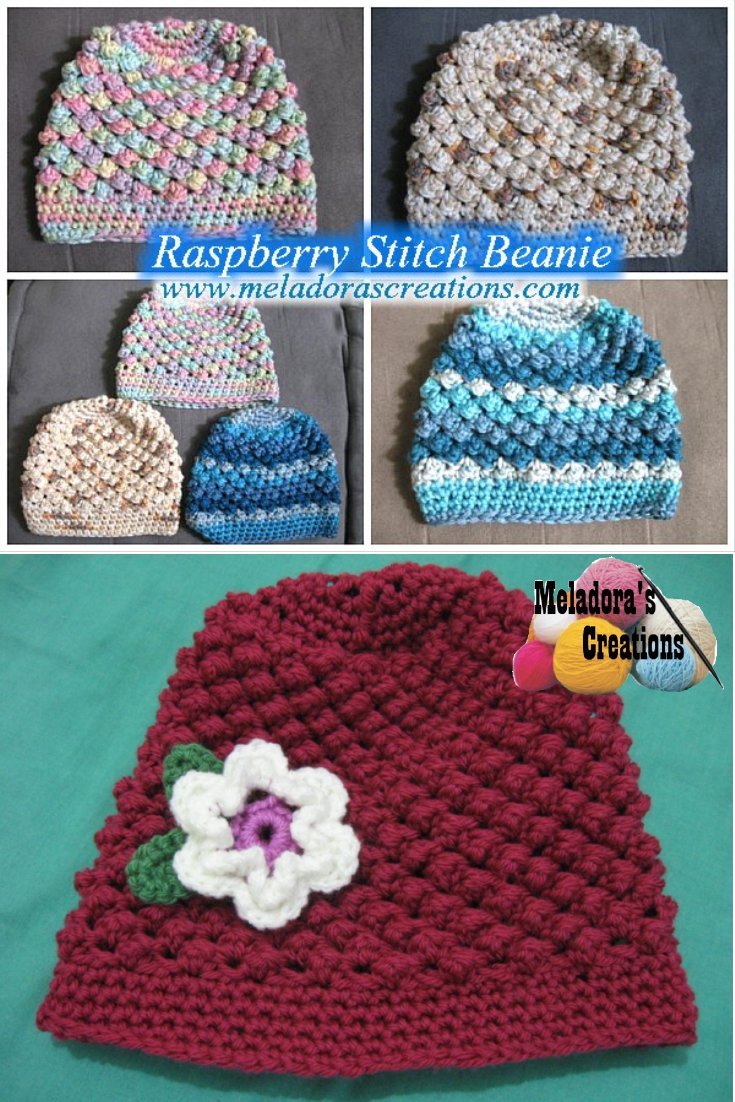
This Raspberry Stitch Crochet Beanie pattern and video tutorial will teach you how to crochet a beanie that uses this beautiful textured stitch called the Raspberry Stitch For Crochet that I discovered while playing around with yarn. This stitch actually shows up in the back of the stitch! So you have to keep this in mind when you make anything from it, also I have only figured out how to do this in the round, not in rows.
For more Beanie patterns click here Crochet Beanies
Other patterns that use this stitch are:
- Bumpy Bear Beanie
- Raspberry Stitch Slouch Hat
- Raspberry Stitch in Rows (for beginners)
- Raspberry Stitch Finger Less Gloves
Raspberry Stitch Crochet Beanie – Free Crochet Pattern and Video tutorial
Please don’t forget to Pin this onto your favorite crochet boards!
This page contains affiliate links
For this project you will need:
- HOOK: 5 mm hook or size H hook for the US
- YARN: 1 skein of worsted weight yarn, 4 ply US, 10 ply AU 100 grams / 3.5. oz – 240 meters / 262 yards
- Tapestry Needle to hide your tails
- And a marker of some kind, this can be just a different color piece of yarn.
For baby hats I recommend using softer yarn of the same recommended ply.
ABBREVIATIONS
(click on link to find tutorials)
ch = Chain
sl st = Slip Stitch
st = Stitch
sk = Skip
YO = Yarn Over
sk a st = Skip a stitch
sk 2 sts = Skip two stitches
SC = Single Crochet
DC = Double Crochet
Repeat what’s in between * for rest of round.
PDF Pattern with Pictures
You can buy the ad free PDF version of my pattern with pictures on Ravelry or Etsy to support this channel. Either way thank you for being here and for all you do to support my channel.
THE VIDEO TUTORIALS:
All my Video Tutorials
If you haven’t yet, take a moment to subscribe to my videos on YouTube to have easy access to all my videos and playlist @meladora1 on YouTube
Pattern sizes runs as follows:
- Baby size 0 – 3 months
- Baby sizes 3 – 6 months
- Baby sizes 6 – 12 months
- Toddlers 1 – 10 years
- 11 years to adult
Please keep in mind that sizes differ from one crocheter to the next, if your hat is to small, then increase more in multiples of 2 until you believe you’ve reached the correct width.
Basic Pattern – Scroll down to the size you need and follow pattern as directed.
Round 1
Ch 2, working over tail, sc 6 into 2nd chain from hook. Pull tail tight to close hole more. (6 sts)
Round 2
Sc 2 in each stitch around. (12 sts)
Round 3
Sc 2 in each stitch around. (24 sts)
Round 4
Sc 2 in first stitch, sc 1 into next stitch, repeat for whole round. (36 sts) (sc 2, sc 1)
Round 5
Sc 2 in first stitch, sc 1 into next stitch two stitches, repeat for whole round. (48 sts) (sc 2, sc 1, sc 1)
Round 6
sl st into the next st, ch 1 and turn your work, with back side facing you, working in same stitch, *sc , dc, sc all into same stitch. Sk 2 sts, and repeat from *
Round 7
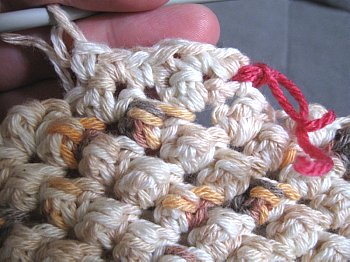
to end your row and continue the next round, you work a sc into the first sc of the round then DC, SC to complete the Raspberry Stitch. Like shown in the pictures. Place marker here if you need. Sk 2 sts, *then in next st work sc, dc, sc all into the same st. Sk 2 sts. Repeat from *
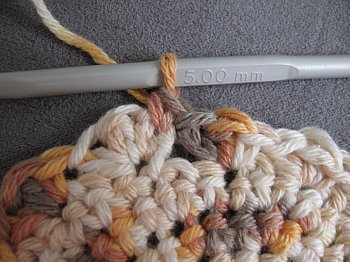

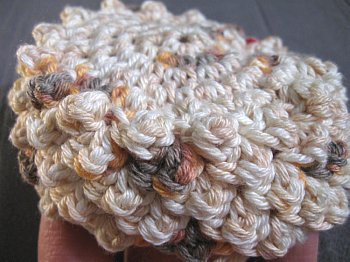
Note: Your pattern for the Raspberry stitch is sc, dc, sc into the same stitch, the first sc of this combination, is the stitch you are supposed to be working in, for 2nd round of Raspberry stitches. The textured side is on the back of the stitch, after a few rows you should be able to see it as the picture shows below, on the inside of the hat.
If your finding this stitch hard to get, try this tutorial for the Raspberry Stitch with Slow Motion
Round 8 – 23 (15 rounds)
Scroll down for instructions on other sizes!
Repeat round 7
Round 24
When you’re ready to start the rim of your hat, you will need to turn your hat inside out.
sl st into next st, ch 1 and turn, front side facing you, skipping first stitch, sc into the second sc from the hook, then sc in all sts around, don’t forget to place marker here – (48 sts) sl st in beginning sc.
When you’re ready to start the rim of your hat, you will need to turn your hat inside out.
Rounds 25 – 28
ch 1 and sc in all sts 47 sts
Baby sizes 3 – 6 months
This size is done almost the same way. The only alteration is to do 17 rounds of the Raspberry Stitch instead of 15 before starting the rim.
*note when joining 2nd rim round, sl st, ch1, do sc in first stitch. Continue around.
Third round skip ch 1 and just work a sc into first sc of round. Keep it one continuous round.
When you’re ready to start the rim of your hat, you will need to turn your hat inside out.
Baby sizes 6 – 12 months
Do rounds 1 -5 the same
Round 6
Do one more increase row of (sc 2, sc 1, sc 1, sc 1) (60sts)
Then continue the pattern the same, but do 17 rounds of the Raspberry Stitch instead of 15 before starting the rim.
The Rim
When you’re ready to start the rim of your hat, you will need to turn your hat inside out.
Round 23 -27
Sc in all sts around (54)
*note when joining 2nd rim round, sl st, ch1, do sc in first stitch. Continue around.
Third round skip ch 1 and just work a sc into first sc of round. Keep it one continuous round.
Toddler size 1 to 10 years
Do rounds 1 -5 the same
Round 6
Do one more increase row of (sc 2, sc 1, sc 1, sc 1) (60sts)
Then continue the pattern the same, but do 17 rounds of the Raspberry Stitch instead of 15 before starting the rim.
When you’re ready to start the rim of your hat, you will need to turn your hat inside out.
Rounds 23 – 27
sc in all sts around (60sts)
*note when joining 2nd rim round, sl st, ch1, do sc in first stitch. Continue around.
Third round skip ch 1 and just work a sc into first sc of round. Keep it one continuous round.
Children ages 11 to adults
Round 1
Ch 2, working over tail, sc 6 into 2nd chain from hook. Pull tail tight to close hole more. (6 sts)
Round 2
Sc 2 in each stitch around. (12 sts)
Round 3
Sc 2 in each stitch around. (24 sts)
Round 4
Sc 2 in first stitch, sc 1 into next stitch, repeat for whole round. (36 sts) (sc 2, sc 1)
Round 5
Sc 2 in first stitch, sc 1 into next stitch two stitches, repeat for whole round.
(48 sts) (sc 2, sc 1, sc 1)
Round 6
Sc 2 in first stitch, sc 1 into next stitch three stitches, repeat for whole round.
(60 sts) (sc 2, sc 1, sc 1, sc 1)
Round 7
Sc 2 in first stitch, sc 1 into next stitch four stitches, repeat for whole round.
(72 sts) (sc 2, sc 1, sc 1, sc 1, sc 1)
Round 8
Do baby hat instructions 0-3 for round 6
Rounds 9 – 26 (17 rounds)
Repeat round 7 of baby hat instructions 0-3, only change is
make your raspberry stitches for 17 rounds instead of 15 before starting the rim
When you’re ready to start the rim of your hat, you will need to turn your hat inside out.
Rounds 27- 31
sc in each stitch around (72 sts)
*NOTE when joining 2nd rim round, sl st, ch1, do sc in first stitch. Continue around.
Third round skip ch 1 and just work a sc into first sc of round. Keep it one continuous round.
This pattern is brought to you by www.meladorascreations.com
You can sell any item made from this pattern and link back to my page or videos, but you do not have permission to copy and paste my pattern anywhere online. ©Copyright 2024, All Rights Reserved
PLEASE READ BELOW!
If you’d like to see my channel stay and grow, please consider becoming a patron.
Or you could make a one time donation through PayPal. Thank you so much for your support! God Bless!