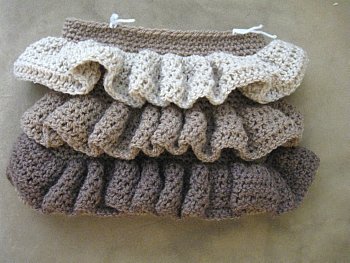
This Crochet Ruffle Bag can be adjusted very easily by making the beginning chain longer. Also you can make this purse with only 2 Ruffles or just one big one! Give it a try.
If you like this bag then maybe you would like more things like this under the category Bags and Purses
There’s a phone holder too!
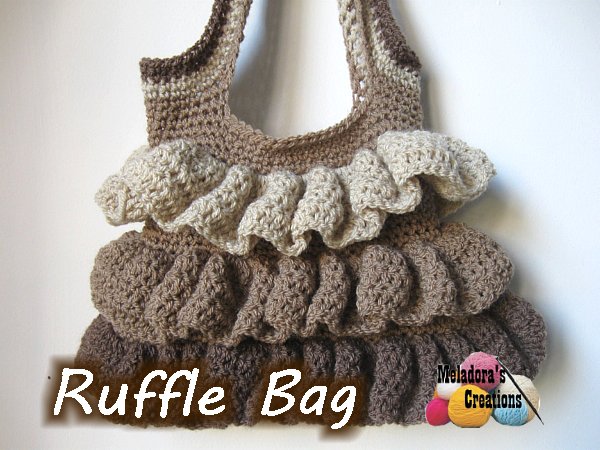
Crochet Ruffle Bag – Free crochet pattern
This page contains affiliate links
HOOK: 5.5 mm hook or size I hook for the US
YARN: at least 4 skeins of worst weight yarn (100 gram skeins) get 2 skeins of the main color of the bag, 1 skein of each of the other 2 colors you want. Or you can just make the whole bag one color.
At least 5 stitch markers.
If you are going to make it with 3 colors like I did, pick a medium color to do the whole bag in, and also use this color as the middle ruffle. Darker color on bottom ruffle, lighter color as top ruffle.
ABBREVIATIONS
ch = Chain
sl st = Slip Stitch
st = Stitch
sk = Skip
sc = Single Crochet
dc = Double Crochet
Sc dec = single crochet decrease
Repeat what’s in between * for rest of round.
PDF Pattern with Pictures
You can find the PDF version of my pattern with pictures on Ravlery Or my shop on Etsy. Thank you very much for all you do to support my channel.
Be sure to come to my Facebook page to ask questions if you get stuck.
Remember to sign up for my email so you can always be update date with the free patterns I release as they come out! https://www.meladorascreations.com/sign-up-for-newsletter/
THE VIDEO TUTORIALS:
RIGHT HANDED VERSION
PART ONE
Ruffle Bag – PART TWO
Ruffle Bag- PART THREE
Ruffle Bag – PART FOUR
If you haven’t yet, take a moment to subscribe to my videos on YouTube to have easy access to all my videos and playlist @meladora1 on YouTube
Come visit me over on my Facebook Page where I share free pattern links Daily!
To start:
Ch 46
Round 1
Sc into second ch from hook and in all remaining stitches. Now pivot your work and now working in the bottom part of single crochets, sc your way across bottom. Sl st into beginning sc. Total of 90 sts
Rounds 2 – 4
Ch 1 and single crochet in same st (place marker here) sc in all sts around (90 sts)
Round 5
Mark 7 stitches symmetrically in each corner as picture shows below. Single crochet in all sts until you come up to a marker, then do a sc dec , and repeat until end of round (86 sts)

Round 6
Mark 9 stitches symmetrically in each corner as done before. Single crochet in all sts until you come up to a marker, then do a sc dec , and repeat until end of round (82 sts)
Round 7
Mark 9 stitches symmetrically in each corner as done before. Single crochet in all sts until you come up to a marker, then do a sc dec , and repeat until end of round (78 sts)
Rounds 8 & 9
ch 1 sc in same st, sc in all sts around. (78 sts)
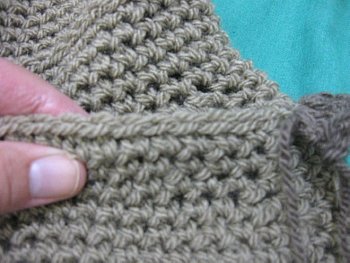
Round 10
Do a sl st in all sts around
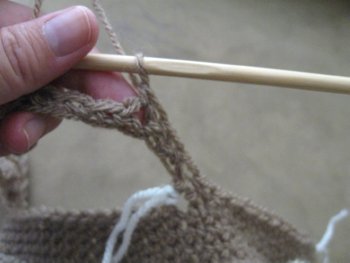
Round 11
Work in the sts behind the slip stitches
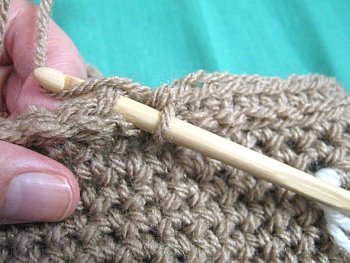
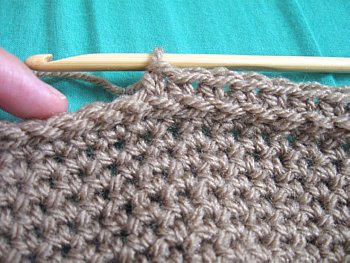
You can clearly see the sl sts here
Sc in all sts, do not slip st at end of row, just continue around, we are starting to work in a continuous row now. Make sure to have your marker here to mark the beginning of the round. (78 sts)
Round 12
Mark 9 stitches symmetrically in each corner as done before. Single crochet in all sts until you come up to a marker, then do a sc dec , and repeat until end of round (74 sts)
Round 13
Mark 9 stitches symmetrically in each corner as done before. Single crochet in all sts until you come up to a marker, then do a sc dec , and repeat until end of round (70 sts)
Round 14
Mark 9 stitches symmetrically in each corner as done before. Single crochet in all sts until you come up to a marker, then do a sc dec , and repeat until end of round (66 sts)
Rounds 15 – 18
Sc in all sts around for 4 rounds
Round 19
Mark 9 stitches symmetrically in each corner as done before. Single crochet in all sts until you come up to a marker, then do a sc dec , and repeat until end of round (62 sts)
Round 20
sl st into all sts around
Round 21
Work in the sts behind the slip stitches
Sc in all sts.
Round 22 – 30
sc in all sts around for 8 rounds
Round 31
sl st in all sts around
Round 32
Work in the sts behind the slip stitches
Sc in all sts.
Rounds 33 – 35
sc in all sts for 3 rounds, after the 35th sl st into next st and ch 1, cute yarn.
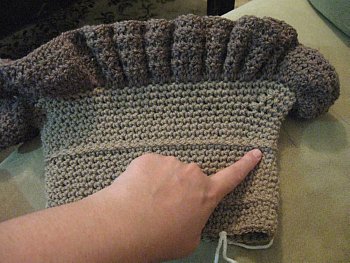
The Ruffles
Note you can do the ruffles one of two ways. First pick the look you prefer.

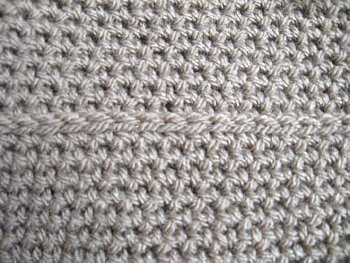
Front side of ruffle
Back side of ruffle
Personally I think back side facing looks better but you may think otherwise.
If you want front side ruffle If you want back side ruffle

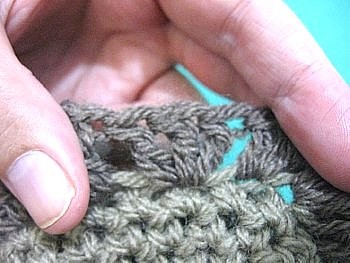
Start with bag upside down Start with bag right side up
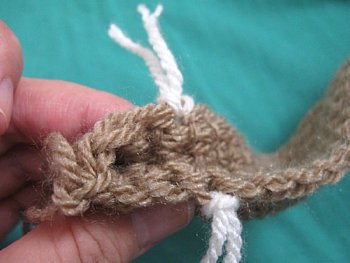
To make the slip stitches easier to work in, it helps if you fold the bag, it will make the slip stitches pop up
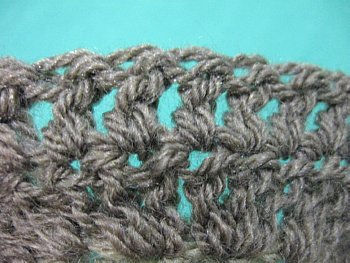
Round 1
sl st to attach the color of yarn you wish and ch 3, (ch 3 counts as first dc)
dc 2 into same stitch. Dc 3 into each st around. Sl st to join
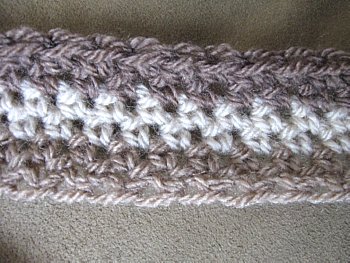
Rounds 2 – 4
ch 3 (ch 3 counts as first dc) dc 1 in next st and in each st around for three rounds.
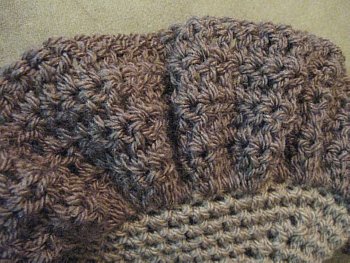
If you use three colors, do darkest color at bottom, medium color (color of the bag) on middle and lightest color on top as show below.
The Handles
If your having trouble with the single crochet foundation stitch, maybe you will find this tutorial with slow motion helpful.
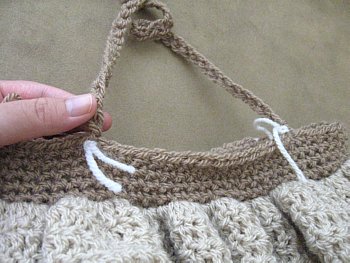
Mark 15 stitches symmetrically in each corner as done before and place markers on both side of the bag to mark where your handle will begin and end. Do this for both sides.
Leaving yourself a tail to be worked in later, make a slip knot and attach your yarn with a sc on the right side marker.
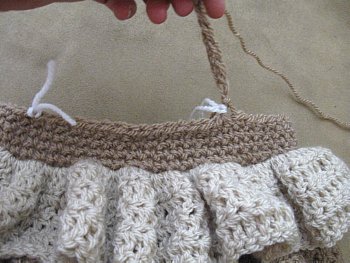
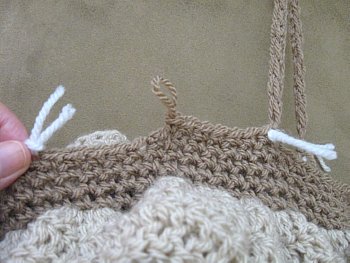
Do 55 single crochet foundation sts then sc connect it horizontally to it’s partner on the left, same side of the bag, sc over to your next marker on the back of the bag and repeat the 55 single crochet foundation sts then connect it horizontally to it’s partner on the same side of the bag.
Sc to the first set of single crochet foundation sts on the handle and start to sc onto the handles. Once done, sc around to where next handle starts and repeat for 5 rounds giving you 6 rows total for the handles.
Sc to next marker to start next
Second row of handles, just work up handle the strap
You can do the medium color for 2 rows, then change to lighter color for next 2 rows, then switch to darkest color for last two rows if you wish. Giving it more color as shown below or just do it all in one color. Your choice.
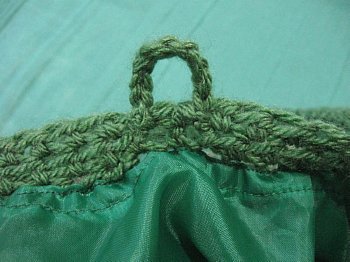
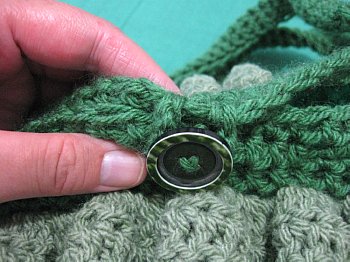
If you wish to add a button to fasten the bag, I suggest you use double yarn when making the loop, to give you extra strength. I usually get a long piece of yarn, fold it in half. Leaving a tail to sew in later, I make my slip knot, Find the center of the bag and sl st on the left side of stitch, skip one stitch and ch 8, sl st to bag, cut and leave a long tail to be worked in on this side as well. I usually do this after I have the lining in the bag.
This pattern is brought to you by www.meladorascreations.com
You can sell any item made from this pattern and link back to my page or videos, but you do not have permission to copy and paste my pattern anywhere online. ©Copyright 2015, All Rights Reserved
PLEASE READ BELOW!
If you’d like to see my channel stay and grow, please consider becoming a patron.
Or you could make a one time donation through PayPal. Thank you so much for your support! God Bless!