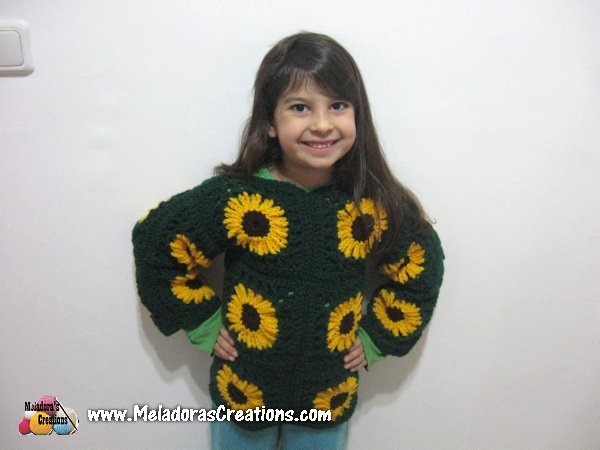
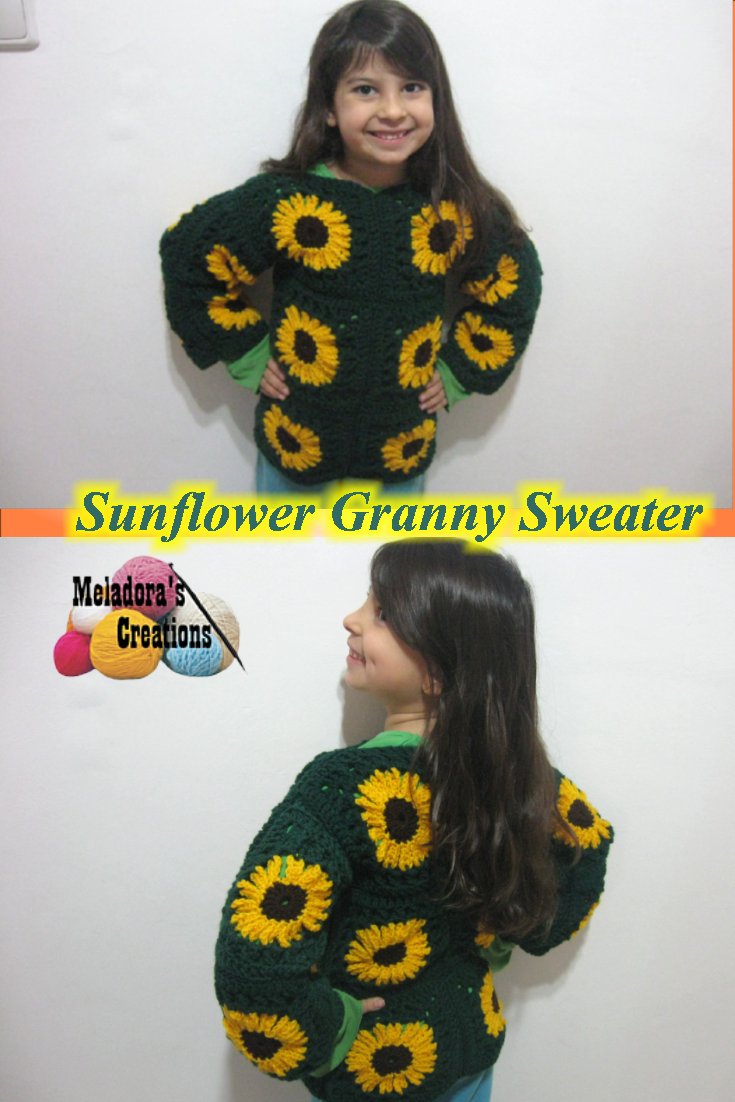
This Granny Square Pullover Sweater was inspired by my love of sunflower squares. This free crochet pattern shows you how to make your Sunflower Granny Squares and how to put them together. Feel free to make another row wider for a larger size.
You can find more afghan patterns under the category Granny Squares
Find more crochet stitches here on the category Crochet for Children
Find more crochet stitches here on the category Crochet Sweaters
Other patterns that use this stitch are:
Sunflower Granny Square Pullover Sweater – Free Crochet Pattern and Video tutorial
Please don’t forget to Pin this onto your favorite crochet boards!
This page contains affiliate links
For this project you will need:
- 2 HOOKs Sizes: 5 mm hook or size H hook for the US and a 4 mm hook or G hook
- YARN: I used worsted weight yarn, 4 ply US, 10 ply AU – Each skein was 100 grams / 3.5. oz – 240 meters / 262 yards
I used:
- 3 skeins of green,
- 2 skeins of bright yellow
- 1 skein of dark brown
ABBREVIATIONS
(click on link to find tutorials)
ch = Chain
sl st = Slip Stitch
SC = Single Crochet
DC = Double Crochet
HDC = Half Double Crochet
st (s)= Stitch(es)
FPDC = Front Post Double Crochet
* = Repeat what’s in between * for rest of round
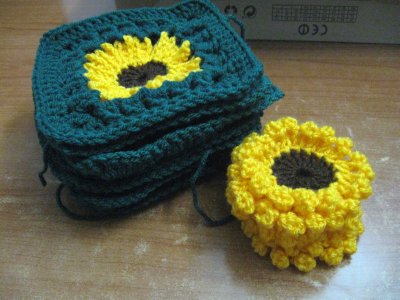
The Granny Square
Find the pattern and video tutorials on how to make the Sunflower Granny Square here
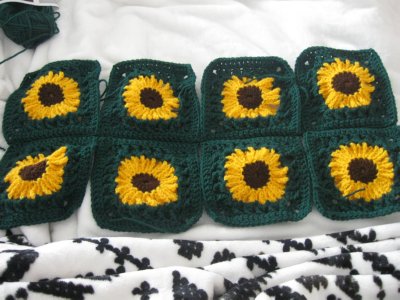
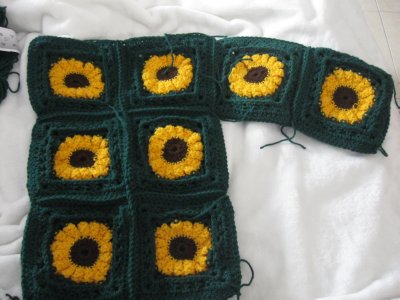
I made 20 squares total.
PDF Pattern with Pictures
You can buy the ad free PDF version of my pattern with pictures on Ravelry to support this channel. Either way thank you for being here and for all you do to support my channel.
THE VIDEO TUTORIALS:
All my Video Tutorials
If you haven’t yet, take a moment to subscribe to my videos on YouTube to have easy access to all my videos and playlist @meladora1 on YouTube
PUTTING THE SWEATER TOGETHER
Grab 8 granny squares, we’ll be making the bottom of the sweater first.
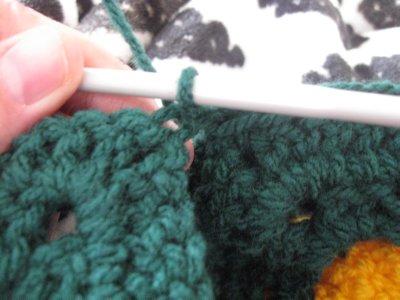
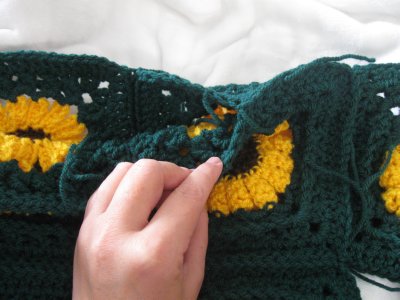
Gran the first 2 granny squares and put them front to front where the good sides are facing each other and the back side of the granny’s are facing outward. Line them up in the corners and using the top of the ch 2 in the corner, start to slip stitch them together using the BACK loops of the grannies only.

Grab your next set of two squares and put them front to front the same way and keep slip stitching your grannies together starting in the same top ch 2 and working across to the next top ch 2 in the corner. Still using back stitches only. You will always sew using back stitches only in the project.
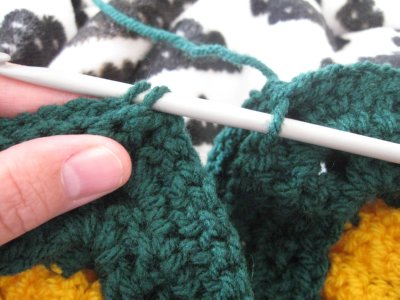
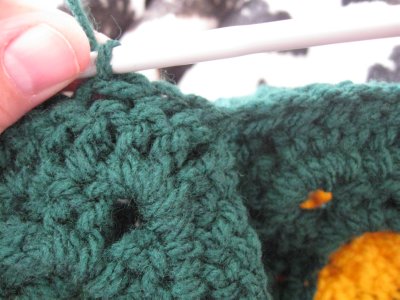
Continue across until you have all eight squares sewn in a straight line like show below.
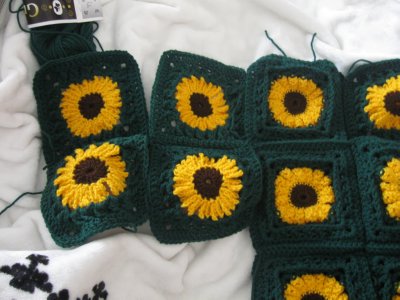
Then fold your piece and connect to form the body.

Now sew up the side of the granny, when you get to the corner, grab your next granny square and sew them together like you did before.

Attach another two to the left, and repeat one more time to have 4 squares that make up the sleeves.
Then cut your yarn leaving a tail to work in later and flip your sweater over.
Attach your yarn at the top of your sleeve and sew the top of your grannies together. Once you reach the main part of your sweater you can grab your next granny for your front and sew it on along the top, only half way. This will be one side of the neck. Cut your yarn. Repeat of next side of front granny.
Create your other arm the same way and sew all your grannies together.
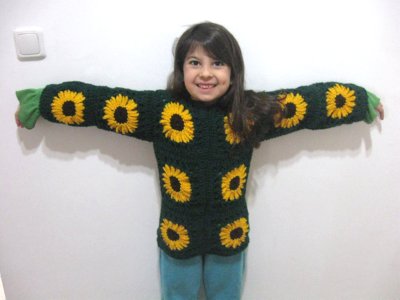
My daughter asked that I not crochet around the neck because she felt it was choking her as it was, so I just crocheted around the sleeves and bottom to sweater.
Take your 4 mm / or G hook and put one double crochet in all the stitches around the end of the sleeves and bottom of sweater, hide your tails.
This pattern is brought to you by www.meladorascreations.com
You can sell any item made from this pattern and link back to my page or videos, but you do not have permission to copy and paste my pattern anywhere online. ©Copyright 2024, All Rights Reserved
PLEASE READ BELOW!
If you’d like to see my channel stay and grow, please consider becoming a patron.
Or you could make a one time donation through PayPal. Thank you so much for your support! God Bless!