These Lacy Crochet Ribbon Bookmarkers are very easy to crochet and make a great scrap yarn project. If you’re like me and have a few bits of ribbon around, then let me show you a great way to turn them into a beautiful piece worthy of a crochet gift idea! And since you can use scrap yarn it just begs to be made.
Find more patterns like this here on the category For The Home or For Beginners
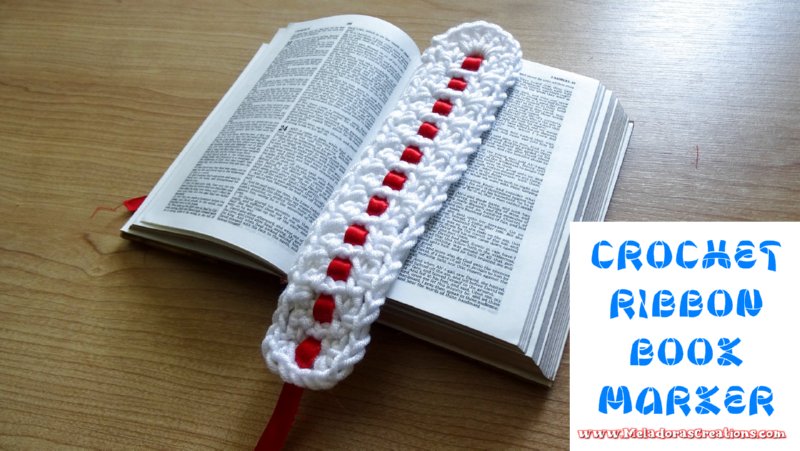
Crochet Ribbon Bookmarkers – Free Crochet pattern
Please don’t forget to Pin this onto your favorite crochet boards!
This page contains affiliate links

For this project you will need:
- HOOK: 4 mm hook or size G hook for the US
- YARN: I used 4ply to 3 ply yarn. Same size hook
- Tapestry Needle
- A strip of Ribbon 13 inches or 40 cms long. Or feel free to make extra long ribbon tips.
ABBREVIATIONS
(click on link to find tutorials)
ch = Chain
sl st = Slip Stitch
st = Stitch
sk = Skip
beg = beginning
YO = Yarn Over
SC = Single Crochet
DC = Double Crochet
Repeat what’s in between * for rest of round.
All my Video Tutorials
If you haven’t yet, take a moment to subscribe to my videos on YouTube to have easy access to all my videos and playlist @meladora1 on YouTube
Another Link Blast you might like

To Start
Ch 5
Row 1
sc in 2nd ch from hook.
Ch 2, Sk 2, sc in last ch
Ch 1 and turn
Row 2
sc in 1st sc
ch 2, sk 2, sc in last ch
Ch 1 and turn
Repeat Row 2 until you have 22 rows or an even number of rows.
The Border
Take time after crocheting a few rows to test your size ribbon with your ch 2 spaces. Thread it through a few rows. It should thread through easily without bunching up or crunching up on the sides.
After your last sc on row 22..
1st row of border – We’ll no longer be crocheting in rows, but instead we’ll be crocheting along the outside of the bookmarker.
- NO NEED TO TURN for Rows anymore. We’ll be Pivoting our piece from now on. Let’s continue and pivot to the left side stitches.
- IMPORTANT to note about the corners. We’ll be making our corners in this bookmarker pattern by doing (sc, ch 1, sc) into the same stitch.
Your SC at the end of row 22 counts as your first SC of the corner. Now CH 1 and SC into that same stitch. *Ch 2 and skipping a stitch and SC in next.*
Repeat what’s in between * for this side row. Make sure your last SC is crocheted in the very last st of the row.
Then CH 1 and SC into the same st and pivot your work to the bottom edge.
Ch 2 and sc in last st. CH 1 and sc into to same st then pivot your work to the other side
*Ch 2 and skipping a st and sc in next.*
Repeat what’s in between * for this side row. Make sure your last SC is crocheted in the very last st of the row.
Then ch 1 and sc into the same st and pivot your work to the Top side
ch 1 and DC 5 into the ch 2 space to create the Shell
ch 1 and sc into the CH 1 space between the sc’s
Ch 1 and cut your yarn leaving a long enough tail to be worked in with a tapestry needle.
We’ll be threading our ribbon through our ch 2 spaces in the middle.
Grab your ribbon and starting at the side with the shell enter from underneath and push it through the first space, then push the ribbon into the next space.
Pull the ribbon through until there is only a small amount left that can be hidden behind the shell.
I really hope you enjoyed this pattern! If you make one of these, please come on over to the Facebook group and share a picture with the community. Thank you!
This pattern is brought to you by www.meladorascreations.com
You can sell any item made from this pattern and link back to my page or videos, but you do not have permission to copy and paste my pattern anywhere online. ©Copyright 2024, All Rights Reserved
PLEASE READ BELOW!
If you’d like to see my channel stay and grow, please consider becoming a patron.
Or you could make a one time donation through PayPal. Thank you so much for your support! God Bless!