
This Angel Crochet Stitch pattern I call the Angel Stitch is a beautiful stitch that’s created in two rows at once.
It’s easy to learn the Angel stitch this pattern because of the picture tutorial and video tutorial that come with this lesson.
You can find more crochet stitches on the category Crochet Stitches
Angel Stitch – Crochet Stitch – Free Crochet Pattern and Video Tutorial
Please don’t forget to Pin this onto your favorite crochet boards!
This page contains affiliate links

This Angel Stitch can be worked in sets of 4 or 3
I have patterns for hats and finger less gloves where I am using 3 stitches
But for this showing of the stitch, I will be using 4 stitches.
This stitch can be done using any size hook and yarn. Best used with thinner yarn, 3 ply US, 8 ply AU because it makes the stitches less stiff and easier to work with.
ABBREVIATIONS
(click on link to find tutorials)
ch = Chain
sl st = Slip Stitch
st = Stitch
sk = Skip
dec = decrease
beg = beginning
YO = Yarn Over
sc = Single Crochet
dc = Double Crochet
* = Repeat what’s in between * for rest of round.
PDF Pattern with Pictures
You can find the PDF version of my pattern with pictures on Ravlery Or my shop on Etsy. Thank you very much for all you do to support my channel.
THE VIDEO TUTORIALS:
All my Video Tutorials
If you haven’t yet, take a moment to subscribe to my videos on YouTube to have easy access to all my videos and playlist @meladora1 on YouTube
To Start:
Chain in multiples of 4
Row 1
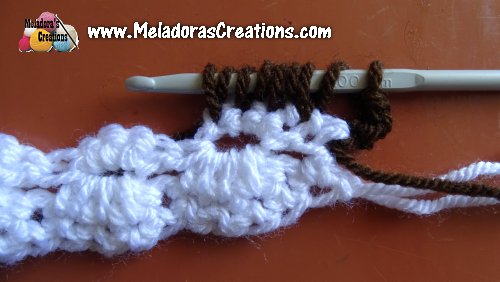
In the 4th stitch from hook, YO and draw up a loop, do this 3 more times until you have 9 loops on your hook as picture shows below.
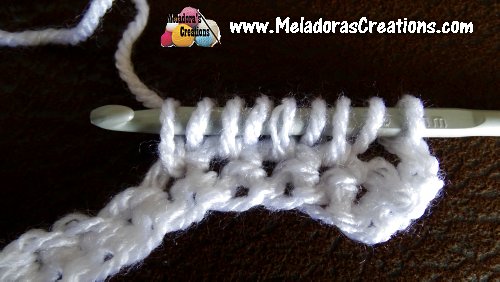
Then pull through only 8 of the loops, leaving 2 loops on your hook
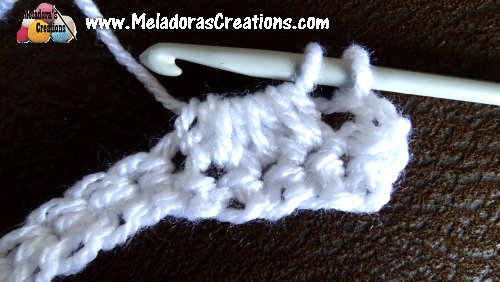
Then YO and pull through the 2 loops to complete your sc, giving you a small hole at the top of your puff stitch.

This is the hole where we will be working next.
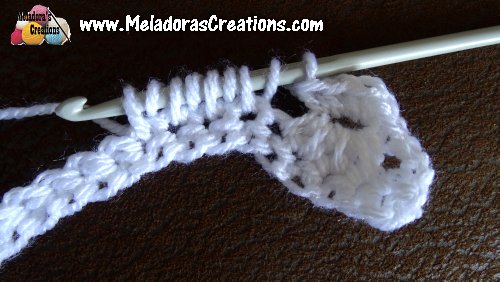
Work 4 single crochet’s into this hole

Then start the stitch all over again, by doing your puff stitch again
DC in top of ch 3 to end row.


Row 2
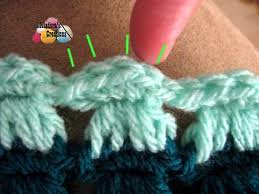
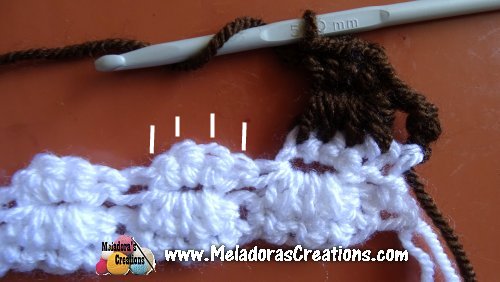
Ch 3 and working in the top 4 sts only, skip the rest, you will be doing your Angel stitch using the top stitches of the Angel stitches from previous row. These 4 sts I point out in the picture below.
At the end of the row, dc in final ch 3 of row.
Repeat row 2 until your scarf is as long as desired.
This pattern is brought to you by www.meladorascreations.com
You can sell any item made from this pattern and link back to my page or videos, but you do not have permission to copy and paste my pattern anywhere online. ©Copyright 2023, All Rights Reserved
PLEASE READ BELOW!
If you’d like to see my channel stay and grow, please consider becoming a patron.
Or you could make a one time donation through PayPal. Thank you so much for your support! God Bless!