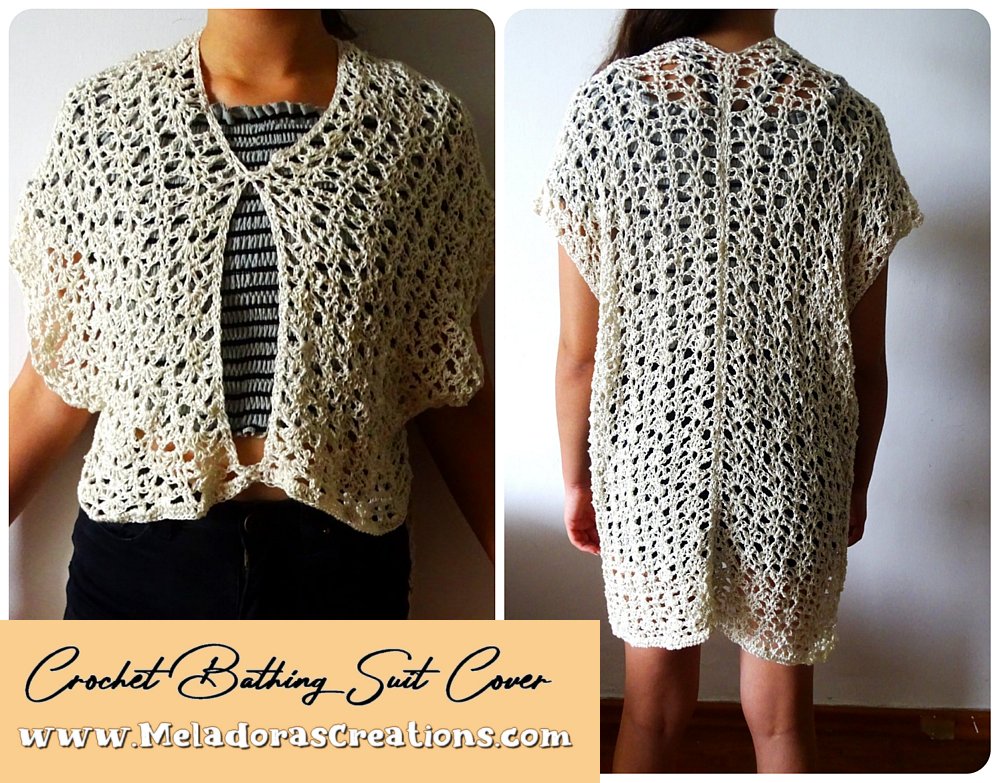
This Crochet Bathing Suit Cover Pattern is so easy to make. This bathing suit cover size can be changed by making the panels wider and longer. The Multiples of the stitch are included and you can continue the pattern to make it as long as you want!
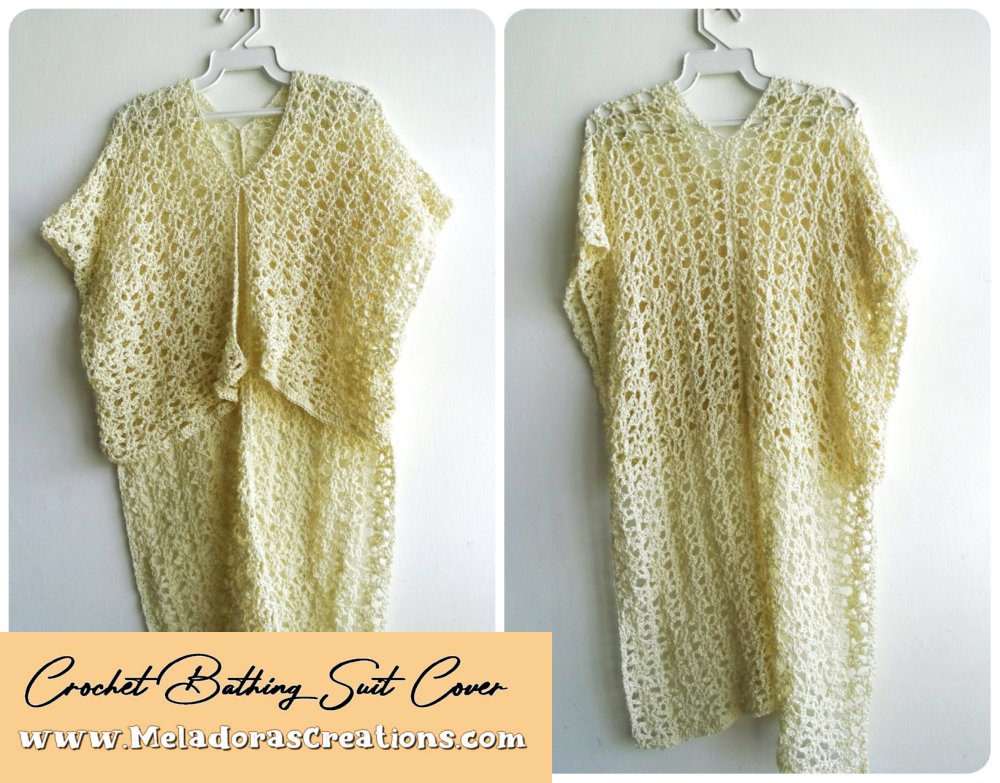
My daughter who I designed this one for, wanted a short semi open front and a closed long back that would cover her bottom. Also she preferred a half way sew on the sides. But this can also be adjusted however you want.
I told her that this cover looked so cute that she could wear it as a summer poncho! What do you think?
You can find more things like this under the category Summer Crochet
Find more crochet stitches here on my site on the category Crochet Shawls and Ponchos
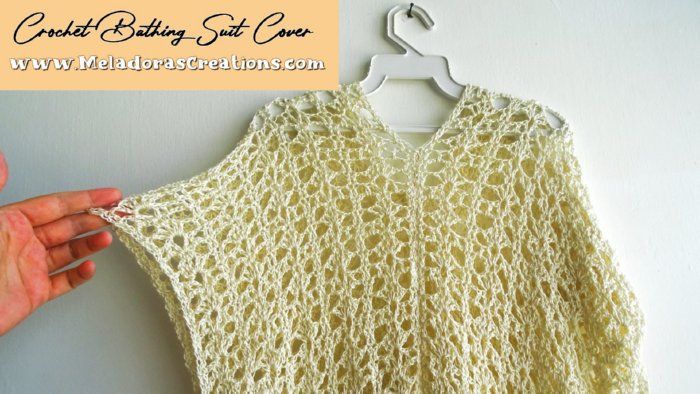
Crochet Bathing Suit Cover Key Hole Top or Summer Poncho – Free Crochet pattern
Please don’t forget to Pin this onto your favorite crochet boards!
This page contains affiliate links

For this project you will need:
- HOOK: 4 mm hook or size G hook for the US
- YARN: Size 1 Super Fine yarn or Sock Yarn. I used Microfiber Acrylic. It’s soft and excellent for any Summer garment that might get wet.
I used 2 skeins total. Each skein was 100g / 5.52 Oz and 350 meter or 382.76 Yards.
So you’ll need 700 Meters or 765.52 yards in total for this size small garment. Obviously if you’re going to make a bigger size you’ll need to get another few skeins depending on how much bigger you plan to make it.
Gauge and Sizing
Gauge is 2 sts per cm or 5 sts per Inch
- I created 2 panels and it only took one skein per panel for the small size.
- Each panel measured 43 inches or 108 cms in length and was 9 inches or 23 cms wide
ABBREVIATIONS
(click on link to find tutorials)
ch = Chain
sl st = Slip Stitch
YO = Yarn Over
st = Stitch
sts = Stitches
sk a st = Skip a stitch
sk 2 sts = Skip two stitches
SC = Single Crochet
DC = Double Crochet
beg = beginning
Repeat what’s in between * for rest of round.
PDF Pattern with Pictures
You can find the PDF version of my pattern with pictures on Ravlery Or my shop on Etsy. Thank you very much for all you do to support my channel.

Multiples of the stitch
Multiples of this pattern is 11 + 2
To start:
Chain 60 to create the small size.
Or chain in multiples of 11 until you reach your desired size. Keep in mind that this is only one panel, so think half the body size you need.
Row 1
DC in 3rd chain from hook. DC in rest of the 58 sts.
With beg chain 2 you should have a total of 59 sts.
Ch 2 and Turn.
This stitch design takes 3 rows to complete and I will be referring to the 3 row repeat as a SET. Rows 2 – 4 are the set repeat.
Row 2
DC in the next st.
*ch 1 skip a st and DC into the next st.
Sk 2 sts and DC, ch 3, DC in next st.
Skip 2 sts and DC in next st.
Ch 1 and skip a st and DC into the next two DC’s.*
Repeat for the row. You should end perfectly at the end of the repeat, with the last two sts being a DC.
Ch 2 and Turn.
Row 3
DC in the next st.
Then skip over to the ch 3 space
*Ch 1, DC into this space 5 times.
Ch 1 and DC in the next 2 DC’s*
Repeat for the row. You should end perfectly at the end of the repeat, with the last two sts being a DC.
Ch 2 and Turn.
Row 4
DC in the next st.
Now we’re going to be using the spaces between our DC’s of our shell.
Spread the 5 DC’s and ch 1 spaces apart. Do you see the 4 spaces? You’ll be suing the 2 center ch 1 spaces.
So Ch 4 and skipping our first space of our shell and sc into the second/next ch 1 space.
ch 1 again and then sc into the next ch 1 space.ee the 4 spaces it makes? You’ll be suing the 2 center ch 1 spaces. So ch 5 then sc into 1 sp, ch 1 and then sc into the
We’ll be using only the 2 middle ch 1 spaces of our shells this row.
Here’s the repeat:
*Ch 4 and skip the first ch 1 space and SC into the second ch sp. Then ch 1 and SC into the next ch 1 space.
Ch 4 and skipping the last ch 1 space of your shell and DC one into the next two DC’s *
Repeat for the row. You should end perfectly at the end of the repeat, with the last two sts being a DC.
Ch 2 and Turn.
Row 5
DC in the next st.
*ch 1 skip and DC on ch 4.
DC, ch 3, DC to create your new V stitch in the ch 1 space that’s in between your 2 sc’s that you made in those two spaces on your shell on the last row.
DC and ch 1 on your next ch 4.
DC into the next two DC’s.*
Repeat for the row. You should end perfectly at the end of the repeat, with the last two sts being a DC.
Ch 2 and Turn.
Repeat the set using rows 3 – 5.
I did a total of 30 sets per panel. After your final set is done and you’re ready to finish it, I always did a row of DC’s.
Final Row of your Panels
DC in the next st.
*DC 3 in ch 4 space,
DC in SC,
DC in the ch 1 space between the sc’s,
DC in SC,
DC 3 in ch 4 space,
DC in next 2 DC’s *
I had 57 DC’s total at the end of my row.
You will need to make 2 panels the same size then I’ll show you how I put them together.
Lay your panels side by side and grab some markers. We’ll be using them to hold your piece together at the sewing points until we can attach them ourselves.
I counted my sets by using the 1st row of our set which creates the biggest hole. So it made it easy to find to count.
- 1st marker – Start from the bottom of the garment and place a marker,
- 2nd marker – …then count up 7 sets and place a marker.
- 3rd marker – …then from there count up 8 sets and place a marker.
Now you have your Open front area of your blouse and Head hole marked out.
Flip your piece over to sew it. It will create a nicer look from the front.
You can attach your markers any place along the rest of the piece to hold it in place until your ready to sew it.
Be sure to Flip your piece inside out to sew. It will create a nicer look.
Attach your yarn to the 1st marker and sew up two stitches. I used Single crochets, but you can use slip stitches or even use a tapestry needle if you’d prefer. Just make sure you get a couple sewn up to hold it in place at the bottom here, unless you would prefer it to be open here completely.
Either way, once you have your 2 sts sewn, then you can cut your yarn and hide your tail.
Repeat this same method of sewing for the 2nd marker. SC 2 stitches together at the next marker. This creates the connection at the top of the garment front.
For your 3rd marker you are starting to sew up the back of your garment. I stopped and added markers randomly to hold the garment closed to make sure it stays lined up until I could sew it evenly.
Doing it this way will ensure that your garment is even and won’t get sewn on crooked.
QUICK TIP
Make sure you’re using the inside of your garment for all the sewing!!!
Once you’re panels are sewn together, creating the main piece, fold your garment at the head hole. Favor the back of the garment than the front, to pull the head hole down away from the neck.
Remember how we counted our sets? We’re going to count our larger holes on row 2. Align your pieces. Let the holes in the garment to guide you.
Once you got it aligned, count up from the bottom of the garment up 3 sets and place a marker there. Then mark the bottom of the sleeve / bottom of garment, to make sure it doesn’t get crooked.
In other words,
I folded then aligned my front piece with the back piece at a set to make sure it was even. Then I counted up 3 sets and placed another marker.
Now attach your yarn at the bottom marker / bottom of the garment and sew up the 3 sets to your marker. Ch 1 and cut your yarn. Repeat for the other side too.
Then enjoy!
This pattern is brought to you by www.meladorascreations.com
You can sell any item made from this pattern and link back to my page or videos, but you do not have permission to copy and paste my pattern anywhere online. ©Copyright 2023, All Rights Reserved
PLEASE READ BELOW!
If you’d like to see my channel stay and grow, please consider becoming a patron.
Or you could make a one time donation through PayPal. Thank you so much for your support! God Bless!