This Free Crochet pattern teaches you how to make a Crochet Envelope for Valentines, Christmas or Birthdays. Great crochet project for Christmas, Valentine or Birthdays. The tutorial shows you how you can make the envelope to fit any size card.
To find more patterns for the holidays check out the Holidays category
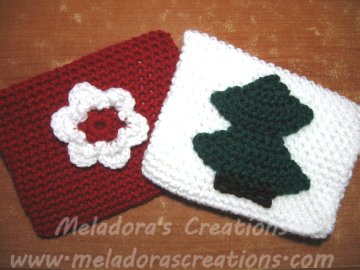
Crochet Envelope for Valentines, Christmas or Birthdays- Free Crochet Pattern and Video tutorial
Please don’t forget to Pin this onto your favorite crochet boards!
This page contains affiliate links

For this project you will need:
- HOOK: 5 mm hook or size H hook for the US
- YARN: 4 ply US 10 ply AU worsted weight yarn in two different colors, It doesn’t take much yarn, you will be using less than a skein of 250 grams. The color you use for the buttons can be done with scraps.
- Two stitch markers
- tapestry needle.
ABBREVIATIONS
(click on link to find tutorials)
ch = Chain
sl st = Slip Stitch
st = Stitch
sk a st = Skip a stitch
SC = Single Crochet
THE VIDEO TUTORIALS:
All my Video Tutorials
If you haven’t yet, take a moment to subscribe to my videos on YouTube to have easy access to all my videos and playlist @meladora1 on YouTube
PDF Pattern with Pictures
You can find the PDF version of my pattern with pictures on Ravlery. Thank you very much for all you do to support my channel.
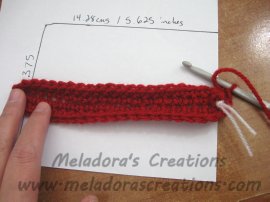
This card holder can be used for any size card you buy. All you need is a piece of paper with the measurements or the card itself to measure from. For this project I am using a standard size card which is 4.375 inches by 5.625 inches or 11.1125 cms
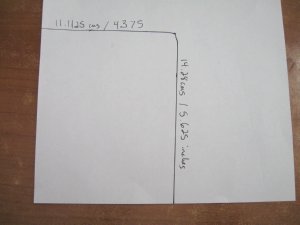

I measured them on a piece of paper and chained up the length of the card that I want to make. In this case, it took 23 chains. You want to chain just a few more past the size you need so the card fits inside. So 23 chains got me just a bit bigger than I need, keeping in mind that when you start your sc’s it will get a bit wider. And when you begin your sc’s you will automatically loose one stitch by working in the second chain from the hook. So chain having at least one chain extra on both ends. Even two extra chains if you crochet tightly. So having said that, the pattern for this size envelope is as follows.
To Start:
ch 23 Round 1 sc in 2nd ch from hook and in rest of the 21 sts (22 sts total) now pivot your work, so you can start working in the bottom stitches.
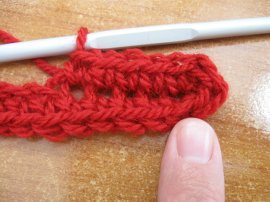
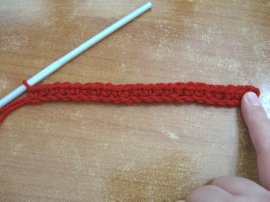
Work a sc into the last stitch again and then down the bottom of your chain for another total of 22 sts, now you should have 44 sts all around. Place a marker here to mark your first stitch of the round.

Rounds 2 – 29
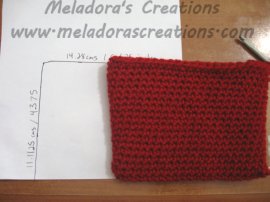
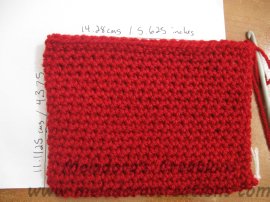
Now working in one continuous round sc in all 44 sts around. After a few rounds you can compare it to your drawing / card and see if it’s a bit bigger than the card, which is what you want, but not to much bigger.
It took me a total of 29 rounds, as I compared it to my drawing / card as you can see by the picture. If you need to do more or less rounds, then that’s okay. Just get it the size of the card you need. As you can see mine is off the paper some, so it’s the right width I need and now the length is good too.
MAKING THE FLAP
Row 30
Mark out 22 sts at the back of the card as centered as you can. Once marker should be in stitch 1 and the last in stitch 22 with 22 stitches marked total. Also one of your two markers should the last stitch worked.
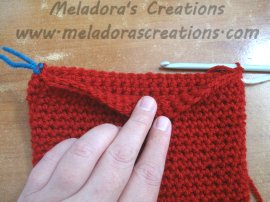
Ch 1 and turn. Sc 1 in the next 22 sts. Rows 31 & 32 Ch 1 and turn. Sc 1 in the next 22 sts. For 3 total tows of sc’s

Row 33
sc dec, sc 18 sts, sc dec (20 sts) ch 1 and turn Row 34 sc dec, sc 16 sts, sc dec (18 sts) ch 1 and turn Row 35 sc dec, sc 14, sc dec (16 sts) ch 1 and turn Row 36 sc dec, sc 12, sc dec (14 sts) ch 1 and turn Row 37 sc 1 in next 3 sts, ch 3, skip 2 sts, sc in next 4 sts, ch 3, sk 2 sts, sc in last 3 sts. ch 1 and turn

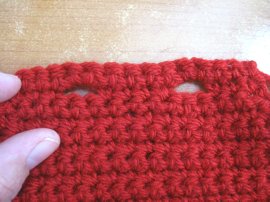
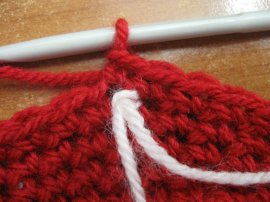
Row 38
sc in first 3 sts, sc two in ch 3 space, sc into next 4 sts, sc 2 into ch 3 space, sc in last 3 sc’s. Ch 1 and cut your yarn, leave a tail to be worked in with a tapestry needle. MAKING THE BUTTONS Best to switch to a different color here. I used white. With your new color…. Ch 3 and sl st into beginning ch to form a ring. Ch 1 and sc 6 into center ring. Sl st in beginning sc to end. Ch 1 and leave a long tail to be used to sew on your button. MAKE TWO
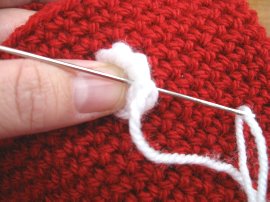
Thread your tapestry needle and put one of your buttons behind one of the button holes.
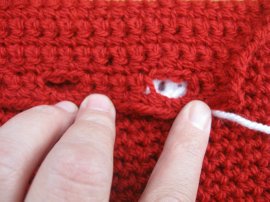
To make it easier to sew on, go through close to the center of your button and pull the yarn to the top of the button.
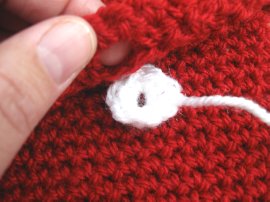
Now sew your button to your envelope going around the center of the button.
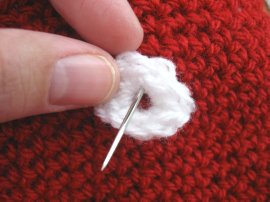
Leave the outside of your button loose, so it can grab on to your button hole.
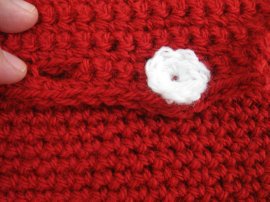
Repeat same method for your next button. If your making this for Valentine’s cards the maybe a nice heart on the front or decorate the front of your card with embroidery, or if you want to use the same flower as I did.
It’s called The Petite Little Flower and you can find the pattern and video tutorials for it. I made the one for my envelope without the leaves. If your making this for Christmas cards then maybe a nice Christmas tree or Christmas bulb, embroidery or a pretty Christmas flower.
If your making this for a Birthday Card, use same techniques above, maybe find a nice birthday cake motif or balloons to sew on the front. Have fun with it!
This pattern is brought to you by www.meladorascreations.com
You can sell any item made from this pattern and link back to my page or videos, but you do not have permission to copy and paste my pattern anywhere online. ©Copyright 2024, All Rights Reserved
PLEASE READ BELOW!
If you’d like to see my channel stay and grow, please consider becoming a patron.
Or you could make a one time donation through PayPal. Thank you so much for your support! God Bless!