
Crochet Rose – Free Crochet pattern, pictorial and video tutorial
At one point or another we all try a crochet flower. Maybe a simple one at first, but we eventually want to Crochet a Rose. Funny thing is, is that it’s probably one of the easiest flowers to make! This Crochet Rose is a roll up design, like many crochet rose patterns are, but I also take you through the steps on video on how to put your rose together and how to sew it together.
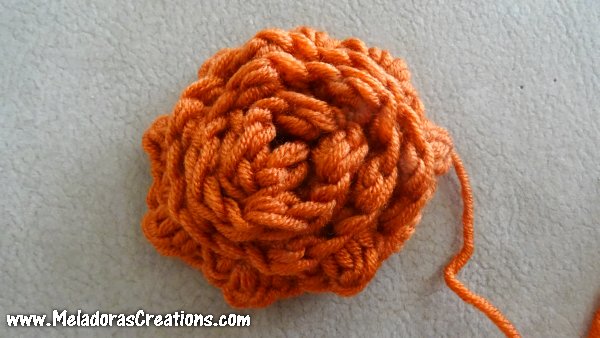
Flowers are beautiful, but the fact that we can crochet a rose that will last forever is amazing to me. I like a busy looking flower. One that has a lot of texture! So this is what I aimed for in this flower. I hope you like it.
Find more crochet stitches here on the category Flowers & Grannies
Crochet Rose – Free Crochet pattern, pictorial and video tutorial
Please don’t forget to Pin this onto your favorite crochet boards!
This page contains affiliate links

PDF Pattern with Pictures
You can find the PDF version of my pattern with pictures on Ravlery Thank you very much for all you do to support my channel.
For this project you’ll need:
- HOOK: 5 mm hook or size H hook for the US
- YARN: A small amount of Medium 4 worsted weight yarn \ Aran 10 ply. This would make a great scrap yarn project
ABBREVIATIONS
(click on link to find tutorials)
ch = Chain
sl st = Slip Stitch
st = Stitch
SC = Single Crochet
DC = Double Crochet
Repeat what’s in between * for rest of round.
THE VIDEO TUTORIALS:
All my Video Tutorials
If you haven’t yet, take a moment to subscribe to my videos on YouTube to have easy access to all my videos and playlist @meladora1 on YouTube
Tip
Make sure to leave a small tail before you make your slip knot, that can be worked in later
To Start
Ch 50
Row 1
sc in 2nd ch from hook. * Ch 2, skip 1 ch, sc into next * repeat for row. You should end perfectly on a sc. Ch 1 and turn
Row 2
We’ll be working in the ch 2 spaces from last row.
Sc, dc, sc into ch 2 space. Repeat for row.
You will notice your row staring to curve. That is what you want.
Just a tip: Make sure the sc that you do after your dc won’t be loose. You want it to curve slightly to make your petals look better.
At end of row ch 1 and cut your yarn leaving a long tail for sewing, leave even more of a tail if you plan on sewing the flower onto something.
First thing you should do is hide your first tail.
Then I highly recommend you thread your needle through the long tail. Because once you start rolling your flower, you’ll only have one hand!
Once that’s done make sure the front side of your work is facing you.
Then using your finger, start to wrap your piece around your finger.
The trick is always making sure that all your rows are showing as you wrap it.
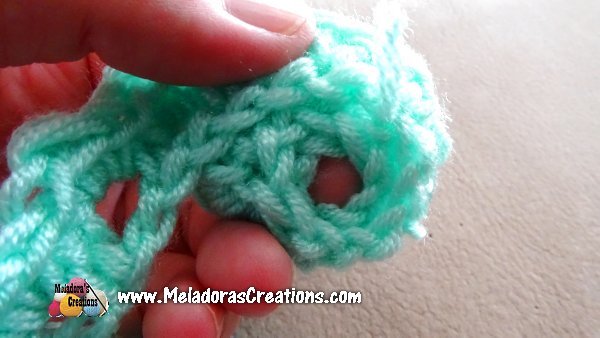
Really take your time here and make sure you can keep all your rows in view.
Then going through the bottom ch of the ending tip and into all of your rows on the back.
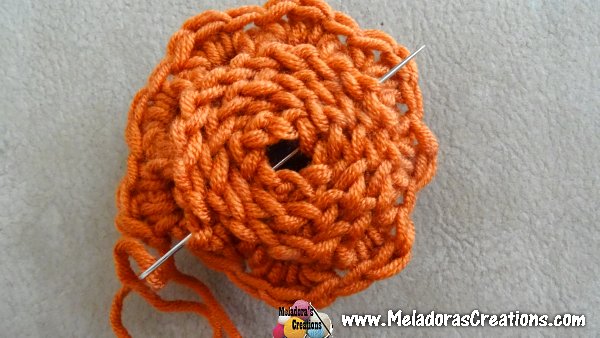
Pull through and * repeat but move over 2 sts then insert your hook again through all the stitches.*
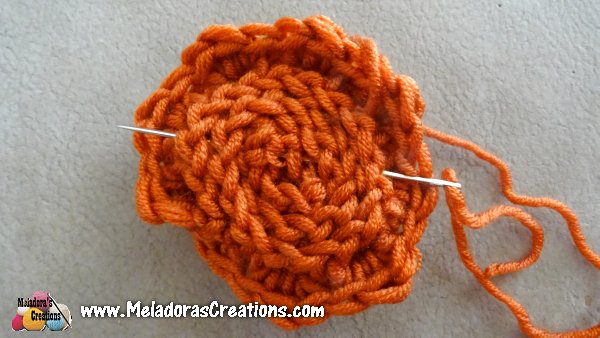
Keep repeating until none of your petal rows are loose. Then turn it over.
This pattern is brought to you by www.meladorascreations.com
You can sell any item made from this pattern and link back to my page or videos, but you do not have permission to copy and paste my pattern anywhere online. ©Copyright 2023, All Rights Reserved
PLEASE READ BELOW!
If you’d like to see my channel stay and grow, please consider becoming a patron.
Or you could make a one time donation through PayPal. Thank you so much for your support! God Bless!