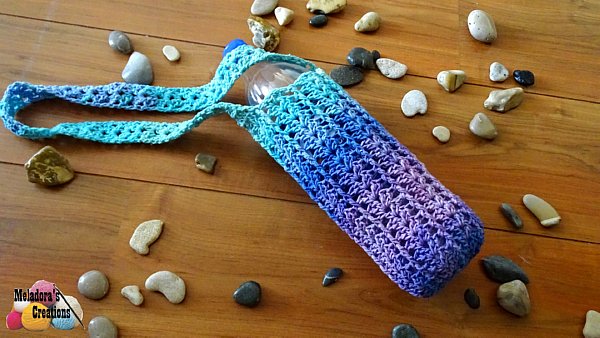
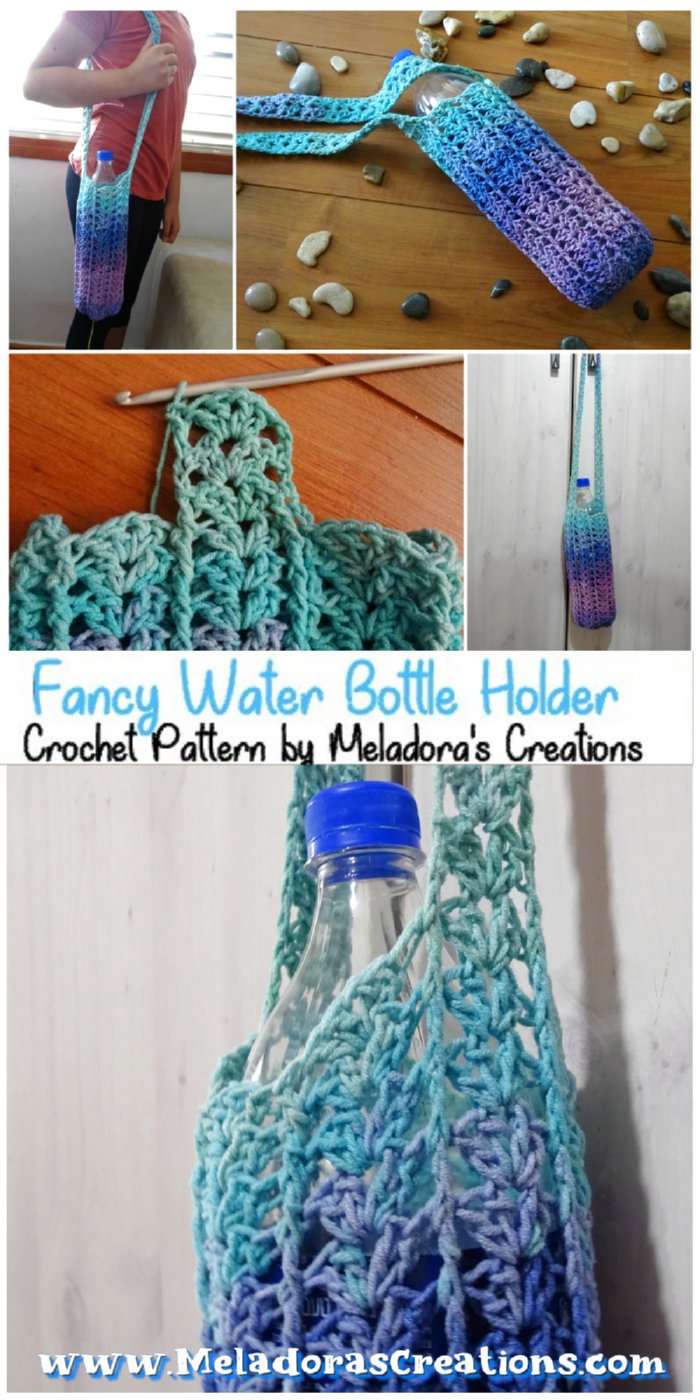
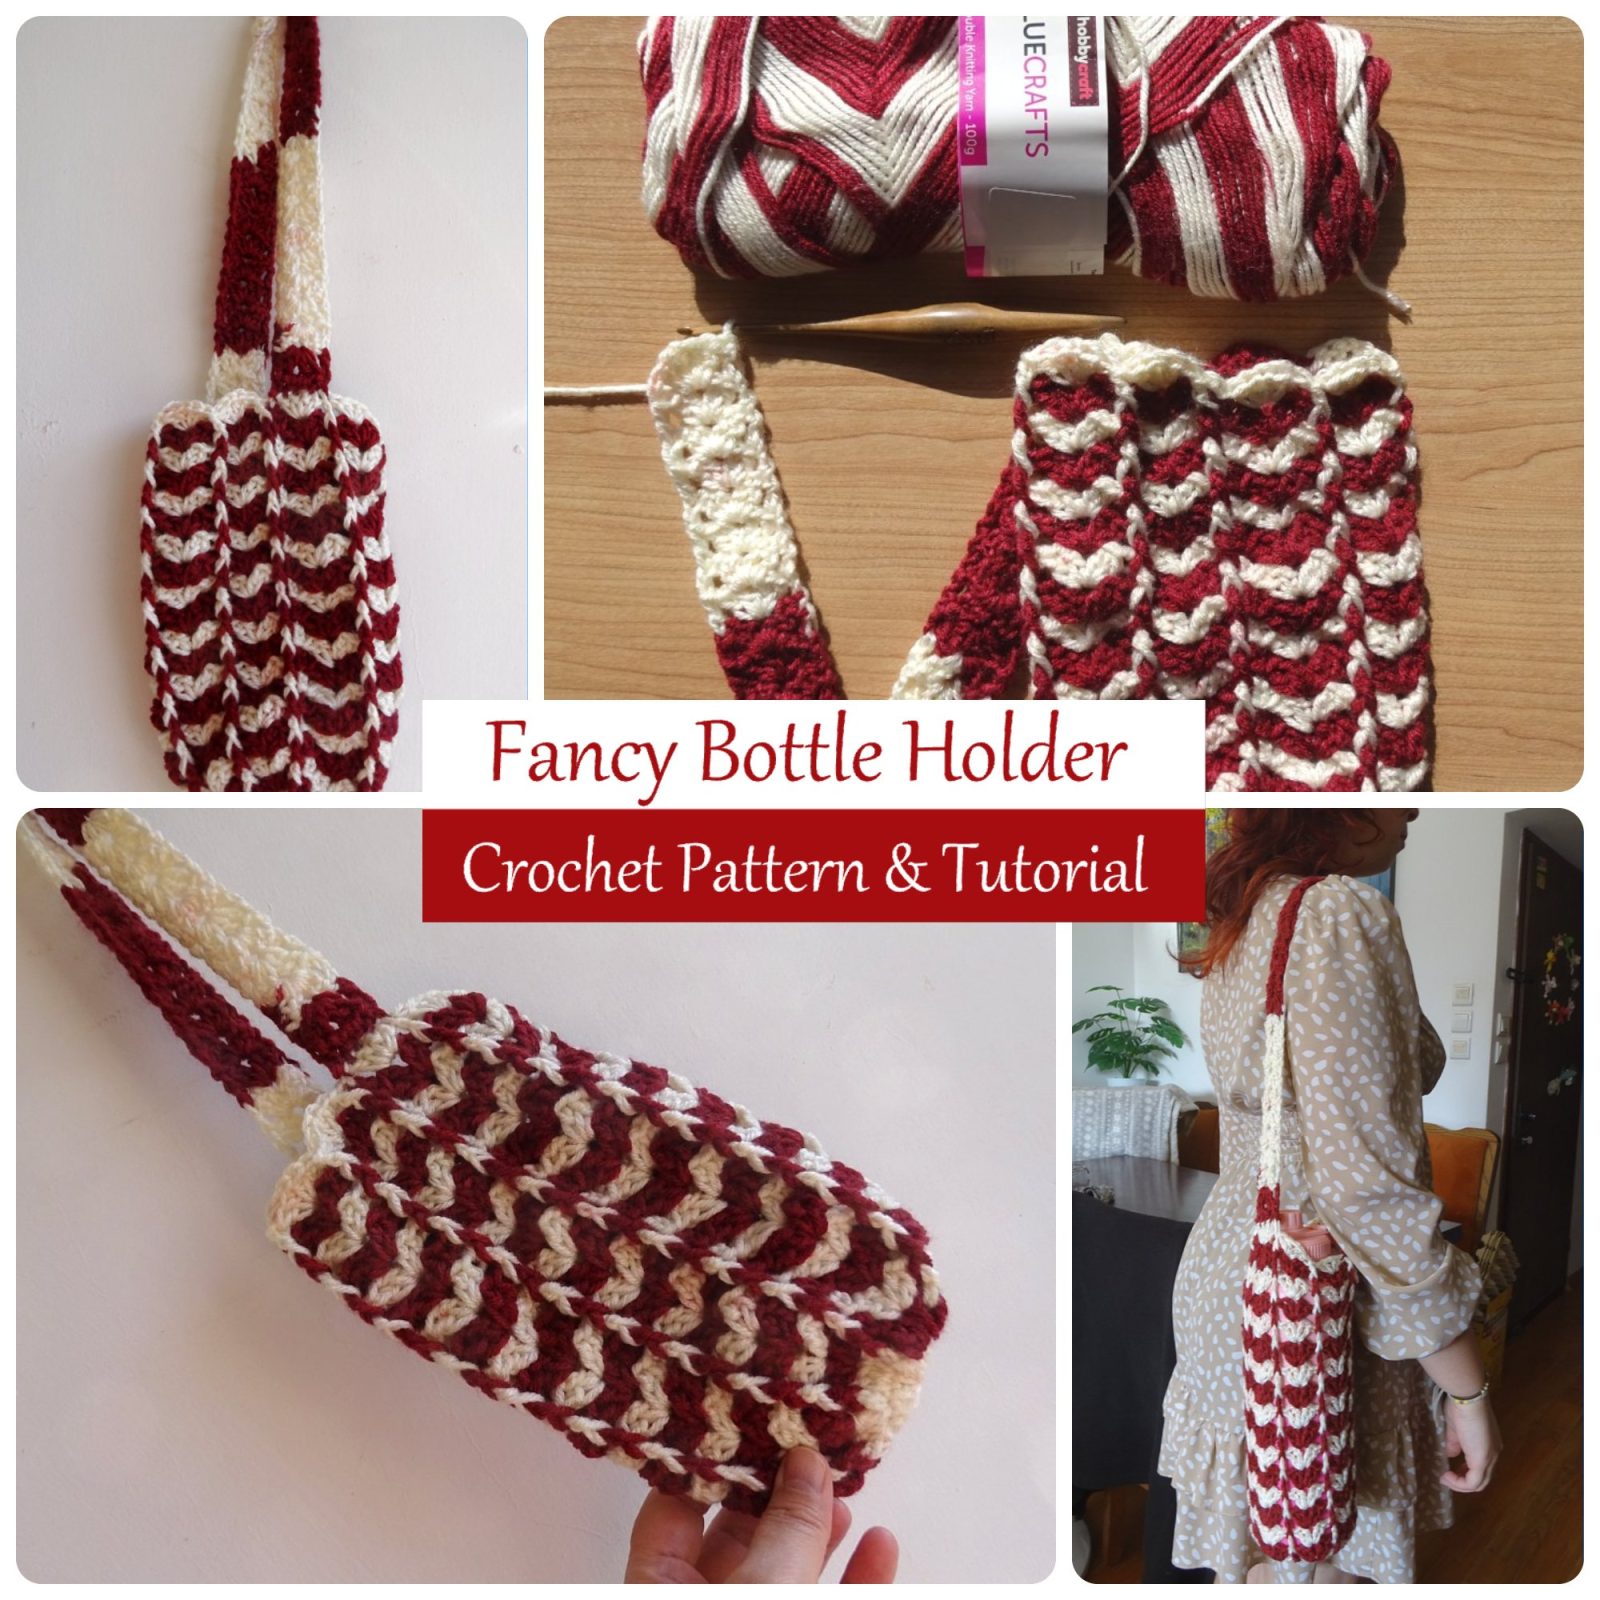
Are you looking for a Crochet Bottle Holder free pattern that is cool and functional? If your anything like me, in the summer you ALWAYS have a water bottle with you when you leave the house. Why not do it in style! This is the easiest crocheted bottle holder you’ll ever make! And talk about Fancy!
This crocheted bottle holder is so easy! Plus the cotton \ acrylic yarn makes it the perfect material for dealing with wetness! The cotton give the material extra strength and it’s absorption of water but acrylic doesn’t absorb so well, so it’s perfect for condensation on those ice water bottles you may use it in. Also the acrylic in the yarn gives the bottle holder just the right amount of stretch. Great for the beach or everyday use.
You can find more things like this under the category Bags and Purses
Remember sign up for my email so you can always be update date with the free patterns I release as they come out!
Fancy Bottle Holder – Free Crochet Pattern and Video Tutorials
Please don’t forget to Pin this onto your favorite crochet boards!
This page contains affiliate links
For this project you will need:
- HOOK: 4 mm hook or size G hook for the US
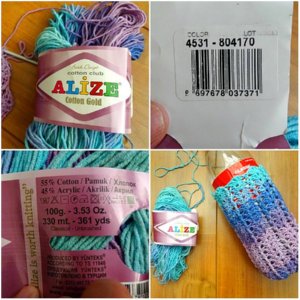
- YARN: The yarn I used is from Alize Cotton – club cotton gold – baltik
- Tapestry Needle (to hide tails)
You’ll only need one skein for this pattern.
- Yarn ply – Sport (12 wpi) US \ 4 ply UK \ 5 ply AUS
- Weight: 100 grams \ 3.5 ounces
- Length: 330 metres \ 360 yards
- Composition: cotton 55% acrylic 45%
ABBREVIATIONS
(click on link to find tutorials)
ch = Chain
sl st = Slip Stitch
st = Stitch
sk a st = Skip a stitch
beg = beginning
YO = Yarn Over
FPDC = Front Post Double Crochet
SC = Single Crochet
DC = Double Crochet
Repeat what’s in between * for rest of round.
THE VIDEO TUTORIALS:
All my Video Tutorials
If you haven’t yet, take a moment to subscribe to my videos on YouTube to have easy access to all my videos and playlist @meladora1 on YouTube
PDF Pattern with Pictures
You can find the PDF version of my pattern with pictures on Ravlery Or my shop on Etsy. Thank you very much for all you do to support my channel.
To start
Ch 4 and sl st in 1st ch to form a ring.
Round 1
ch 2 and DC 15 in the ring. The ch 2 counts as a st. sl st in beg ch 2 to end round. (16 sts)
Round 2
ch 2 and DC into same st. Dc 2 in all stitches to increase your sts to 32 total. sl st in beg ch 2 to end round.
Round 3
ch 2. FPDC onto the post of the ch 2 from previous round. * Sk a st and dc 2, ch 1, dc 2 (this creates our V stitches this round) all into the next st. sk a st then FPDC onto the post of the next st. *
Repeat for the round. sl st in beg ch 2 to end round.
Round 4
ch 2. FPDC onto the FPDC from previous round.
*Skip the first 2 DC’s of the V stitch and using the middle ch 1 space, creates the next V stitch by crocheting – DC 2, ch 1, dc 2 all into the ch 1 space. sk a st the next 2 DC’s of the V stitch on the other side, then FPDC onto the FPDC. *
Repeat for the round. sl st in beg ch 2 to end round.
Rounds 5 – 22
Repeat round 4 for 22 more rows. (or desired length)
THE STRAP
Round 23
After you sl st into beg FPDC on row 22, ch 2 and DC 2, ch 1, DC 2 into peak as usual. Then DC in DC instead of the usual FPDC. For strap we will not be using FPDC, only DC’s. CH 2 and turn.
Rows 24 – 46
so for 22 rows create this one side of the strap.
Row 47
(For last row) ch 2 and turn. Skip 1st dc on your peak st and sc in next 3 DC’s. Skip last DC of your peak st and DC in ending ch 2. CH 1 and cut your yarn.
Now you want to skip 3 sections and in the 4th section attach your yarn back using a DC attachment. Or a sl st and ch 2. Then repeat what you did for rows 24 – 47 for this side of strap. But before cutting your yarn, this time you’ll need to sew your straps together. I used single crochets for this. Make sure you turn your straps toward the back so the stitching won’t show after your done sewing.
Going through the loops of both rows – sc in dc, sc in 3 sc’s, sc in ending ch 2 and ch 1 and cut your yarn. Hide all your tails
This pattern is brought to you by www.meladorascreations.com
You can sell any item made from this pattern and link back to my page or videos, but you do not have permission to copy and paste my pattern anywhere online. ©Copyright 2023, All Rights Reserved
PLEASE READ BELOW!
If you’d like to see my channel stay and grow, please consider becoming a patron.
Or you could make a one time donation through PayPal. Thank you so much for your support! God Bless!