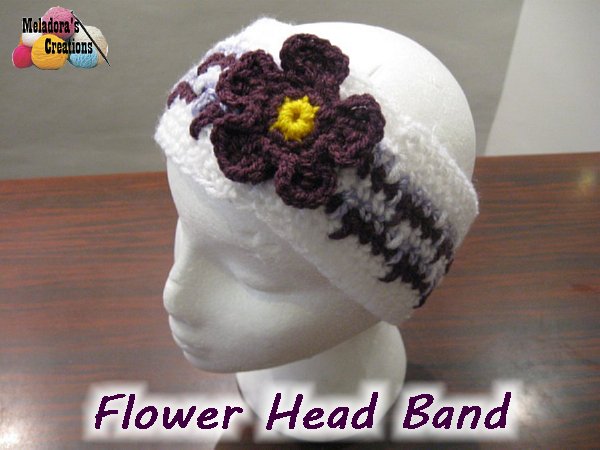
A Flower Crochet Ear warmer is a great way to spruce up your look. I made this one for my daughter and her favorite color is purple, but you can make it in several colors! So it would go with almost anything, the stitch itself is made to bleed into the other row to really make your colors pop.
Find more Motifs patterns here on the category Summer Crochet
Flower Ear warmer– Free Crochet Pattern and Video Tutorial
Please don’t forget to Pin this onto your favorite crochet boards!
This page contains affiliate links

For this project you will need:
- HOOK: 6 mm hook or size J hook for the US
- And a tapestry needle
- YARN: 3 different colors of worsted weight yarn, 4 ply US, 10 ply AU
Each Skein was – 100 grams / 3.5. oz or 240 meters / 262 yards
ABBREVIATIONS
(click on link to find tutorials)
ch = Chain
sl st = Slip Stitch
st = Stitch
sk = Skip
YO = Yarn Over
sp = Space
SC = Single Crochet
DC = Double Crochet
TRC = Triple Crochet
* = Repeat what’s in between * for rest of round
This video was filmed with a webcam way back in the beginning of YouTube and YouTube was trying out a stabilizing option which I tried on this video. YouTube quickly stopped using it for obvious reason as you can see in this video, but they didn’t remove it from the videos, we were stuck with it. So I wanna say sorry for the weird video, but I hope you can still get use from it.
THE VIDEO TUTORIALS:
All my Video Tutorials
If you haven’t yet, take a moment to subscribe to my videos on YouTube to have easy access to all my videos and playlist @meladora1 on YouTube
Making the Head Band
Rounds 1-3
Ch 55 and sl st to beginning ch to form a ring. Place your marker here. Sc all sts around. After third row, ch 1 cut yarn and change to dark purple.
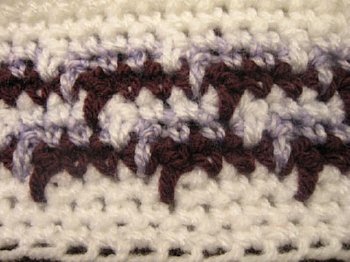
Round 4 (with Dark Purple)
Attach your yarn in the 2nd sc from where you double crocheted the previous round with a sc connection, when I say that I mean instead of sl stitching your color on, pull up the yarn instead of pulling it through the loop and then get more yarn and pull it through the two loops like a SC, like shown below

This will count as your first sc, sc in the next 2 stitches as well, then do a trc into the space below on the previous row, like shown below

after you TRC, make sure you do not work a sc in the space behind the TRC, continue to do 1 SC in the next 3 sts, then do another TRC, and repeat til end of round. Then ch 1 and cut your yarn, change to light purple.
Round 5 (with Light Purple)
Attach your yarn using the SC way again, but make sure you start somewhere else on the project, don’t attach your yarn all at the same place because it makes kind of a seam. So attach it to the left of any TRC and start your 3 sc’s, the third sc you end up on the top of a TRC from the previous round. So that your TRC of this round falls in line in a diagonal pattern going to the left
Continue doing the 1 sc, 3 times then 1 TRC until end of round. Ch 1 cut yarn and back to White.
Round 6
Repeat round 5
Rounds 7-9 (3 rounds)
Repeat rounds 4-6
If your headband is to loose then do a decrease every 8 stitches
Making the Flower
Change to your 3.5 MM hook
Round 1 (with yellow)
ch 4 and sl st to beginning ch to form a ring. Ch 1 and sc 8 into ring, sl st into beginning st to form a ring (8 sts) ch 1 cut yarn, switch to dark purple
Round 2 (with dark purple)
Sc 2 in all sts around, sl st into beginning st (16 sts)
Round 3
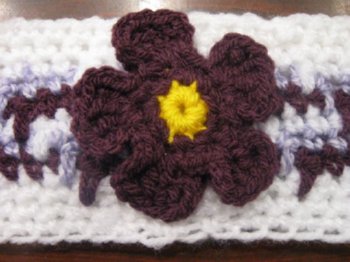
ch 3 and pull yarn up a bit, Trc 4 into same sp, ch 3 and pull up a bit sl st into same st. Sc into next 3 sts (watch out here because first stitch hides) ch 3 and repeat same as before to make next petal, sc 3 and ch 3, repeat til you have 5 petals, after 5th petal sc 1, then sl st in last st, ch 1 cut yarn
Now using your tapestry needle, get a bit of the dark purple and cut a decent size piece, tie a knot in one end and thread the other through the eye, work your way around the inside of the petals, keeping the outside of the petal to be free to come up, giving it a bent look. (as shown in picture below) (You don’t have to sew it this way, it’s up to you)
Makes the petals stand out a little more. Also in the center yellow part, if you have a gap showing uneven from when you added the dark purple, this is your chance to hide it, sew over the yellow with this dark purple and even it out.
That’s it, enjoy your new look and warm ears!
This pattern is brought to you by www.meladorascreations.com
You can sell any item made from this pattern and link back to my page or videos, but you do not have permission to copy and paste my pattern anywhere online. ©Copyright 2022, All Rights Reserved
PLEASE READ BELOW!
If you’d like to see my channel stay and grow, please consider becoming a patron.
Or you could make a one time donation through PayPal. Thank you so much for your support! God Bless!