The Invisible Seam for Crochet Hats is a technique can really be a life saver when it comes to creating a beautiful hat as a gift and not have to worry about that ugly seam that runs down the back of it. And you may be surprised how easy it is to make it almost invisible!
This Free Crochet pattern teaches how to work in the round without leaving that big hole at the end of a round. Please enjoy this Invisible Seam Crochet pattern and tutorial!
Find more crochet stitches here on the category Crochet Stitches
The Invisible Seam – Free Crochet Pattern
Please don’t forget to Pin this onto your favorite crochet boards!
This page contains affiliate links

For this project you will need:
- HOOK: Any size but I used 5 mm hook or size H hook for the US
- YARN: Any size but I used worsted weight yarn, 4 ply US, 10 ply AU
THE VIDEO TUTORIALS:
All my Video Tutorials
If you haven’t yet, take a moment to subscribe to my videos on YouTube to have easy access to all my videos and playlist @meladora1 on YouTube
It’s very easy to make an Invisible Seam. If you’ve ever made a hat before and know how to increase in the round, then you’ll know that every round you do increases as you make each round bigger. Most patterns start with 6 to 12 stitches worked in a ring and doubled to 12 to 24 the next round, and then continues as you increase, adding 6 to 12 stitches more per round which usually gives you a space between the first ch and the last stitch worked.
This is how you prevent this. All you need to do is instead of starting the round with on an increase, start with a single stitch first. That way you’ll be ending on an increase. Ending on an increase pushes your ending stitch closer to the beginning stitch, closing the gap and making it harder to see the space.

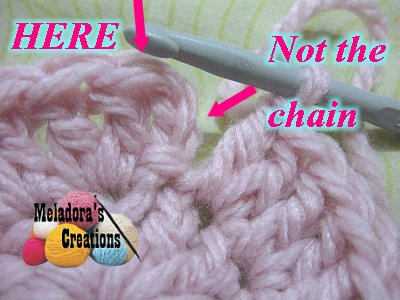
Then when you reach the end of the round. Slip stitch in the first Double crochet and NOT the chain.
From now on crochet 1 DC in the first stitch and never an increase. So for example the pattern tells you “DC 2 in beginning st, DC 1 in the next” repeat for round. What you would do instead would be to DC only 1 in the beginning stitch and then DC 2 in the second.
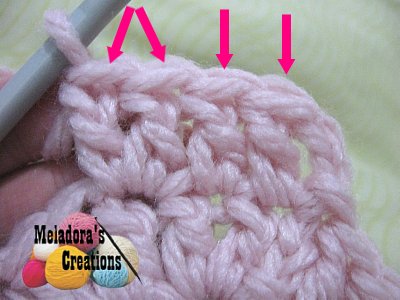
Doing this you will always end the round on an increase instead of a single stitch.

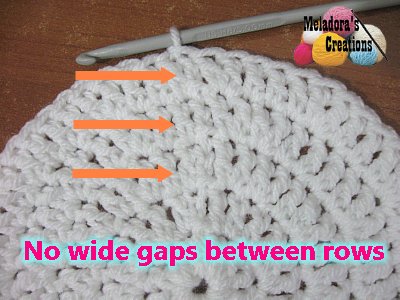
And then you will have no more spaces between the start and end of a row!
Be sure to visit my Crochet for Beginners section to see all my useful tips to make crocheting that much easier!
This pattern is brought to you by www.meladorascreations.com
You can sell any item made from this pattern and link back to my page or videos, but you do not have permission to copy and paste my pattern anywhere online. ©Copyright 2023, All Rights Reserved
PLEASE READ BELOW!
If you’d like to see my channel stay and grow, please consider becoming a patron.
Or you could make a one time donation through PayPal. Thank you so much for your support! God Bless!