
This Petite Flower Headband crochet pattern is super easy to make. I’ll show you how to make the Petite Little Flower With Leaves and how to attach your yarn to the headband. Learn to crochet over a plain plastic headband and make it beautiful with a small amount of scrap yarn.
You can find more flowers under the category Hair Accessories
Petite Crochet Flower Headband – Free Crochet Pattern and Video tutorial
Please don’t forget to Pin this onto your favorite crochet boards!
This page contains affiliate links

For this project you will need:
- HOOK: a 3.5 mm hook or size E hook
- YARN: worsted weight yarn. 4ply for the US or 10 ply for AU.
- Tapestry needle to sew on your flower.
- A plain head band: It is preferred that you get the kind with the spikes on it so that the yarn will not slide down the headband.
PDF Pattern with Pictures
You can find the PDF version of my pattern with pictures on Ravlery . Thank you very much for all you do to support my channel.
THE VIDEO TUTORIALS:
All my Video Tutorials
If you haven’t yet, take a moment to subscribe to my videos on YouTube to have easy access to all my videos and playlist @meladora1 on YouTube
This pattern and tutorial shows you how to crochet around the headband and attach the flower, if you wish to learn to make the flower, then see this link on how to make the petite flower.
To Start
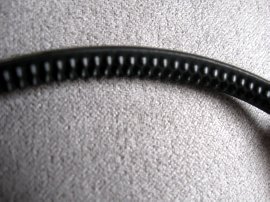
Get your hook and headband and start to single crochet about a half inch inside the spikes, to give you some slipping room for later encase the stitches loosen. Like shown below.
Single crochet around it by putting your hook below the headband and drawing up some yarn. Just like you do for the scrunchy like shown below.

Keep your stitches snug around the band, you don’t want them to be loose or to tight.
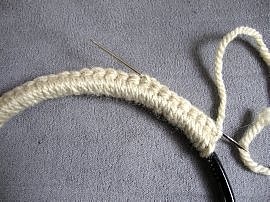
Make sure to take your time and single crochet close to one another to give you a solid crochet look, you won’t be able to move the stitches tighter together later because of the spikes on the headband. Stop about a half inch before the spikes stop.

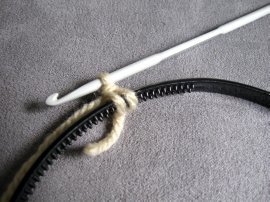
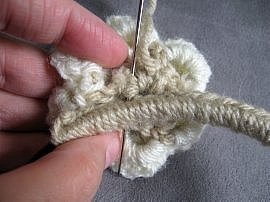
Then chain 1 and cut your yarn leaving a very long tail to sew your flower on with. Unlike the picture shows below, that tail was way to short!

Find where you want your flower to be and then work your tapestry needle up to that point. I wanted mine to be on the side. So I stopped just a little ways in.
Make sure to align the center of the bottom of the flower to the headband so you sew it on evenly.
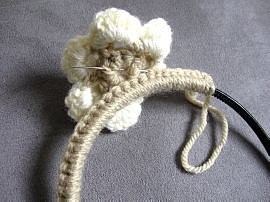
Going through some of the bottom stitches on one side, then through the single crochets on the headband, then into some of the bottom stitches on the other side. Work your way back and forth, down one side of the flower, then back up to where you started. Then create a loop and make a knot to tie your tail down. Then work in your tail through the single crochet stitches.
This pattern is brought to you by www.meladorascreations.com
You can sell any item made from this pattern and link back to my page or videos, but you do not have permission to copy and paste my pattern anywhere online. ©Copyright 2024, All Rights Reserved
PLEASE READ BELOW!
If you’d like to see my channel stay and grow, please consider becoming a patron.
Or you could make a one time donation through PayPal. Thank you so much for your support! God Bless!