
This Long Crochet Skirt Pattern and tutorial teaches you how to do the picot shell stitch in the round and shows you how to make a skirt for any size. All you need is a measuring tape and measurement of the person’s hips your making it for.
You can find more things like this under the category Dresses and Skirts
To view more crochet sets that use the same stitch, you can find a list here
Other patterns that use this stitch are:
Long Picot Shell Crochet Skirt – Free Crochet Pattern and Video tutorial
Please don’t forget to Pin this onto your favorite crochet boards!
This page contains affiliate links

For this project you’ll need:
- HOOK: 3.50 mm hook or size E hook for the US. Also you will need a 4.50 mm or 5 mm size H hook
- YARN: 6 skeins of 2 ply fine size US, 5 ply AU
NOTE: I used 3 different colors and changed colors every row, you don’t have to do this. If you do, be ready to hide a lot of tails when your done. I used 2 skeins of each color.
You’ll also need a measuring tape and a stitch marker
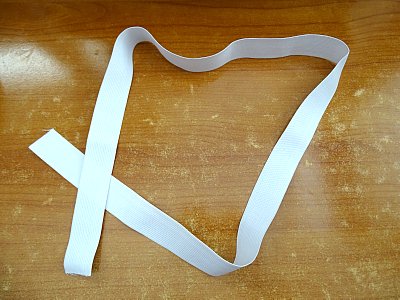
You will also need an elastic band to go around the waist of the skirt. Rolls of this stuff can be found at any craft store or material stores may sell you just a yard of it right off the roll. I used white, but I really should have gotten black, so I recommend trying to find a black one!
ABBREVIATIONS
(click on link to find tutorials)
ch = Chain
sl st = Slip Stitch
sk a st = Skip a stitch
beg st = beginning Stitch
SC = Single Crochet
BP TRC = Back Post Triple Crochet
Picot stitch
Sc dec = single crochet decrease
*( )* = Repeat what’s in between
THE VIDEO TUTORIALS:
All my Video Tutorials
If you haven’t yet, take a moment to subscribe to my videos on YouTube to have easy access to all my videos and playlist @meladora1 on YouTube
Multiples of the stitch
This stitch is done in multiples of 6
To start: WITH YOUR LARGER SIZE HOOK
- STEP 1: Have your measurements needed for the person your making the skirt for.
- STEP 2: Grab your larger hook, 4.50 or 5 mm \ H hook to make your beginning chain with.
- STEP 3: You will be working in sets of 6 stitches for the multiple, and you want to make your chain twice the size of the person your making it for. So if they were a size 23 inches around the waist, then crochet your chain until it reaches 46 inches. Same goes for centimeters.
Row 1 CHANGE TO SMALLER SIZE HOOK
Sl st into beg ch to form a ring. Make sure not to have a twist in the chain. Ch 3 and work a TRC in the next 5 sts. * ch 2 TRC in next 6 sts * repeat for round. To end: sl st in top of beg ch 3.

Row 2
(remember to change colors here if you want)
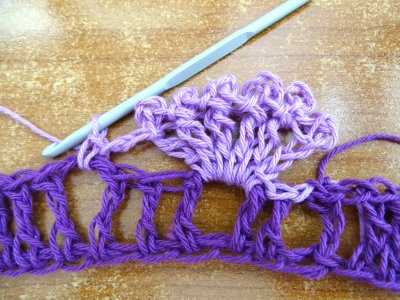
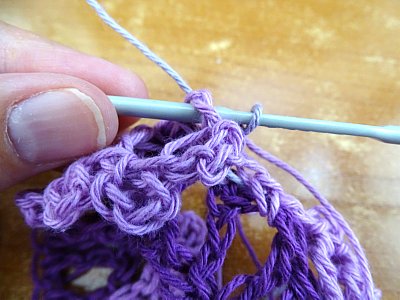
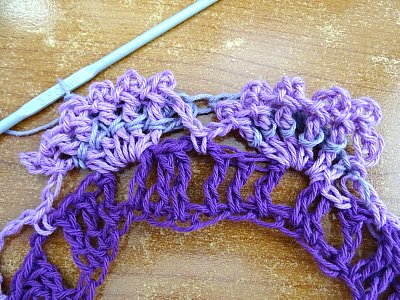
sl st in the next sts bringing you up to the ch 2 space. Ch 6 and sl st in the 3rd ch from the hook.
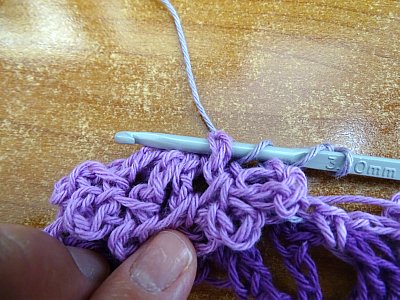
* TRC, ch 3 and sl st onto the post of the TRC *
Repeat this 4 more times giving you 6 TRC picot sts for your shell.
Ch 2 and sc in the ch 2 space.
*Ch 2 and TRC in the space between the 3rd and 4th TRC (TRC, ch 3, sl st onto post of TRC) repeat this 5 more times into the same space. Ch 2 and sc in the ch 2 space.* Repeat for round. To end the round ch 1 instead of the normal ch 2, and sl st in the top of the beg ch 3.
Round 3
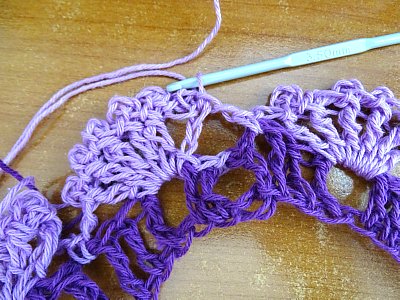
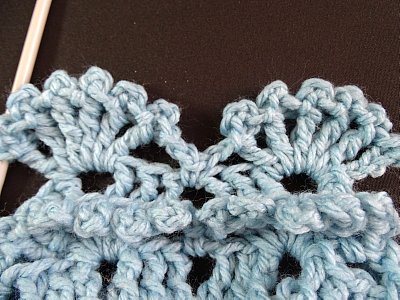
sl st onto the post of the first TRC. If you need to ch 1 1st to accomplish this then do so. Then ch 3

Work a BP TRC onto the post of the next 2 stitches.


Then ch 2 and work a BP TRC onto the post of the next 3 stitches.

This is how it looks once your finished
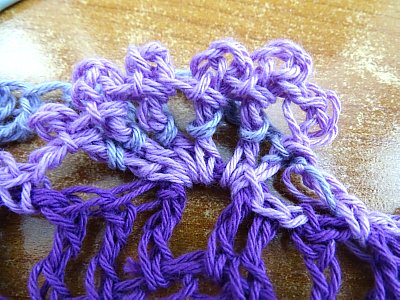
Then repeat the same for the rest of the round * BP TRC on next 3 sts, ch 2, BP TRC on next 3 sts * SL st in top of beg ch 3 to end the round.
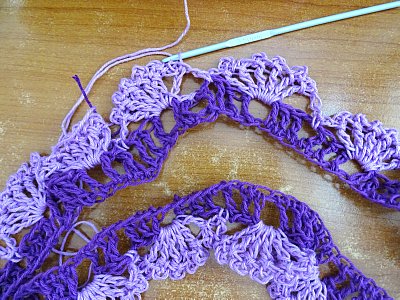
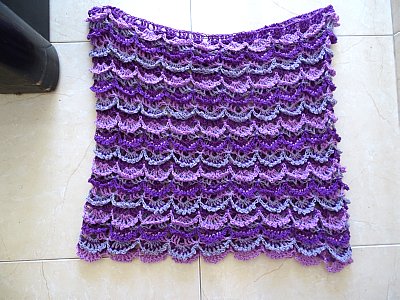
Repeat rounds 2 & 3 until your skirt reaches desired length. MAKE SURE you end on a Picot shell row to give it a nice border on the bottom of the skirt.
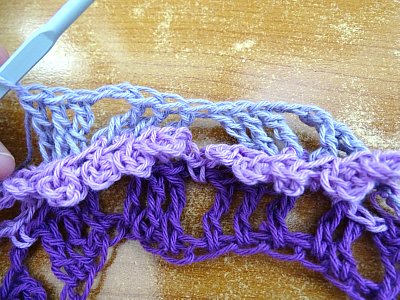
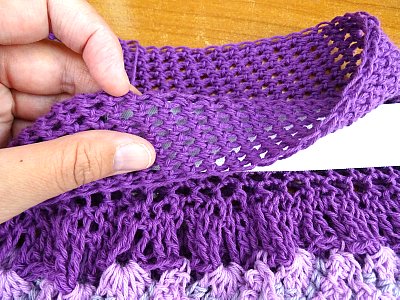
The only note worthy difference in round 4 is you will be working in the ch 2 spaces in between the TRC’s. Your Picot shells will be lining up and the space in between the picot shells is where you will be putting your ch 2, sc, ch 2 as show in the picture below.

MAKING THE TOP OF SKIRT
Row 1
Using your 3.50 \ E hook you want to work on the other side of the beginning row. Attach your yarn and you want to work a scdc in all sts around. We are reducing the skirts size by half at the top. Be sure to mark your beginning st with a STITCH MARKER.
Sl st in beg st to end the row

Rows 2 & 3
Still using your 3.50 \ E hook ch 1 and in the same st do a single crochet. Single crochet in all sts around for 2 rows.
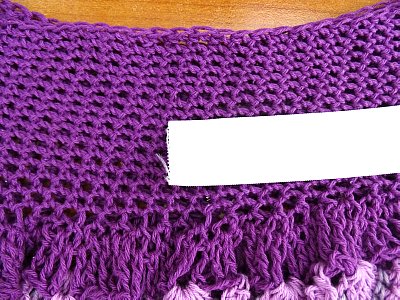
Rows 4 – ?
Switch back to your bigger size hook 4.50 mm or 5mm \ H hook Keep working your single crochets in all sts until you have enough to be able to fold it over the elastic band. Of course when sewing the elastic band will be on the inside of the skirt, but you can quickly check if you’ve done enough rows as shown below.
My finished skirt was 28 rounds total, from first round to last but this will be determined by who your making this for and how long they want the skirt.
Once you do then your ready to finish up!
Now you will need the person, or use your beginning measurements.
If you have the person you can wrap it around the waist and pull it tight a bit around them. The key it to have the elastic band stretched a bit so that when it relaxes it will tighten and hold the skirt up to the body. If you sew it without stretching it first then it won’t hold correctly.
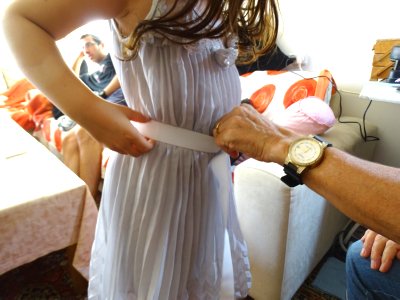
Once the person says it’s tight and not cutting off circulation (Just Kidding) then hold this place with your fingers and this is where you will cut.
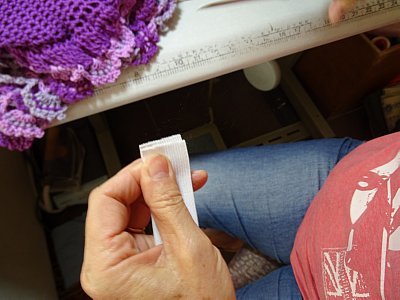
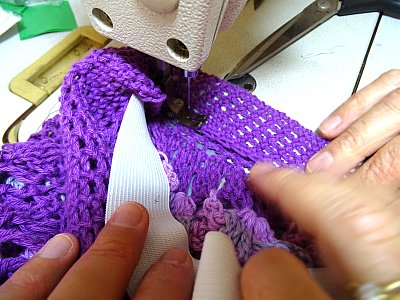
This next part you can sew by hand or quicker with a sewing machine. But sew this piece to form a ring.


Then you want to place this where you want it to go on the skirt and fold the flap over it and start to sew along the bottom. There is not need to sew on the elastic itself, just close it up. Super easy to do by hand so no need for a sewing machine if you don’t have one.
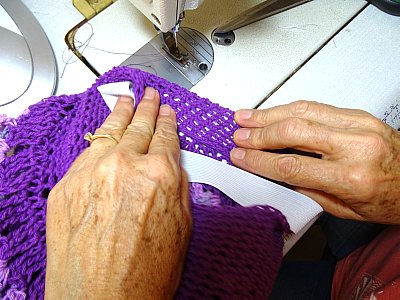
Once it’s sewn at the bottom the elastic band won’t move out of place and your skirt is ready for it’s owner!
This pattern is brought to you by www.meladorascreations.com
You can sell any item made from this pattern and link back to my page or videos, but you do not have permission to copy and paste my pattern anywhere online. ©Copyright 2024, All Rights Reserved
PLEASE READ BELOW!
If you’d like to see my channel stay and grow, please consider becoming a patron.
Or you could make a one time donation through PayPal. Thank you so much for your support! God Bless!