The Raspberry Angel Baby Afghan is a combination of stitches. The Angel stitch and the Raspberry Crochet Stitch. The multiples of this stitch is part of this pattern so mark a crochet Boho Throw or Full size Afghan.
This crochet stitch has lots of texture. This is also a yarn eater so if you plan on making a full size afghan using this stitch, then gets lots of yarn. This over sized baby afghan took a little over 6 skeins to make.
Find more patterns like this here on the category Afghans & Baby Blankets
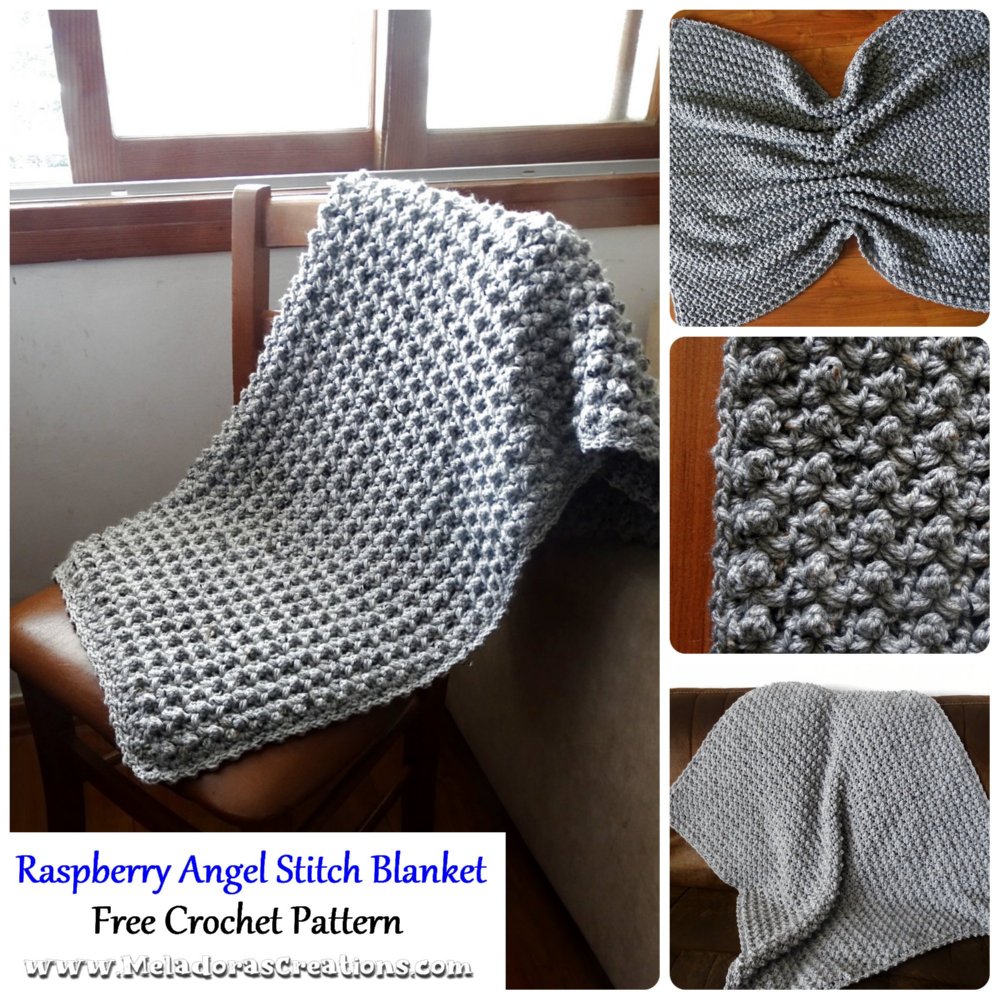
Raspberry Angel Baby Afghan – Free Crochet Pattern
Please don’t forget to Pin this onto your favorite crochet boards!
This page contains affiliate links

For this project you will need:
- HOOK: 5 mm hook or size H hook for the US
- YARN: 7 skeins of worsted weight yarn, 4 ply US, 10 ply AU
- I used 6 skeins and a little bit of the next, so get 7 skeins to be sure.
Each skein was:
100 grams / 3.5. oz
210 meters / 229 yards
- Marker
- Tapestry Needle – to hide tails
I always make my baby blankets big, I want the baby to be able to use it the whole time they are in the crib and even as a stroller or car blanket as they grow.
My Afghan measured:
- Length: 41 Inches or 104 Centimeters
- Width: 36 Inches or 91 Centimeters
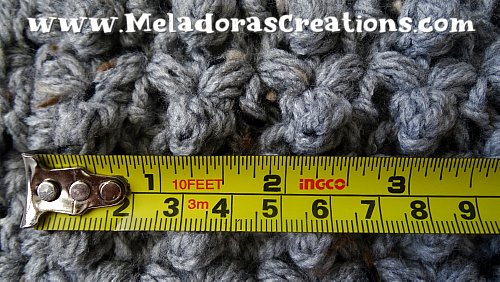
GAUGE of this stitch
One Raspberry Angel st is 1 inch or 2 ½ cm
ABBREVIATIONS
(click on link to find tutorials)
ch = Chain
sl st = Slip Stitch
st = Stitch
sk = Skip
beg = beginning
YO = Yarn Over
SC = Single Crochet
DC = Double Crochet
RS = Raspberry Stitch
Repeat what’s in between * for rest of round.
The Special Stitch you’ll be using is a combination of the Angel stitch and the Raspberry stitch that I am calling the Raspberry Angel stitch or RA for short.
RA = Raspberry Angel Stitch – This stitch has 2 parts to it.
This special stitch is written in the way you’ll be using it from row 2 and on, you may see a slight difference in Row 1 only.
The First part:
Insert your hook into stitch and pull up a loop (2 loops on the hook)
YO and insert your hook back into the same stitch (4 loops)
YO and insert your hook back into the same stitch (6 loops)
YO and pull through all 6 loops and ch 1
The Second Part:
Now using the ch 1 stitch you just created
SC, DC, SC into that ch 1 space.
THE VIDEO TUTORIALS:
All my Video Tutorials
If you haven’t yet, take a moment to subscribe to my videos on YouTube to have easy access to all my videos and playlist @meladora1 on YouTube
PDF Pattern with Step by Step Pictures
You can find the PDF version of my pattern with pictures on Ravlery Or my shop on Etsy. Thank you very much for all you do to support my channel.
Multiples of the stitch
The multiples of this stitch is 3
To start:
Ch 138 or in multiples of three.
IMPORTANT NOTE:
The way the stitch is done in row 1 is different than how you will be doing it for the rest of the afghan because for row 1 only you will be using chain sts and the rest of the time you will be using one single stitch to make your RA’s.
Row 1 – NOTE you are using 3 chs to create one RA st here.
– Insert your hook into the 3rd ch from the hook and pull up a loop (2 loops on the hook)
YO and insert your hook into the next ch space (4 loops)
YO and insert your hook into the next ch space (6 loops)
YO and pull through all 6 loops and ch 1
– Now using the ch 1 stitch you just created
SC, DC, SC into that ch 1 space.
No need to skip any stitches, just go into the very next st,
– *Insert your hook and pull up a loop (2 loops on the hook)
YO and insert your hook into the NEXT ch space (4 loops)
YO and insert your hook into the NEXT ch space (6 loops)
YO and pull through all 6 loops and ch 1
– Now using the ch 1 stitch you just created
SC, DC, SC into that ch 1 space* to complete your second RA st
Repeat this for the row.
To End Row: DC in last st. CH 2 and Turn.
IMPORTANT NOTE
From here on out we’ll be using the ch 1 spaces that’s in the center of the previous row’s stitches. Remember I told you this stitch has a first and second part to it? And the second part is made in the ch 1 space after you’ve completed the first part. We’ll be using the same ch 1 stitch to create our stitches on our next row.
Row 2
Skip over to the first Ch 1 space. In this space you will create your RA stitches.
– *Insert your hook into the ch 1 stitch and pull up a loop (2 loops on the hook)
YO and insert your hook back into the SAME ST ch 1 stitch (4 loops)
YO and insert your hook back into the SAME ST ch 1 stitch (6 loops)
YO and pull through all 6 loops and ch 1
– Now using the ch 1 stitch you just created
SC, DC, SC into that ch 1 space.
Then move over to the next ch 1 space*
Repeat this for the row.
To End Row: DC in last st. CH 2 and Turn.
Repeat row 2 until you have 67 rows total.You can count your rows by counting the first part of the stitch, we’ll call them the cluster part of the stitch. They stick out easier and will make counting your rows easier. Once you have 67 rows you’re ready to move on to the border section of the pattern.
The Border
Round 1
The border will consist of 2 rounds. You’ll start after the very last st of row 67. You’ll ch 2 like you usually would at the end of the row and turn. This will be the only time you turn for this border. From now on it will be in the round. Now DC again in the same beg st.
This will give us half of our corner for this row. We will compete the corner when we end our row.
TOP SIDE
So after you have your ch 2 and DC you’ll move over to the SAME ch 1 spaces we’ve been using this whole time to create our RA stitches, only this time we’ll be putting a SC, DC, SC in those spaces. This is how we do the Raspberry stitch (RS).
Continue to repeat this for the row, putting a SC, DC, SC into the next ch 1 spaces until you reach the end of the row where our ending DC is.
But instead of just Double crocheting once in this st to end the row, instead we’ll be making a full corner st. So DC 2, ch 1, DC 2 in this space. You should have 44 Raspberry stitches on the top.
FIRST SIDE
Pivot your work to the side stitches now.
The stitches we’ll use here are the hole spaces on top of our clusters.
SC, DC, SC in those spaces. This stitch is called the Raspberry stitch (RS) Repeat until you reach the corner ch 2.
DC 2, ch 1, DC 2 in this space to create the corner. You should have 33 Raspberry stitches on the side.
BOTTOM SIDE
Pivot your work to the Bottom side now. SC, DC, SC into the large spaces to the left of the Puff\Cluster sts here. Repeat until you reach ending st. DC 2, ch 1, DC 2 in this space. You should have 44 Raspberry stitches on the bottom just like you did at the top.
SECOND SIDE
Again use the holes on top of the clusters to make your Raspberry stitch (RS) . Once you reach the last corner, finish your corner space by finishing our corner that we starting at the beginning of the row.
DC twice and sl st in beg ch 2. By slip stitching you create the ch 1 space. This is the ch 1 space we’ll use to create our new corner.
You should have 33 Raspberry stitches on this side as well.
Round 2
ch 1 and WITHOUT turning, SC 3 into the ch 1 space of corner. This is the first part of our corner that we’ll complete later.
Last row we did a SC, DC, SC into our spaces. To create our stitches, this row you will skip over the SC, DC and in the next SC you will create the new stitches.
So do this now, in the last SC of the set you will put a SC, DC, SC. Repeat this for all your stitches for the row.
This is the second row of the Raspberry stitch (RS)
You’ll be repeating this for all sides.
Your corners for this round will be SC 3, ch 1, SC 3.
Skip the DC’s of the corners and only use the SC’s as indicated, unless you fell it’s tugging or pulling to much, then feel free to use them to even it out more.
This was put in place as a safe way to even out your sides if you needed them, if not and the regular way works for you then perfect! It worked out for me and I did not need to use them, but my pattern tester did, so do what is best for you. Just remember if you do use the space after the DC corner, that you’ll need to add one more to your stitch count for that side.
To end this round you will complete your beginning corner by doing SC 3 into the beginning ch 1 space.
This pattern is brought to you by www.meladorascreations.com
You can sell any item made from this pattern and link back to my page or videos, but you do not have permission to copy and paste my pattern anywhere online. ©Copyright 2023, All Rights Reserved
PLEASE READ BELOW!
If you’d like to see my channel stay and grow, please consider becoming a patron.
Or you could make a one time donation through PayPal. Thank you so much for your support! God Bless!