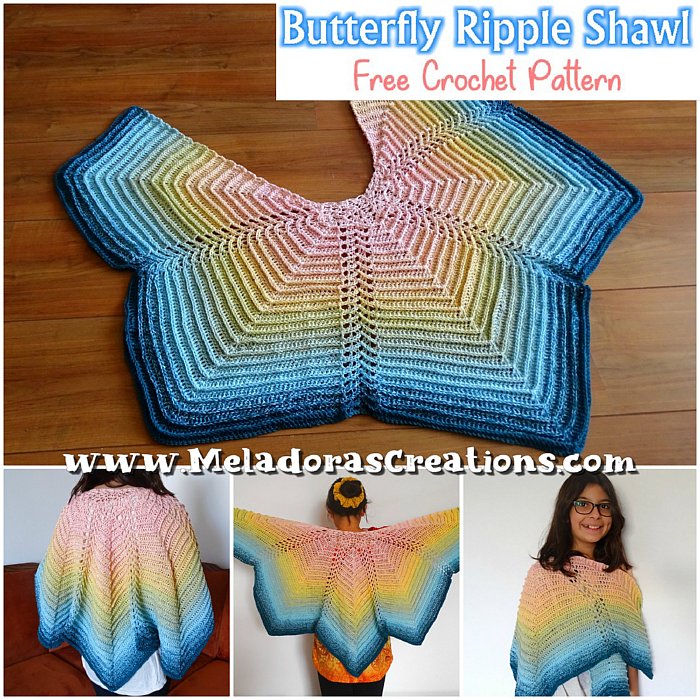
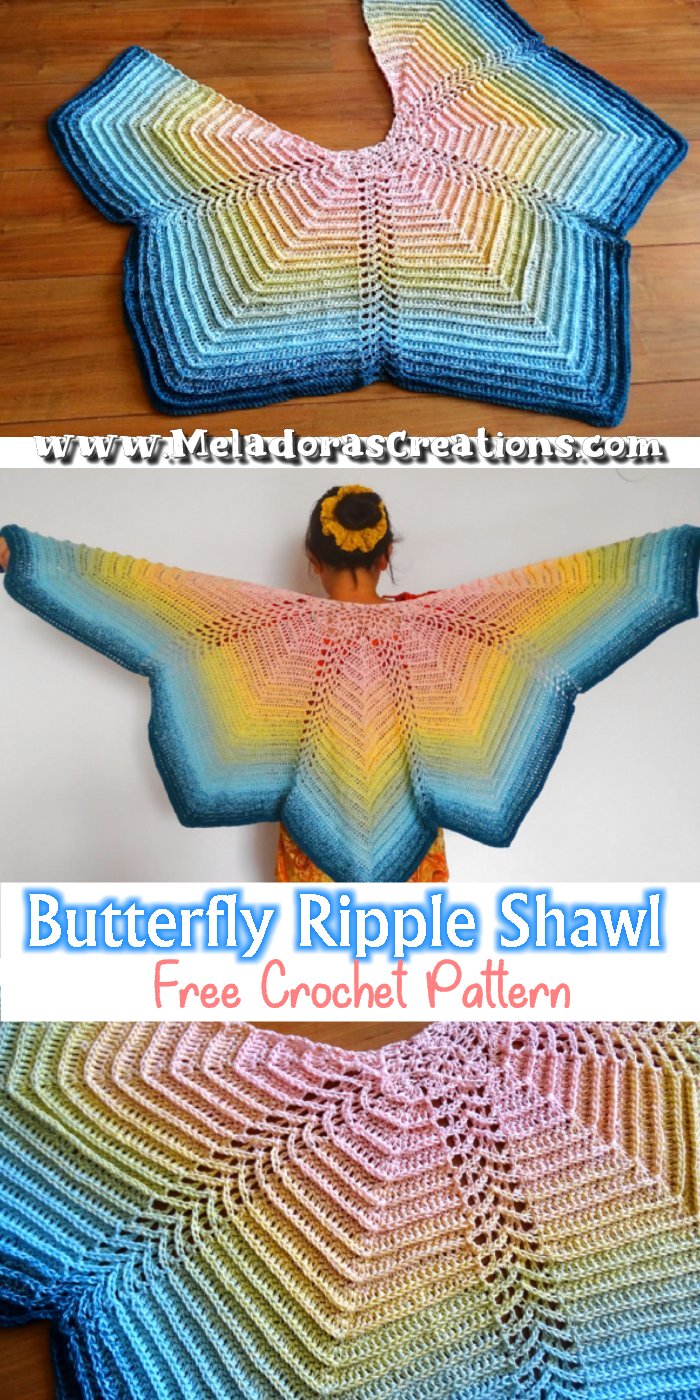
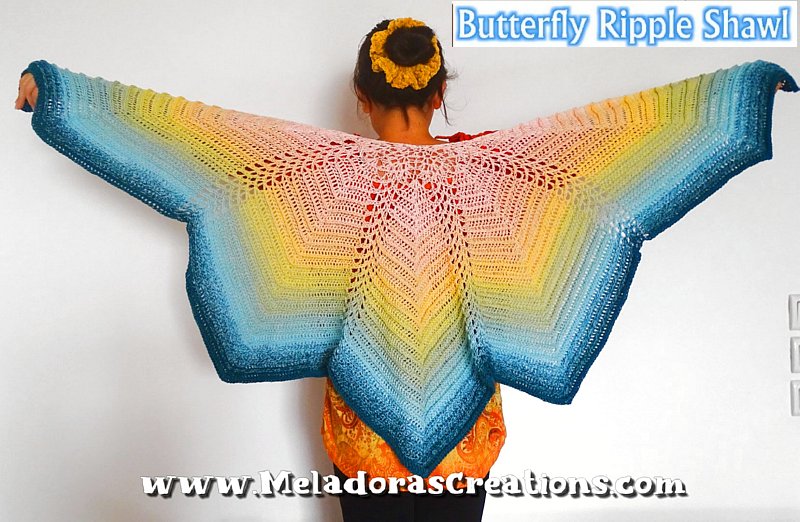
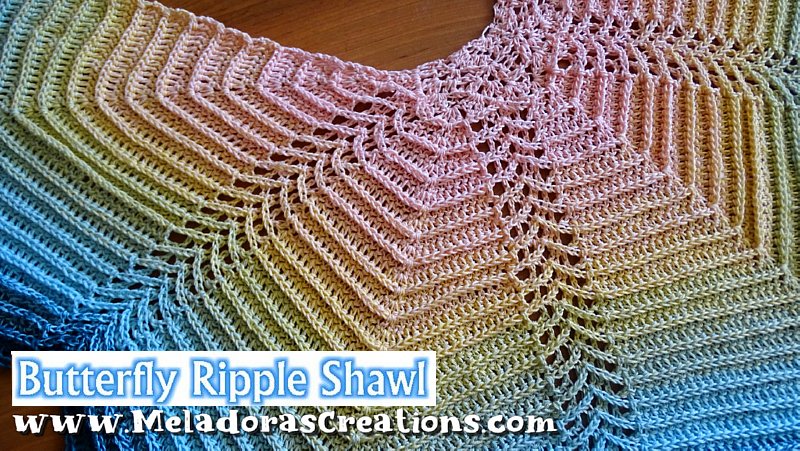
I wanted to crochet a Butterfly Shawl Crochet Pattern that has a ripple pattern in it without changing the butterfly shawl shape, so I used the stitches to get the effect done. I think this Butterfly Shawl Crochet Pattern really took the idea I was hoping for. I really like how this Butterfly Shawl turned out! How about you?
The idea behind this design was from the fact that I like ripple stitches and I thought it would be awesome to have a Butterfly Shawl using smaller more defined ripples, but it kept changing the shape of the shawl to much away from a Butterfly, so I scraped it. Then I thought maybe I could use the stitches themselves to make it look like a ripple without actually changing the shape and this is what I came up with.
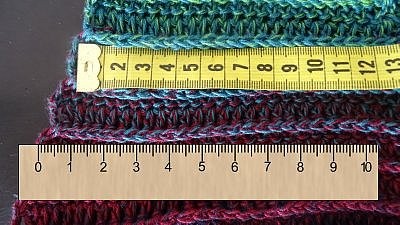
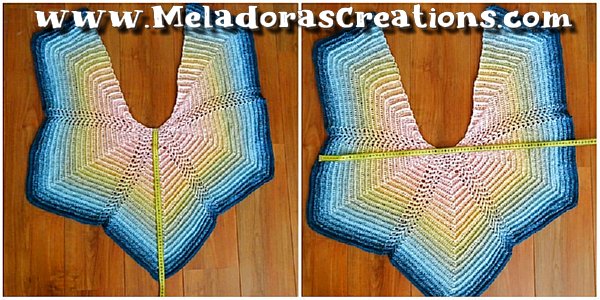
I was hoping since the stitches used in this design were slightly more lacier than the Butterfly Riptide Shawl that the shawl would be a bigger, but it it only added 6 cms \ 2 inches more to the total length. So again to make this ADULT size, you will have to use 2 Yarn Cake Skeins.
I also made a page just for the Butterfly Shawls so you can go see all of them encase you’ve missed any. ALL of the Butterfly Shawls
Find more crochet stitches here on my site on the category Crochet Shawls and Ponchos
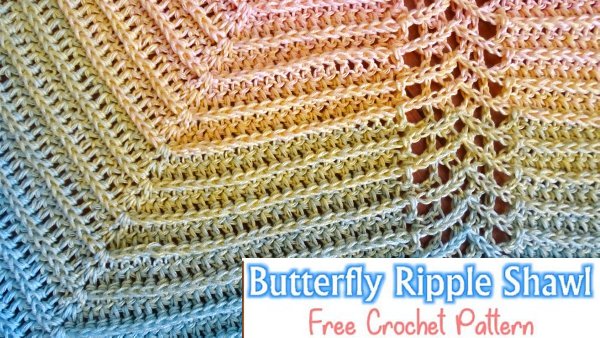
Butterfly Ripple Shawl – Free Crochet Pattern & Tutorial
Please don’t forget to Pin this onto your favorite crochet boards!
This page contains affiliate links
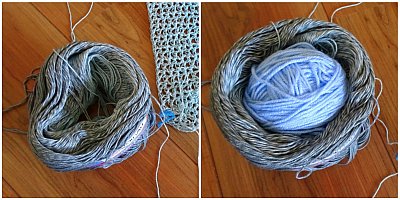
TIP when using Yarn Cakes: Add a ball of yarn in the middle before storing. It will prevent the cake from collapsing.
THE VIDEO TUTORIALS:
All my Video Tutorials
If you haven’t yet, take a moment to subscribe to my videos on YouTube to have easy access to all my videos and playlist @meladora1 on YouTube
PDF Pattern with Pictures
You can buy the ad free PDF version of my pattern with pictures on Ravelry or Etsy to support this channel. Either way thank you for being here and for all you do to support my channel. Or find the Ebook of all 10 Shawl patterns here
Row 1
ch 3 and DC 8 in 3rd ch from the hook. Ch 2 and turn – 9 sts
Row 2
Ch 2 counts as first DC. Dc in 1st st and DC 2 in all sts. Ch 1 and turn. – 18 sts
Row 3
FPDC on 1st DC of row * sk a st, DC 2, ch 1, DC 2 in next st. This is your first Cluster St. sk a st. FP on next DC * repeat for row. Skip the ch 2 on the end. CH 1 and turn.
Row 4
*BPDC on BPDC from last row. DC 2 in between the post’s of the next 2 sts, in the space and not in the stitch itself. Then do another cluster stitch (DC 2, ch 1, DC 2) in middle space. Then again put 2 DC’s in between the next DC’s * repeat for row. CH 1 and turn.
Row 5
*FPDC on FPDC | skip next 2 DC’s and cluster stitch in next space | repeat 2 more times * ch 2 and turn. We’re only crocheting in the clusters from last row.
Row 6
ch 2 counts as a stitch. DC 3 more into first stitch of row. Then *DC in the next ch 1 space. (This is our first Anchor st) Ch 5 and working one row down, we are using our previous row for our next connection, sl st onto the center ch 1 space of the next cluster stitch..
Ch 5 again then DC in the ch 1 space of the next cluster stitch. (This is our second Anchor st)
DC 4 into the st of the BPDC* Repeat for row.
To end row: DC 4 in last st of row. Ch 2 & turn.
Row 7
Ch 2 counts as a st. DC in second st of row. DC 2 in the space between the next 2 DC’s. This is your Peak Stitch. DC in the next (2 sts) This leaves you with 1 DC left.
The next DC we’ll be doing is called the Anchor st and it’s very important because it will help guide your row count and border of the next section of the pattern.
Anchor st – this is the DC that comes before and after a CH 5
So now that I’ve said all that. Let’s start creating the Anchor st now by DCing into the next st and Ch 1.
In this next section Be careful not to grab the ch 5, it needs to float.
So working on the “flap” section and not over the chain.
Sk a st *|DC & ch 1 in next st. Skip a st | repeat 3 more times. A indication of “if you’re in the right stitches” is you should end up with a DC on either side of your ch 1 from the previous row.
This brings you up to where you need to put your next Anchor st. You’ll skip the last DC on this “flap part”
You should have 4 dc’s and 4 ch 1 spaces on this “flap section.
The next DC you’ll do it the Anchor st then DC in next (2) sts as well. Peak Stitch (dc 2) in next stitch.
then DC in next (2) sts. The next DC you’ll do it the Anchor st. *
Repeat for row. To end row: DC in top of ch 2. Ch 1 and turn.
1st Row of Repeat
I am now going to put () around the number that will be changing every row
Row 8
Ch 2 counts as first DC, DC in the 2nd and 3rd DC of row. * DC 2 in the sp between the next 2 DC’s to create our first Peak Stitch, DC in the next (3) DC’s.
You’ve come up to the *Anchor st so DC in this DC and Ch 5. Working one row down, we are using our previous row for our next connection, sl st onto the ch 1 space. Then Ch 5 again and DC in the next Anchor st. DC in the next (3) DC’s * repeat for row
CH 1 and turn.
Row 9
FPDC onto the post’s of the first (4) sts. DC 2 in sp between DC’s to create your Peak Stitch then PLACE MARKER here in this new Peak Stitch to mark it.
FPDC in next (4) sts.
*DC in next DC to create your Anchor st
CH 1 and now we’ll be using our DC & CH 1’s from the previous row.
DC & ch 1 in all (4) of your DC’s here. This brings you up to where you create your second Anchor st. So DC in this DC to create it then,
FPDC in next (4) sts. DC 2 in sp between DC’s to create your Peak Stitch, FPDC in next (4) sts. DC in DC to create your Anchor st* repeat for row. CH 2 and turn.
Repeat rows 8 and 9
***Don’t forget to mark your Peak Stitches as your piece grows!***
This pattern is brought to you by www.meladorascreations.com
You can sell any item made from this pattern and link back to my page or videos, but you do not have permission to copy and paste my pattern anywhere online. ©Copyright 2024, All Rights Reserved
PLEASE READ BELOW!
If you’d like to see my channel stay and grow, please consider becoming a patron.
Or you could make a one time donation through PayPal. Thank you so much for your support! God Bless!