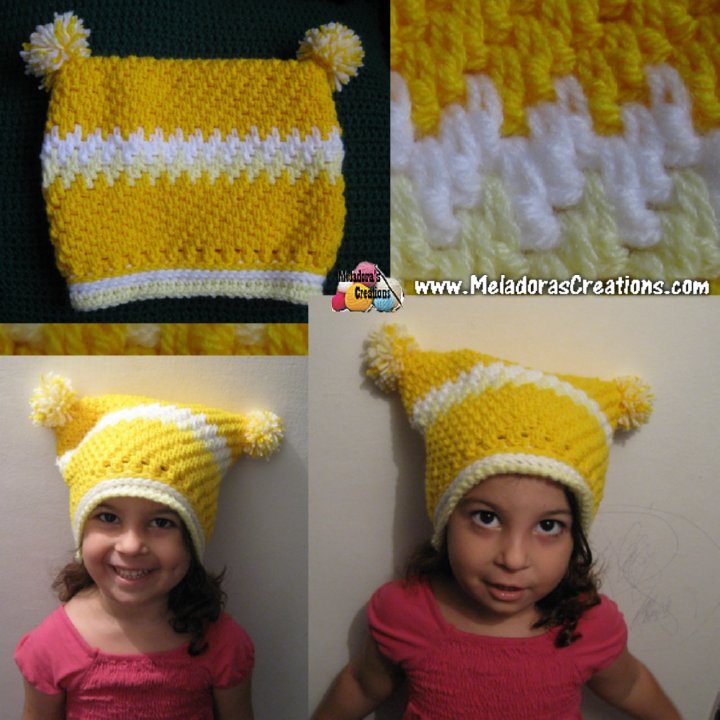
This Childs Square Crochet Beanie is easy to make. The size can be adjusted to fit any size you need! I love the square beanies because I love the two pompom look. Don’t you?
Oh and the stitch I used for this beanie is of my own design. It can be tricky at first to find the stitches, but this video tutorial will take you through it step by step.
You won’t regret learning this stitch. If you don’t believe me, go check out the Thick Mesh Beanie that I also made using this stitch.
For more Beanie patterns click here Crochet Beanies
For the Pom Pom tutorial
This stitch is also used in the Pattern & tutorials for:
- Chunky Slouch Beret
- Thick Mesh Pot Holder
- Mesh Stitch Scarf
- Brick Stitch Fingerless Gloves
- Thick Mesh Slouch Hat
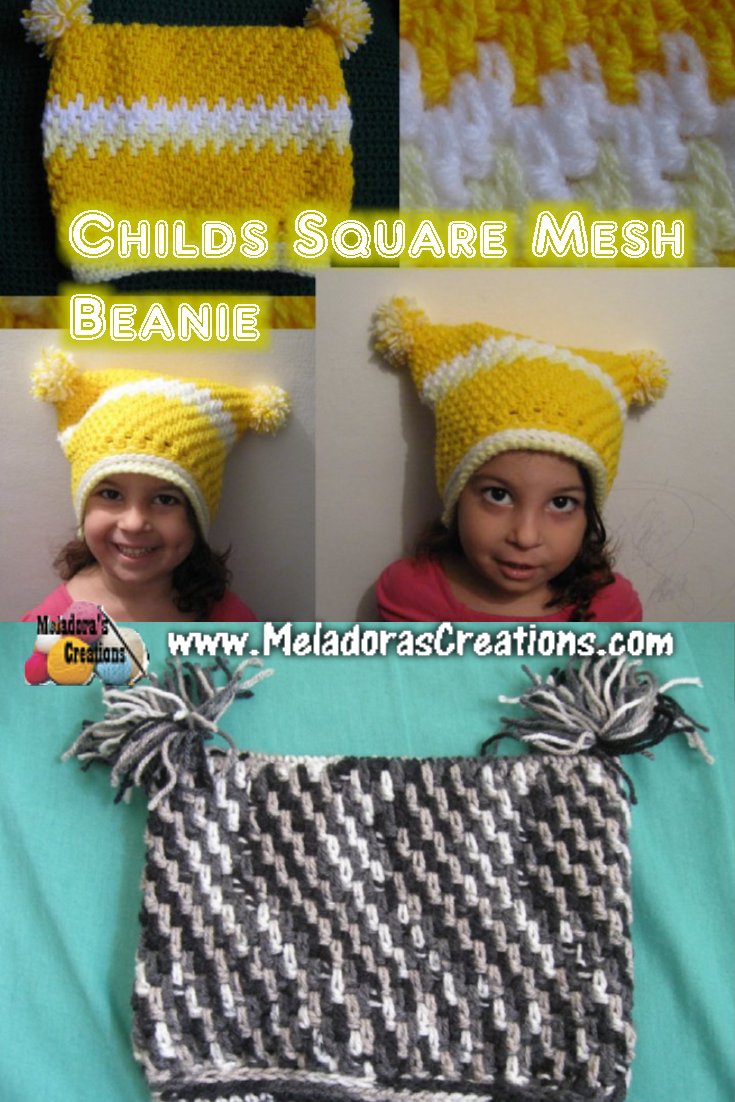
Childs Square Mesh Beanie – Free Crochet Pattern and Video tutorial
Please don’t forget to Pin this onto your favorite crochet boards!
This page contains affiliate links
For this project you will need:
HOOK: 5 mm hook or size H hook for the US
YARN: I used one skein of yellow and a bit of some scrap yarn in white and light yellow
It was all worsted weight yarn, 4 ply US, 10 ply AU
ABBREVIATIONS
(click on link to find tutorials)
ch = Chain
sl st = Slip Stitch
SC = Single Crochet
DC = Double Crochet
st = Stitch
To start
- For sizes 2 to 4 years old use 8 ply (3 ply) yarn or use 27 chains
- For sizes 5 to 8 years old use 10 ply (4ply) yarn and 31 chains
Multiples of stitch are 2 + 1
Round 1
SC In 2nd chain from hook and in all 30 stitches, put another sc into the last stitch and pivot your work and work a sc into the rest of the 29 sts on this side giving you a total of 60 sts.
Round 2
sl st and ch 1 into beginning st, DC into this beginning stitch as well. *Ch 1 and sk a st, dc into next stitch* sl stitch into beginning stitch and ch 1 (30 dc’s total)
Round 3
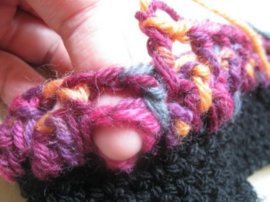
You will be working in the stitches that you skipped from last round.
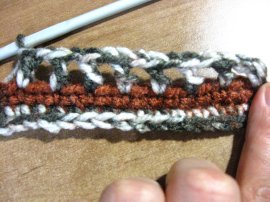
The beginning stitch you work one row down below, to the right, put a DC here. See picture below
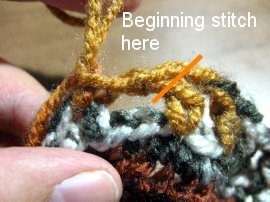
Ch 1 and DC into next skipped stitch to the left. * repeat sl st into beginning stitch. (30 dc’s total)
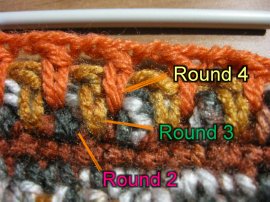
Round 4
For beginning stitch ch 1 and working two rows down just to the right of the beginning stitch, put a DC, * ch 1 and DC into next stitch two rows down beside the dc from two rows down * so for this row it will be the dc’s from round 2. The picture below where the tip of my finger is. Always to the left of the smaller stitch two rows down.
Round 5 – 28
Continue to repeat round 4. Remember to chain in between the dc’s . When counting the rows from here on out, count from your first set of dc’s, don’t count the sc rows. So starting from your first dc row, keep working until you have 28 rows of dc’s done.
Round 29
sc and ch 1 in the same spaces you were using before. sc in all sts around. (If your making this hat for a smaller child, you may wish to do a few decreases here.)
Round 30 & 31
Start your Front post Single crochets (FPSC) in all spaces around.
Rounds 32 & 33
Sc in all sts around.
Now add pompoms, tassels or flowers to the two top corners to add style!
I have a tutorial on how to make your own pompom maker below.
This pattern is brought to you by www.meladorascreations.com
You can sell any item made from this pattern and link back to my page or videos, but you do not have permission to copy and paste my pattern anywhere online. ©Copyright 2025, All Rights Reserved
PLEASE READ BELOW!
If you’d like to see my channel stay and grow, please consider becoming a patron.
Or you could make a one time donation through PayPal. Thank you so much for your support! God Bless!