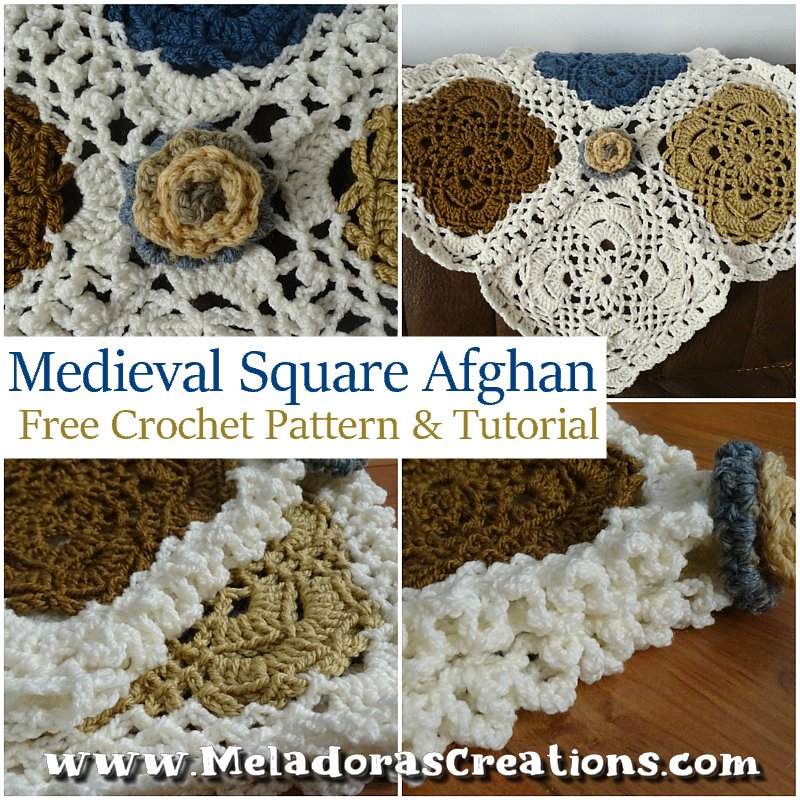
In this Granny Square Blanket Crochet tutorial will teach you how to make this beautiful lacy granny square that I have named the Medieval Lacy Granny Square thanks to my husband who told me it looked Medieval lol. I had to split this video tutorial into 2 parts because if I tried to make it all in one crochet granny tutorial, with the crochet border and sewing included, it would be a VERY long tutorial.
As I was making the Butterfly net shawl I had a thought that it would make a great lacy granny square, so I went to work and designed this granny using the same stitch pattern that I used in the shawl. So if you’ve tried out the shawl pattern and already got the basic pattern down, this one will be a easy on for ya.
I hope you enjoy this one! I wish I could make a big afghan for you to see, but I still need healing with my arm and so all I could create was the parts that you needed to be able to create an afghan of your own.
Find more crochet stitches here on the category Granny Squares
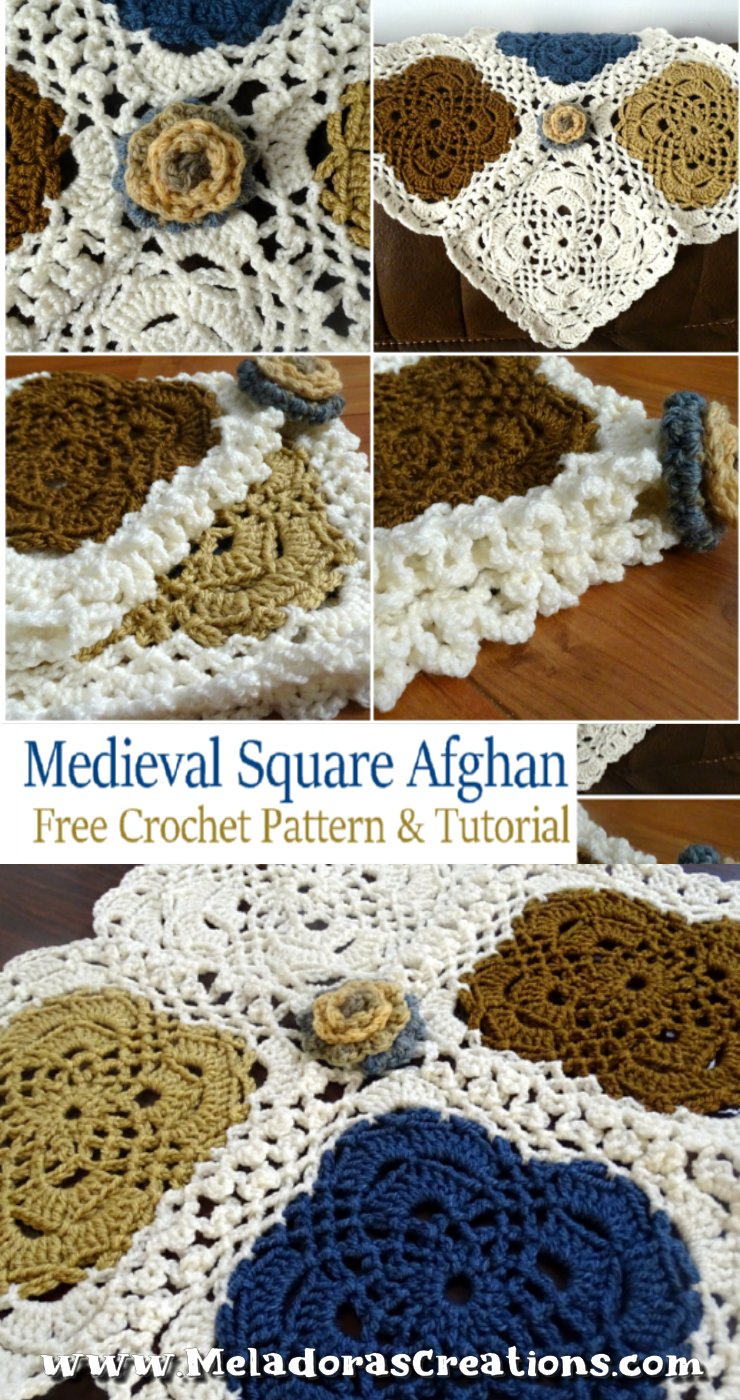
Granny Square Blanket Crochet – Medieval Lacy Granny Square Afghan – Free crochet pattern
Please don’t forget to Pin this onto your favorite crochet boards!
This page contains affiliate links
For this project you will need:
- HOOK: 5 mm hook or size H hook for the US
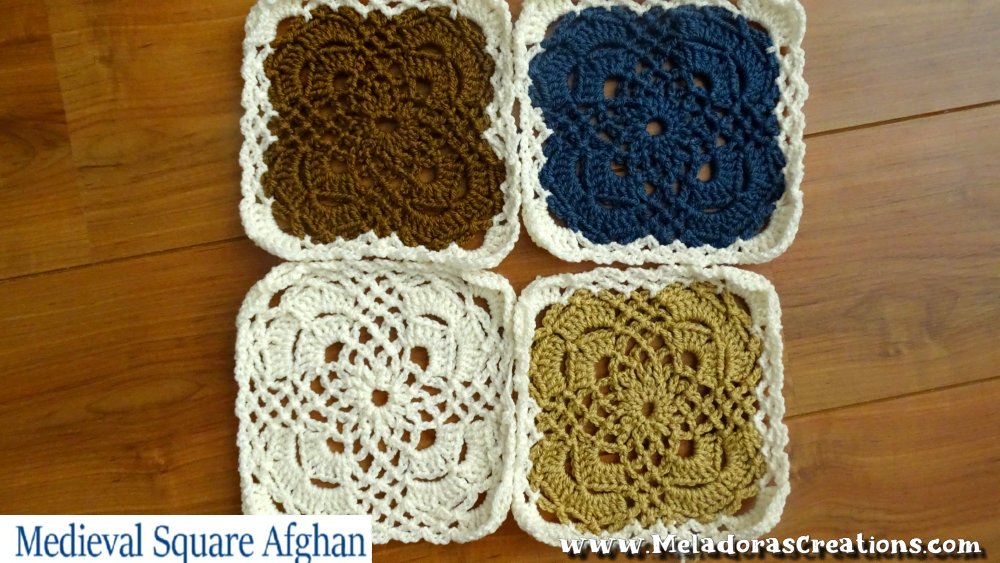
- YARN: |Four colors & a Variegated color | I used medium blue, cream white, golden brown, coffee brown for my squares and a variegated color that matched the colors I used for my flowers.
Worsted Weight Yarn, 4 ply US, 10 ply AU
100 grams / 3.5. oz per skein
240 meters / 262 yards per skein
- Tapestry Needle to hide ends
- A marker! It’s very important in this project to have a marker.
Blanket Sizes and yarn amount
Each square measures 20 cms \ 8 inches in width and length. The border around the whole blanket will add another 2.5 cms or 1 inch to the outside. So the measurements will reflect that.
Keep in mind that these are just guesses made by measurements of the granny squares and use of a chart that has measurements of bed sizes. I hope they will help you get a idea of how many squares you’ll need to make, but I have not made these sizes myself so I don’t know how much yarn you will need for each afghan size. I estimate that you can make about 5 squares per skein.
- Baby size – 4 sq’s width by 5 sq’s in length – 12 flowers
- Throw – 5 sq’s width by 6 sq’s in length – 19 flowers
- Twin – 6 sq’s width by 8 sq’s in length – 34 flowers
- Queen – 8 sq’s width by 10 sq’s in length – 62 flowers
- King – 11 sq’s width by 11 sq’s in length – 109 flowers
I made the baby blanket, but I used puff flowers instead of roses. I have also updated the flowers you’ll need for the blanket sizes.
ABBREVIATIONS
(click on link to find tutorials)
ch = Chain
sl st = Slip Stitch
st = Stitch
sk = Skip
beg = beginning
YO = Yarn Over
DC = Double Crochet
SC = Single Crochet
sp = space
Repeat what’s in between * for rest of round.
Repeat what’s in between | for # indicated.
THE VIDEO TUTORIALS:
RIGHT HANDED VERSION
LEFT HANDED VERSION
All my Video Tutorials
If you haven’t yet, take a moment to subscribe to my videos on YouTube to have easy access to all my videos and playlist @meladora1 on YouTube
PDF Pattern with Pictures
You can find the PDF version of my pattern with pictures on Ravlery Or my shop on Etsy. Thank you very much for all you do to support my channel.
To start:
ch 5 and sl st in beg ch to form a ring.
Round 1
| ch 4 and sl st into ring | repeat 10 more times. You should have 11 ch 4 loops total.
Rounds 2 & 3
Ch 4 and sl st in ch 4. PLACE MARKER on this 1st ch 4.
|Ch 4 and sl st in ch 4 | repeat until you reach your marker.
ONLY CHANGE – To end Round 3 – ch 5 instead of 4 and sl st in marked beg st. Move your marker up to the ch 5.
Round 4
| ch 5 and sl st in next ch 4 | repeat for round. Ch 3 in marked st to end round. Move marker to ch 3.
Round 5
* ch 2 and DC 4, ch 1, DC 4 in next ch 5 sp. Ch 2 and sl st in next ch 5 sp. Ch 3 and sl st in next ch 5 sp. * repeat for row.
To end round – after last shell cluster – ch 2 and sl st in ch 3. Move marker to this ch 2 sp.
Round 6
ch 3 and sl st in ch 2. * ch 5 and sl st in ch 1, ch 5 and sl st in ch 2, ch 3 and sl st in ch 3, ch 3 and sl st in ch 2. * repeat for row. To end round – after last ch 5 and sl st in the ch 2, you want to ch 3 and sl st in the ch 3. Move your marker to the ch 3.
Round 7
*ch 2 and DC 4 ch 1 DC 4 in next ch 5 space. CH 1 and DC 4, ch 1, DC 4 in next ch 5 space. Ch 2 and sl st in next ch 3. ch 3 and sl st in ch 3 * repeat for row. To end row, ch 2 and sl st in marked ch 3. Move marker to ch 2.
Round 8
* ch 3 and sl st in ch 2 | ch 5 & sl in ch 1 repeat 2 more times. Ch 5 and sl st in ch 2, ch 3 and sl st in ch 3 * MOVE MARKER up to this new ch 3. This will be your new starting point from now on. *repeat for row.
Now it’s time to change color to your border color. Sl st your new color in your current loop and continue.
Border Around Squares
Round 9
* | Ch 5 and sl st in ch 5 until you reach a ch 3 | Ch 5 and sl st in ch 3 | ch 3 and sl st in ch 3 * repeat for row
To end row ch 3 and sl st in ch 5. Move marker to this new ch 3
Round 10
* ch 5 and sl st in next ch 5. ch 2 and DC 4 ch 1 DC 4 in next ch 5 sp. Ch 2 and sl st in ch 5. CH 5 and sl st in ch 5. ch 3 and sl st in ch 3. CH 3 and sl st in ch 5. * repeat for row until you reach your marker. Move marker to new ch 5
Round 11
* ch 3 & sl st in ch 5. CH 5 & sl st in ch 2. Ch 5 & sl st in ch 1. Ch 5 & sl st in ch 2. ch 5 and sl st in ch 5 | ch 3 and sl st in ch 3 | repeat until you reach ch 3. * repeat for row until you reach marker. Move marker to new ch 3
Sewing your Squares together
Attach your border color by sl stitching into the ch 5 on the side you want to crochet on. Leaving the other ch 5 for the other side.
Ch 3 and sl st into same sp creating your first picot on your 1st sq.
Then grab your 2nd square and using the same ch 5, ch 3 and sl st in this ch 5 to create a picot on 2nd sq.

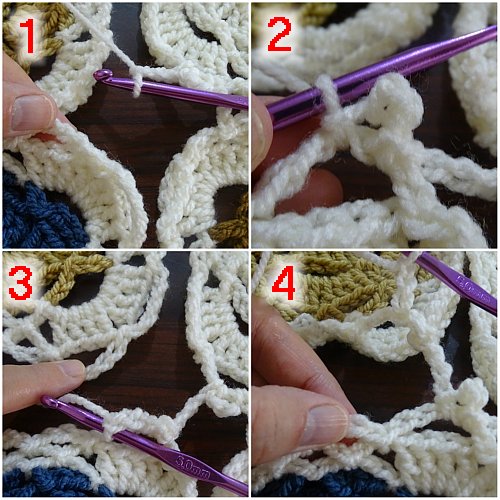
* Then ch 3 and sl st into the 1stgranny’s ch 3 sp. Then ch 3 and sl st in same ch 3 sp to create a picot. Then ch 3 and sl st in the ch 3 on the 2ndsquare. Ch 3 and sl st in same ch 3 to create picot. * repeat this without skipping any of the ch 3 sp’s until you reach your next ch 5 sp. Then ch 3 and sl st in ch 5 that’s in the opposite corner. (pic 1) ch 3 and sl st in same ch 5 to create picot (pic 2) ch 3 and sl st in ch 5 up from where you are (pic 3) ch 3 and sl st in same ch 5 to create a picot. Then ch 3 and sl st in the previous square’s ch 3 (pic 4)
Continue going between both granny squares ch 3 spaces by repeating * ch 3, sl st in next ch 3 on other square, ch 3 and sl st in same sq to create picot * continue for row until you reach the very last ch 5 of this sewing row.
On the ch 5’s on end you want to continue as before and ch 3, sl st in next ch 5 on other square, ch 3 and sl st in same sq to create picot. Repeat for other ch 5 and ch 1 and cut yarn. Repeat all side rows the same way.
Now I’ll show you how to sew your squares going the other direction.
It’s the same, only the middle of squares after you’ve done your picot in ch 5 you’ll ch 3 as usual only this time you will sl st in the middle ch of the ch 3 (pic 2), then ch 3 and sl st in the ch 5 in the opposite corner again. (pics 3 & 4)

Then ch 3 and create your picot for this corner and continue sewing and creating our picot’s and ch 3’s as before.
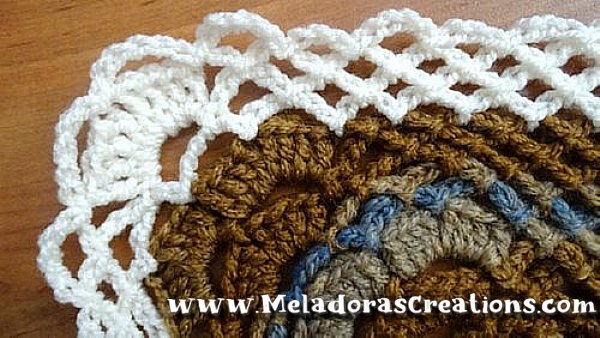
Creating the Border
First Row of Border
Starting in the very corner ch 5 space. DC 4, ch 1, DC 4. Continue and put 3 DC’s in all ch 3 spaces.
When you reach your ch 5 on the end, DC 4 into it. Then ch 3 and sl st in the next ch 5.
Then repeat what you did but in reverse for the other side. Ch 3 and sl st in next ch 5, then DC 4 in next ch 5. DC 3 in all ch 3 spaces. When you get to the very corner ch 5 spaces you will crochet them as follows:
DC 4, ch 1, DC 4, ch 1 in the first ch 5 space. Then DC 4, ch 1, DC 4 in the next ch 5 space. Then continue to DC 3 in all your Ch 3 spaces and complete the sides as you did before.
When you come to the end of your last ch 5 of your row, complete the corner as you’ve done so far. DC 4, ch 1, DC 4 in the ch 5 and sl st to the beginning DC to end your row.
Second Row of Border
CH 5 and sl st in the space between your DC 4 and DC 3. You will always ch 5 over your DC 4’s and you’ll always ch 4 over your DC 3’s. So let’s continue.
Ch 4 and sl st into the space between next DC 3. Continue until you reach your DC 4 at the end of the square. Ch 5 and sl st in the ch 3 (pic 1) then ch 3 and sl st on the ch 3 between squares (pic 2) then ch 3 and sl st into the ch 3 before your next DC 4 (pic 3 & 4)
Then ch 5 and sl st in the next space between your DC 4 and DC 3. CH 4 and continue as before. Repeat until you reach the very corner. You’ll ch 5 over your DC 4’s in the corner. Sl st in your last ch 5 to end your border.
To create the Roses I used my Crochet Rose Pattern. You can find the pattern and tutorial for free on my site here.
Sewing on the Flowers
Thread your long tail into your needle and insert it in the center of the X from the back of the afghan (pic 1) then insert your hook into the ch 3 and in the flower underneath to sew them together as (pics 2 & 3 show) Once you have it secured all the way around, make a knot and hide your tail using the tapestry needle.
This pattern is brought to you by www.meladorascreations.com
You can sell any item made from this pattern and link back to my page or videos, but you do not have permission to copy and paste my pattern anywhere online. ©Copyright 2023, All Rights Reserved
PLEASE READ BELOW!
If you’d like to see my channel stay and grow, please consider becoming a patron.
Or you could make a one time donation through PayPal. Thank you so much for your support! God Bless!