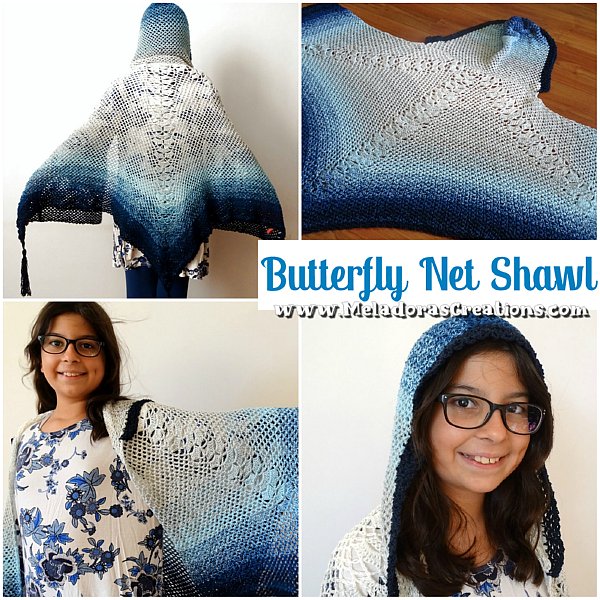
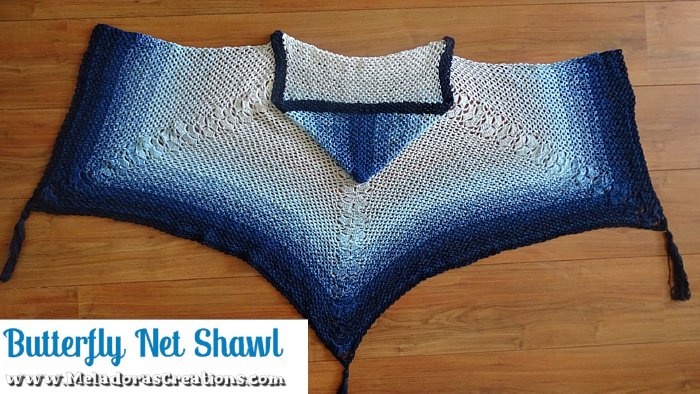
Crochet Shawl with a hood – For this Butterfly Shawl my daughter insisted I make it a shawl with a hood instead of just a flap like I did the The Bat-terfly shawl so I got to work.
This shawl reminds me of a net so staying with the theme of the name Butterfly Shawl, I went with Butterfly Net Shawl.
This shawl is Child Size with 1000 meter skein, but the pattern can be repeated as long as you have yarn, so feel free to make it any size you need by just continuing the repeat.
I also made a page just for the Butterfly Shawls so you can go see all of them encase you’ve missed any. ALL of the Butterfly Shawls
Find more crochet shawls here on the category on my site Crochet Shawls and Ponchos
Butterfly Net Shawl – Free Crochet Pattern
Please don’t forget to Pin this onto your favorite crochet boards!
This page contains affiliate links
For this project you will need:
- HOOK: 4 mm hook or size G hook for the US
- YARN: I used a Yarn cake from YarnArt “Flowers” yarn, color 261
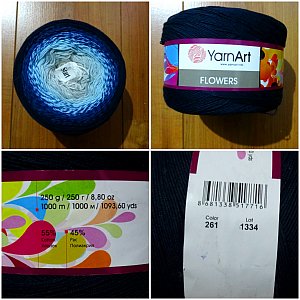
Content: 55% Organic Cotton 45% Anti Pilling Acrylic
- Ball Weight: 250 g (8.8 oz)
- Yarn Weight: 1 : Fingering
- Yarn Length: 1000 m (1093 yd)
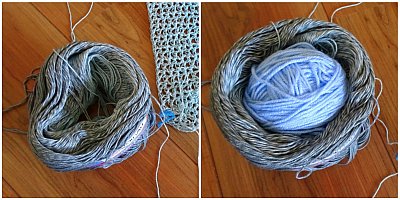
TIP when using Yarn Cakes: Add a ball of yarn in the middle before storing. It will prevent the cake from collapsing.
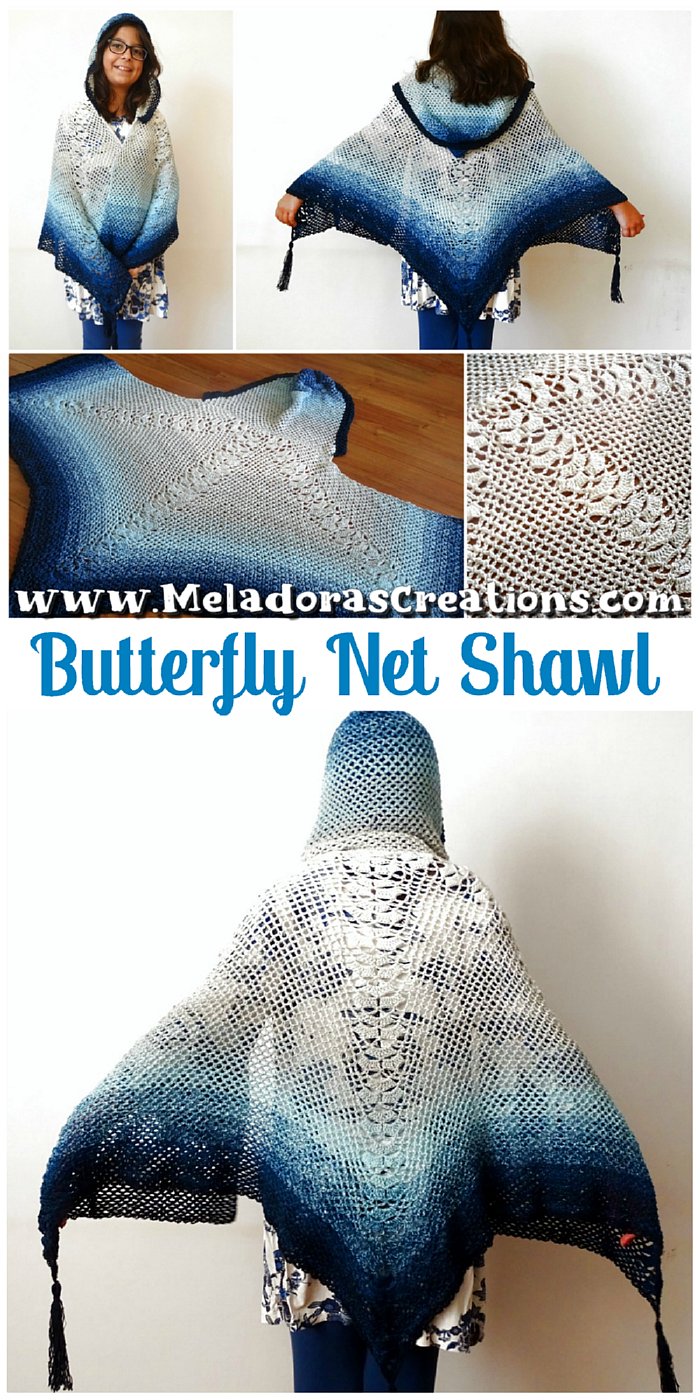
My Shawl Measured
My finished shawl measured 49 inches or 125 cms wide (but you can keep going and make it as big as you like) and 32 inches or 80 cms tall (not including hood)

ABBREVIATIONS
(click on link to find tutorials)
ch = Chain
sl st = Slip Stitch
st = Stitch
sk = Skip
beg = beginning
YO = Yarn Over
DC = Double Crochet
Repeat what’s in between | for amount of time stated in pattern.
Repeat what’s in between * for rest of round.
To make this pattern easier to read. I am calling the DC 4, ch 1, DC 4 a “shell cluster” and will be referred to as such for this pattern.
PDF Pattern with Pictures
You can find a PDF version of my pattern with pictures on Ravlery Or my shop on Etsy. Thank you very much!
Or find the Ebook of all 10 Shawl patterns here

THE VIDEO TUTORIALS:
RIGHT HANDED VERSION
LEFT HANDED VERSION
All my Video Tutorials
If you haven’t yet, take a moment to subscribe to my videos on YouTube to have easy access to all my videos and playlist @meladora1 on YouTube
To start:
ch 4 and sl st into beg ch to form a ring.
Row 1
| ch 4 and sl st into ring | repeat 4 more times. You should have 5 little ch 4 spaces. Ch 4 and turn
Row 2
sl st in 1st ch 4 sp. |Ch 4 and sl st in next ch 4 sp| repeat 3 more times.
You should have 5 bigger ch 4 spaces with 2 little ch spaces on beg and end of row. Ch 4 and turn
Row 3
sl st in 1st ch 4 sp. |Ch 4 and sl st in next ch 4 sp| repeat 3 more times. Ch 5 and turn
Row 4
sl st in 1st ch 4 sp. |Ch 5 and sl st in next ch 4 sp| repeat 3 more times. Ch 3 and turn
Row 5
DC 3, ch 1, DC 4 in first ch 5 space. Ch 2 and sl st in next ch 5, *Ch 2 and DC 4, ch 1, DC 4 and sl st in next ch 5 sp. You have made your first Shell Cluster of the shawl. Ch 2 and sl st in next ch 5. * repeat for row. CH 5 and Turn
Row 6
sl st into 1st ch 1 between your first shell cluster, ch 5 and sl st in ch 2 sp. Ch 3 and sl st in next ch 2 sp. CH 5 and sl st in the ch 1 between your next shell cluster. Ch 5 and sl st in top of ending ch 3. ch 3 and turn
Row 7
DC 3, ch 1, DC 4 in 1st ch 5 sp. * CH 1 and DC 4, ch 1, DC 4 in next ch 5 space. Ch 2 and sl st in next ch 5 sp. Ch 2 and DC 4, ch 1, DC 4 in next ch 5 sp. * repeat for row. CH 5 and turn
Row 8
sl st in 1st ch 1 sp * |ch 5 and sl st in next ch 1 sp| repeat 1 more time. Then ch 5 and sl st in ch 2. CH 3 and sl st in ch 2, ch 5 and sl st in next ch 1 * repeat for row. Ch 5 and sl st in the top of the ending ch 3. Ch 3 and turn
Row 9
sl st in 1st ch 5. |Ch 5 and sl st in ch 5| repeat 2 more times. * ch 3 and sl st into next ch 3 sp. CH 3 and sl st into next ch 5 sp |Ch 5 and sl st in ch 5| repeat 2 more times * Repeat for row.
To end row: ch 3 and sl st in bottom of first ch 5. CH 3 and turn.
Row 10
sl st in ch 3. ch 3 and sl st in ch 5 * ch 2 & DC 4, ch 1, DC 4 in next ch 5 sp. ch 2 and sl st in next ch 5. | ch 3 and sl st in ch 3 | repeat 1 more time. Ch 3 and sl st in ch 5 sp * repeat for row.
To end row: ch 3 and sl st in bottom of first ch 3. CH 3 and turn.
Row 11
sl st in ch 3, | ch 3 and sl st in ch 3| 1 more time. ch 3 and sl st in ch 2, * ch 5 and sl st in ch 1, ch 5 and sl st in ch 2. | ch 3 and sl st in ch 3 | repeat 2 more times. Ch 3 and sl st in ch 2 * repeat for row.
To end row: after you last ch 3 and sl st in ch 3, ch 3 1 more time and sl st it to the bottom ch of ending ch 3. Ch 3 and turn
Row 12
sl st in ch 3 | ch 3 and sl st in ch 3 | repeat 1 more time. * ch 2 and DC 4, ch 1, DC 4 in next ch 5 sp. Ch 1 and DC 4, ch 1, dc 4 in next ch 5 sp. Ch 2 and sl st in next ch 3 sp. | Ch 3 and sl st in ch 3 sp | repeat 2 more times. * repeat for row.
To end row: after you last ch 3 and sl st in ch 3, ch 3 1 more time and sl st it to the bottom ch of ending ch 3. Ch 3 and turn
Row 13 – Start of repeat
sl st in ch 3, |ch 3 and sl st in ch 3| repeat 1 more time. Ch 3 and sl st in ch 2. *|ch 5 and sl st in ch 1 | repeat 2 more times. Ch 5 and sl st in ch 2. | Ch 3 and sl st in ch 3 | repeat 2 more times
Row 14
sl st in ch 3, | ch 3 and sl st in ch 3 | repeat 1 more time. * Ch 3 and sl st in ch 5 | ch 5 and sl st in next ch 5 | repeat 2 more times. | CH 3 and sl st in ch 3 | repeat 3 more times * repeat for row.
A CHANGE here. After you ch 3 and sl st in your last ch 3 sp, then your done with the row. For the rest of the shawl you won’t have to sl st in bottom ch anymore. Just ch 3 and sl st in last ch 3. Ch 3 and turn from here on out!
Row 15
sl st ch 3 in 1st ch 3. | ch 3 and sl st in next ch 3 | repeat 3 more times. Ch 3 and sl st in ch 5 sp * ch 2 and DC 4, ch 1, DC 4 in next ch 5 sp. Ch 2 and sl st in next ch 5 sp. | ch 3 and sl st in next ch 3 until you reach your ch 5 sp | then Ch 3 and sl st in ch 5 sp *
repeat for row. Ch 3 and turn.
Row 16
sl st in ch 3 | ch 3 and sl st in ch 3 | repeat 3 more times * ch 5 and sl st in ch 2, ch 5 and sl st in ch 1, ch 5 and sl st in ch 2. ch 5 and sl st in ch 3 | ch 3 and sl st in ch 3 | repeat 4 more times * repeat for row. Ch 3 and turn
Row 17 – End of repeat
sl st in ch 3 | ch 3 and sl st in ch 3 | repeat until you reach ch 5 * ch 2 and DC 4, ch 1, DC 4 in next ch 5 space. CH 1 and DC 4, ch 1, DC 4 in next ch 5 sp. Ch 2 and sl st in next ch 3 sp. | ch 3 and sl st in next ch 3 sp | repeat until you reach ch 5 * repeat for the row. Ch 3 and turn
Repeat rows 13 – 17 for 2 sets.
**NOTE! On the repeat on the end of row 14, do now ch 3 and sl st in the bottom of the ending ch 3, just chain 3 and sl st in last ch 3 from now on.
As your piece gets bigger the top part of your shawl should flatten out. When it does it pulls your peak rows closer together. So this is why we will change the pattern slightly to help make up for this.
Row 27 – (repeat of row 13 with some changes)
sl st in ch 3, |ch 3 and sl st in ch 3| repeat until you reach the ch 2 sp. Ch 3 and sl st in ch 2. *|ch 5 and sl st in ch 1 | repeat 3 more times until ch 2 space. Ch 5 and sl st in ch 2. | Ch 3 and sl st in ch 3 | repeat for the row
Row 28 – (repeat of row 13 with some changes)
sl st in ch 3, |ch 3 and sl st in ch 3| repeat until you reach the ch 2 sp. Ch 3 and sl st in ch 2. *|ch 5 and sl st in ch 1 | repeat 3 more times until ch 2 space. Ch 5 and sl st in ch 2. | Ch 3 and sl st in ch 3 | repeat for the row
Row 29 (repeat of row 14 with some changes)
sl st in ch 3 | ch 3 and sl st in ch 3 | repeat until you reach your chain 5 space * Ch 3 and sl st in ch 5 | ch 5 and sl st in next ch 5 | repeat 2 more times. | CH 3 and sl st in ch 3 | repeat until you reach ch 5 * repeat for row.
Row 30 (repeat of row 15 with some changes)
sl st in ch 3 | ch 3 and sl st in ch 3 | repeat until you reach your chain 5 space
Ch 3 and sl st in ch 5 sp * ch 2 and DC 4, ch 1, DC 4 in next ch 5 sp. Ch 2 and sl st in next ch 5 sp. | ch 3 and sl st in next ch 3 until you reach your ch 5 sp | then Ch 3 and sl st in ch 5 sp *
repeat for row. Ch 3 and turn.
Row 31 (repeat of row 16 with some changes)
sl st in ch 3 | ch 3 and sl st in ch 3 | repeat until you reach your chain 2 space
ch 3 and sl st in ch 2 sp. | ch 5 and sl st in ch 1 | Ch 5 and sl st in ch 2 sp. | ch 3 and sl st in ch 3 | * repeat for row. Ch 3 and turn
Row 32 (repeat of row 17 with some changes)
Ending of set & repeat
sl st in ch 3 | ch 3 and sl st in ch 3 | repeat until you reach ch 5 * ch 2 and DC 4, ch 1, DC 4 in next ch 5 space. CH 1 and DC 4, ch 1, DC 4 in next ch 5 sp. Ch 2 and sl st in next ch 3 sp. | ch 3 and sl st in next ch 3 sp | repeat until you reach ch 5 * repeat for the row. Ch 3 and turn
Repeat rows 28 – 32 for 3 more sets then it will be time to start your hood.
Cut your yarn and attach it on the first top stitch. We’ll be using the top stitches along the top of our shawl.
IMPORTANT
Be sure to mark the first in last st of your hood! I didn’t and I messed up and had to create a border to make my hood big enough. Which you can too if you like. But if you mark it and do it correctly, (unlike me) it should be big enough.
When I had a color change on my skein, I would add about 4 rows to the hood. My hood got to tall though and I had to stop short of all my color changes, so I recommend measuring how long you need your hood.
I would allow about 30 cms or 11 ½ inches in length for the hood, so measure it out and make your color changes accordingly.
Sew your hood closed
When you’re ready to sew your hood closed fold in half and put 2 sc’s & ch 1 in each ch 3 space.
1st row of HOOD
Use a single crochet attachment to connect your yarn. Then ch 1. Sc and ch 1 in the next 6 stitches which should bring you up to your ch 5 sp before your large space. You will skip the 1st st and sc and ch 1 in next. Repeat 1 more time. Then sc and ch 1 then sk a st and sl st in large space. Sc and ch 1 in DC side st, sc and ch 1 in next big space. Sc and ch 1 in next large sp, Continue to sc and ch 1 in all large side sts until you reach the next ch 5 sp again. Now you do the same only in reverse. I had 64 sts at the end. Ch 3 and turn.
2nd row and on for HOOD
All the rest of the rows you just need to ch 3 and sl st.
If you want to make the hood deeper or just to add a border either way then this is what I did.
I marked both 1st and last stitch of each side of hood. Then sl st to attach your yarn, ch 3 and sl st in next side st. repeat until you reach marker on other side. Ch 3 and turn, sl st in next ch 3 sp.
I did mine for a total of 6 rows do more if you want a deeper hood, but if it’s just a border I’d recommend doing only 2 rows.
Attach your yarn back to your shawl and continue until you have another color change that you want to add to your hood. Repeat the process. Be sure to keep your places marker so you don’t forget where you cut your yarn.
This pattern is brought to you by www.meladorascreations.com
You can sell any item made from this pattern and link back to my page or videos, but you do not have permission to copy and paste my pattern anywhere online. ©Copyright 2024, All Rights Reserved
PLEASE READ BELOW!
If you’d like to see my channel stay and grow, please consider becoming a patron.
Or you could make a one time donation through PayPal. Thank you so much for your support! God Bless!