
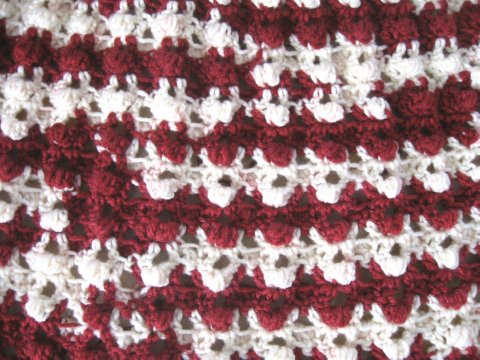
This Crochet Cape with hood uses a cool stitch I designed called the black berry stitch. This cape is for a child, but can be altered easily for any size. This lesson uses pictures and video tutorials to teach you step by step so that even a beginner crocheter can make this.
You can find more things like this under the category Shawls and Ponchos
Other patterns that use this stitch are:
Red Riding Hood – Crochet Cape and hood – Free Crochet Pattern and Video tutorial
Please don’t forget to Pin this onto your favorite crochet boards!
This page contains affiliate links

For this Cape and hood project you will need:
- YARN: 4 skeins of 282 meters / 308 yards 4 ply US 10 ply AU, may take 3 but I barley had any yarn left after the third, so get one more just in case!
- HOOK: 5 mm hook or size H hook for the US
ABBREVIATIONS
(click on link to find tutorials)
ch = Chain
sl st = Slip Stitch
BB = Black Berry
YO = yarn over
SC = Single Crochet
DC = Double Crochet
sts = stitches
* = repeat what’s in between
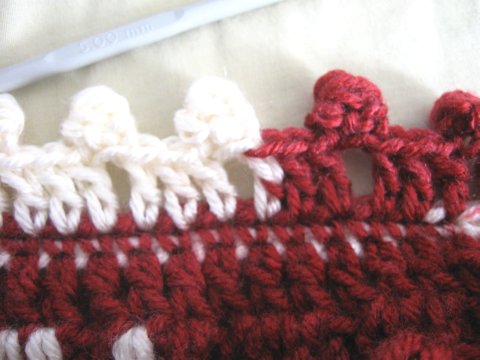
HOW TO MAKE A BLACK BERRY
Black Berry stitches will always be worked this same way into the chain. Insert your hook into first chain and pull up a loop, YO and insert your hook back into the same chain, (4 loops on hook) YO and insert your hook back into the same chain, ( 6 loops on hook ) YO and pull through all 6 loops. Ch 1 to secure berry, then sl st into the same ch space.

THE VIDEO TUTORIALS:
All my Video Tutorials
If you haven’t yet, take a moment to subscribe to my videos on YouTube to have easy access to all my videos and playlist @meladora1 on YouTube
PDF Pattern with Pictures
You can buy the ad free PDF version of my pattern with pictures on Ravelry to support this channel. Either way thank you for being here and for all you do to support my channel.
To Start:
ch 92
Row 1
Dc into first 3 sts. *Ch 3, and work a BB stitch into first chain as explained above on “How to make a Black Berry” then DC into the next 3 sts * Repeat. Dc into last three stitches of round. Ch 2 and turn.

Row 2
*dc 1 in the next 2 sts, sc into top of BB from previous row, making sure you grab both loops. Dc into next stitch, ch 3, make BB, * repeat. Dc into last 3 sts. Ch 2 and turn

Row 3
dc 1 in next 3 sts, sc into top of BB from previous row, * dc 1 in next stitch, sc into top of BB from previous row, dc in next stitch * DC in last 3 sts.
I’m sure you’ve noticed that there is a curve in the pattern like shown below. But this is what you want. This is where the tie will be later.
Rounds 4 – 30
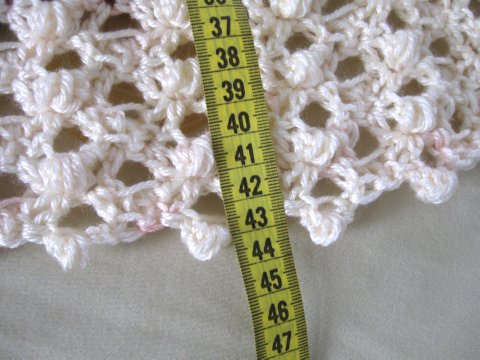
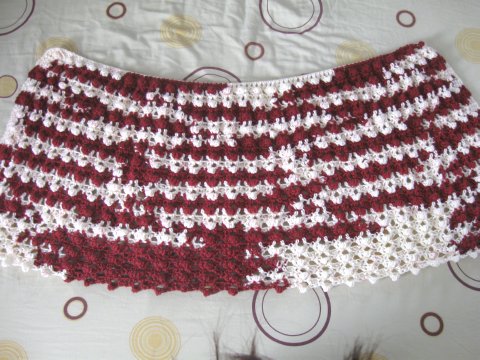
Repeat rows 2 and 3 do this until it reaches 42 cms or 16 ½ inches.
MAKING THE HOOD
Now pivot your project. We are going to be working on the other side of the original chain.
Row 1
Do a sc attachment and sc in all sts (90 sts) chain 1 and cut your yarn.
Turn your work where you have the back of the single crochets facing you. You should have an obvious fold, if you can see where it easily fold back, this is the side where you want the hood to fall.
Count over 20 sts from one corner and place a marker. Do the same from the other corner. In between the markers you should have 50 sts.
Row 2
Attach your yarn on the stitch NEXT to the marker to the right, if you’re right handed or to the Left if your left handed. And DC in the next 4 sts, ch 3 and created your BB as before, dc in next 3 sts. Just as you did before. DC in last 3 sts, ch 2 and turn.
Row 3
DC 1 in first 2 sts, * sc in top of BB, dc in next st, ch 3, make BB as normal, dc in next st * repeat DC in last 4 sts, ch 2 and turn
Row 4
DC in first 4 sts, * ch 3, make BB, dc in next stitch, sc into top of BB from last round, dc 1 into next stitch * and repeat DC in last 4 sts ch 2 and turn
Row 5 – 16
Repeat rows 3 and 4
Row 17
sc in all sts (50 sts)
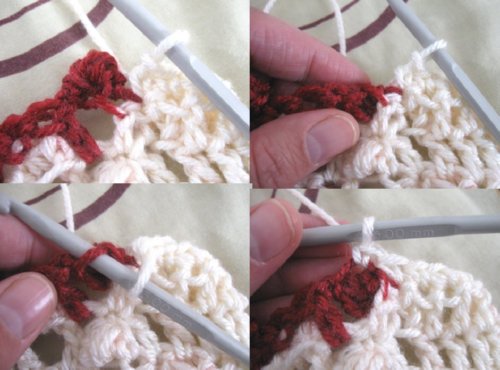
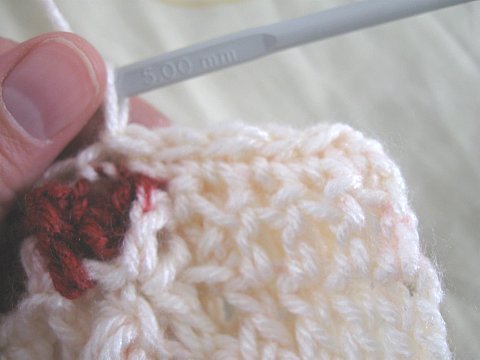
Make sure when you come to a BB, that you fold it back and sc in the stitch at the bottom as pictures show below.
Then fold this piece in half length wise.

Then slip stitch done the single crochet row, watch your tension here. Do not pull the stitches tight, keep them even.

Ch 1 and cut your yarn. Hide tail
Not to make the tie, I made of a chain of 101 and weaved it into the first BB stitch we made. The row below the hood. Weaving it in between every 2 stitches.

This pattern is brought to you by www.meladorascreations.com
You can sell any item made from this pattern and link back to my page or videos, but you do not have permission to copy and paste my pattern anywhere online. ©Copyright 2024, All Rights Reserved
PLEASE READ BELOW!
If you’d like to see my channel stay and grow, please consider becoming a patron.
Or you could make a one time donation through PayPal. Thank you so much for your support! God Bless!