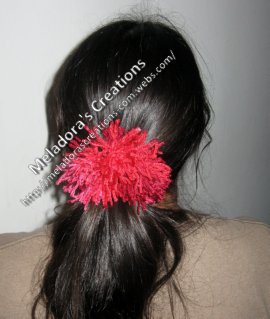
This Shaggy Crochet Scrunchie Pattern and tutorial will teach you how to crochet a shaggy pompom Scrunchie. The way this Shaggy Scrunchie is made allows you to use make different colors! I’d love to see pictures if you make one!
You can find more things like this under the category Hair Accessories
Other patterns that use this stitch are:
- Double Crochet Scrunchie
- Chain Scrunchie
- Mini Chain Scrunchie
- Flower Petal Scrunchie
- Cotton Pac Scrunchie
- Pom Pom Scrunchie
- Fuzzy Scrunchie
Shaggy Crochet Scrunchie – Free Crochet Pattern and Video tutorial
Please don’t forget to Pin this onto your favorite crochet boards!
This page contains affiliate links
For this project you will need:
- HOOK: size 3.5mm hook or size E hook
- YARN: A bit of 3 ply yarn for the US and 8 ply for AU
- a rubber band, without the metal piece is best.
ABBREVIATIONS
(click on link to find tutorials)
ch = Chain
sl st = Slip Stitch
st = Stitch
THE VIDEO TUTORIALS:
All my Video Tutorials
If you haven’t yet, take a moment to subscribe to my videos on YouTube to have easy access to all my videos and playlist @meladora1 on YouTube
PDF Pattern with Pictures
You can buy the ad free PDF version of my pattern with pictures on Ravelry or Etsy to support this channel. Either way thank you for being here and for all you do to support my channel.
Round 1
Go in through the center of the rubber band, pull up some yarn, and then grab more yarn to complete you first sc. Tighten up the stitch to the rubber band if you can.
Work your way around until whole of rubber band is covered, push sc’s down slightly and add a few more single crochets just to make sure rubber band is covered but do not add to many stitches. Sl stitch into beginning stitch and cut yarn leaving small tail.
Next take your yarn, with tail down, and wrap it around your first 3 fingers 5 times.
Then cut your yarn at the bottom leaving both loose tails in the same place.
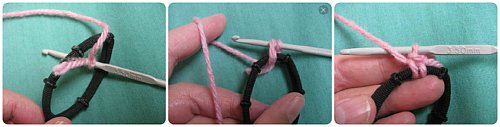
Then take your scrunchie and go in through one of the sc stitches,
Then grabbing from the top of the loop, pull loop through stitch.
Pull up slightly forming a loop, then pull bigger loop through smaller loop, creating a slip knot.
Now pull down to tighten loop and your done with first connection
Keep repeating this until all stitches are used, skip a stitch if you need to, if the stitches are two close or over lapping.
Then take a pair of scissors and pulling up to make sure the cut will be even, cut all loops around scrunchie. And your done!
Be sure to check out the video tutorial or get the step by step picture tutorial PDF if you need more assistance
This pattern is brought to you by www.meladorascreations.com
You can sell any item made from this pattern and link back to my page or videos, but you do not have permission to copy and paste my pattern anywhere online. ©Copyright 2024, All Rights Reserved
PLEASE READ BELOW!
If you’d like to see my channel stay and grow, please consider becoming a patron.
Or you could make a one time donation through PayPal. Thank you so much for your support! God Bless!