A Crochet Tube Scarf is awesome to have if you live in cold places because it’s double thick! Not to mention it’s great for using stitches that look better while crocheting in the round like my Butterfly crochet stitch does! I had thought to use my Raspberry crochet stitch, but since the look of the stitch gets made on the back I rethought that idea, because you really don’t want to turn it inside out and stretch it.
Because of this reason you want to carry your colors along with you when you make a color change. If you’ve ever done tapestry crochet then you already know how to carry your color with you and change mid row.
If not then I hope the video tutorial will help you learn this very useful way of using color in crochet. Once you learn this method you’re another step up at becoming a crocheting pro! I encourage you beginner advanced crocheters to give it a try.
Find more crochet scarf patterns here on my site on the category Scarves
If you made the scarf, why not make a matching Hat or Gloves!
- Butterfly Stitch for beginners
- Butterfly Stitch Slouch hat
- Butterfly Stitch Scarf
- Butterfly Stitch Beanie
- Butterfly Stitch Flower Spiral
- Butterfly Stitch Jacket
- Flower Granny Pattern
- Finger less Gloves
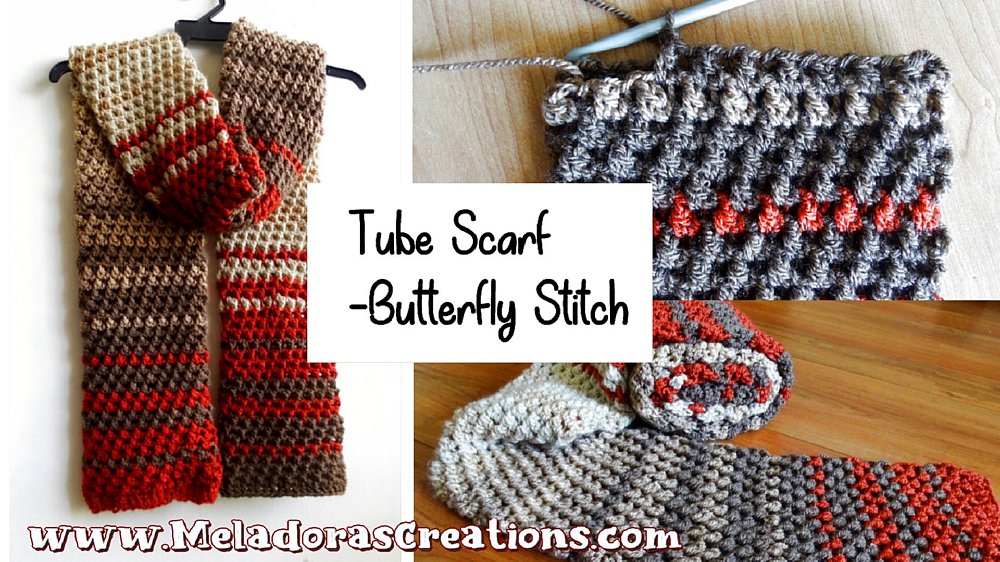
Crochet Tube Scarf – using the Butterfly Stitch – Free Crochet pattern with pictures
Please don’t forget to Pin this onto your favorite crochet boards!
This page contains affiliate links

For this project you will need:
- HOOK: 6 mm hook or size J hook for the US
- YARN: I used 5 colors of Worsted weight yarn, 4 ply US, 10 ply AU
Colors I used
- 1st Maroon
- 2nd Teddy Bear brown
- 3rd Medium brown
- 4th Light Tan
- 5th Very light brown
I used scrap yarn I had in stock and matched colors to my liking. Most were almost full skeins, but colors 4 and 5 I had about half a skein, but since I only used them twice it was enough yarn. Keep this in mind when choosing your own colors.
I tried to make the colors I choose gender neutral so I could give it to anyone who may need it.
Measurements
My scarf measured 5 ½ inches or 14 cms wide and 62 inches or 157 ½ cms in length

ABBREVIATIONS
(click on link to find tutorials)
ch = Chain
sl st = Slip Stitch
YO = Yarn Over
DC = Double Crochet
beg = beginning
Repeat what’s in between * for rest of round.
Our Special Stitch will be:
BFS = Butterfly Stitch
The BFS uses to stitches to create. You’ll insert your hook into the 1st stitch and pull up a loop.
You should have 2 loops on your hook. YO and only pull through one of those loops.
Then without YO insert your hook into next stitch and pull up another loop,
now YO and double crochet by pulling through 2 loops at a time then
ch 1. Be sure to always chain 1 at the end. It’s very important.
Color changes
In this pattern you will be doing many color changes, I used 5 different colors and a certain stitch change pattern. But feel free to mix it up and change colors when you like to use up scrap yarn, as well as changing color patterns whenever you want.
I will explain my main color changing tactic and would mix it up sometimes, but this is the basic pattern.

I’ll speak in # of rows and which color I used.
3 Rows of 1st color, 1 Row of 2nd color
3 Rows of 1st color, 2 Rows of 2nd color
2 Rows of 1st color, 3 Rows of 2nd color
1 Row of 1st color, 3 Rows of 2nd color
Then I would add in my next color and go in reverse order of the way I did my 1st color. Let’s continue.
1 Row of 3rd color, 3 Rows of 2nd color
2 Rows of 3rd color, 2 Rows of 2nd color
3 Rows of 3rd color, 1 Row of 2nd color
3 Rows of 3rd color, 1 Row of 4th color
2 Rows of 3rd color, 2 Rows of 4th color
1 Row of 3rd color, 3 Rows of 4th color
1 Row of Next color, 3 Rows of 4th color etc…
You getting the pattern now? There will always be 3 rows of the current color on either side of the 1 row of the new color that your bringing in. Then it’s a count down for the old color, and a count up for the new one, as it takes over.
When adding a new color, when pulling it through your slip knot be sure to leave at least 2 inches of tail so prevent small tails from poling through.
I never cut my yarn color until I was done with it, then I would always leave a 2 inch tail to make sure it didn’t pop through the other side later.
I never hide my tails during the making of the scarf, I just let them remain on the inside where no one would see them.
THE VIDEO TUTORIALS:
All my Video Tutorials
If you haven’t yet, take a moment to subscribe to my videos on YouTube to have easy access to all my videos and playlist @meladora1 on YouTube

PDF Pattern with Pictures
You can buy the ad free PDF version of my pattern with pictures on Ravelry or Etsy to support this channel. Either way thank you for being here and for all you do to support my channel.
To Start – using 1st color
Ch 40 (or in multiples of 2)
Then sl st into your beg ch to form a ring.
Row 1 still using 1st color
Ch 2 and DC in next st and in all sts around. Counting your beginning ch 2 you should have 40 total stitches.
Sl st in top of ch 2 and ch 1.
Row 2 still using 1st color
In the same st you just sl stitched into insert your hook and pull up a loop to begin your first BFS (see special st directions) [repeat for restof the round. repeat for 19 times. For a total of 20 BFS’s for the round.
Be sure to always do this ch 1 or else your stitch won’t turn out right. Exception is only for the ending BFS. The sl st counts as your ch 1.
Below in the picture shows the large stitch at the end of the row that you will be slip stitching into to end your round. Also it shows how you begin your next round.

Rows 3 & 4 still using 1st color
To begin a row with the BFS, you will ch 1 and insert your hook into
the previous space on the right of your ending slip st and pull up a
loop and ch 1
Then insert your hook into the very next space after your ending sl
stitch and pull up a loop.
Now YO and double crochet by pulling through 2 loops at a time. This is how you will always begin your rounds.
*ch 1, bfs through the wing spaces of the butterflies to make our new butterfly * Repeat 19 more times for the row. Giving you a total of 20 BFS’s all the way around.
When you reach the end of the round don’t ch 1, just sl stitch into the big stitch of your beginning BFS. This sl st counts as your ch 1.
Row 5 is when you switch to your 2nd color. We’ll be doing only 1 round with this color this time. I’ve added the color chart again below.
Remember this? We just completed 3 of 1st color.
I’ll speak in # of rows and which color I used.
3 Rows of 1st color, 1 Row of 2nd color
3 Rows of 1st color, 2 Rows of 2nd color
2 Rows of 1st color, 3 Rows of 2nd color
1 Row of 1st color, 3 Rows of 2nd color
Then I would add in my next color and go in reverse order of the way I did my 1st color. Let’s continue.
1 Row of 3rd color, 3 Rows of 2nd color
2 Rows of 3rd color, 2 Rows of 2nd color
3 Rows of 3rd color, 1 Row of 2nd color
3 Rows of 3rd color, 1 Row of 4th color
2 Rows of 3rd color, 2 Rows of 4th color
1 Row of 3rd color, 3 Rows of 4th color
1 Row of Next color, 3 Rows of 4th color etc…

Feel free to write it out and mark it off as you go. Your beginning row and last row of your scarf you will use the color you’re currently using, so my 1st color had an extra color row and the last row color will too, but they were DC’s instead of BFS’s.
So for example:
To end: After your last 3 rows of your last color, just continue with the same color and ch 2 to start round, then put 1 DC in each of your wings, you should end up with 40 sts. Sl st in top of beginning ch 2 and leaving a bit of a tail to hide with a tapestry needle, cut your yarn.
I only hid my first 3 tails on both ends so they wouldn’t fall to the bottom and be seen.
I did 42 total rows, this includes the beginning and ending rows. So 40 rows of BFS’s and 2 rows of DC’s, one on the first and last row.

This pattern is brought to you by www.meladorascreations.com
You can sell any item made from this pattern and link back to my page or videos, but you do not have permission to copy and paste my pattern anywhere online. ©Copyright 2024, All Rights Reserved
PLEASE READ BELOW!
If you’d like to see my channel stay and grow, please consider becoming a patron.
Or you could make a one time donation through PayPal. Thank you so much for your support! God Bless!