
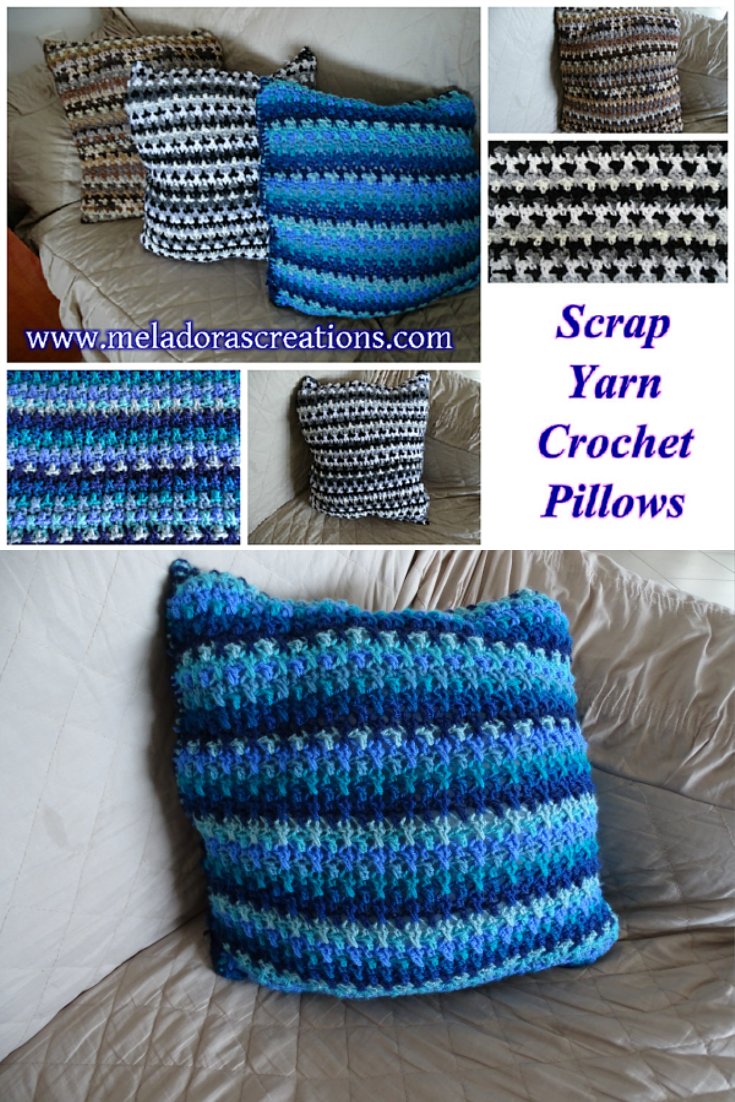
This Scrap Yarn Pillow Crochet design is a great way to use up all your leftover yarn in such a beautiful way! You can change every row for a great blending effect. Get creative with color and this scrap yarn Crochet Pillow can really look amazing!
You can find more things like this under the category For the Home
Find more crochet stitches here on the category Crochet Stitches
Other Patterns that use this stitch:
- Birds of a Feather Beanie
- Birds of a Feather Scarf
- Birds of a Feather Crochet Cowl
- Birds of a Feather Crochet Slouch hat
Scrap Yarn Pillow Crochet – Free Crochet Pattern and Video tutorial
Please don’t forget to Pin this onto your favorite crochet boards!
This page contains affiliate links
For this project you will need:
- HOOK: Any size but I used 5 mm hook or size H hook for the US
- YARN: Scraps of the same weight yarn, I used worsted weight 4 ply US, 10 ply AU
I have drawers like you see below that were so full I had to empty them. This is the brown scrap yarn I’ve been holding on to. I also had a drawer full of blues and one full of black, white and grey. So I had to make those colors to empty those drawers some. All in all I now have 3 fluffy pillows on my couch that were fun to make and didn’t cost me any more money in yarn, just the fiber fill, which wasn’t to bad because hubby found a great deal on some!


PDF Pattern with Pictures
You can buy the ad free PDF version of my pattern with pictures on Ravelry or Etsy to support this channel. Either way thank you for being here and for all you do to support my channel.

ABBREVIATIONS
(click on link to find tutorials)
ch = Chain
sl st = Slip Stitch
st = Stitch
sk = Skip
dec = decrease
beg = beginning
YO = Yarn Over
SC = Single Crochet
DC = Double Crochet
SCFS = Single Crochet foundation stitch
Sc dec = single crochet decrease
CS = Cross Stitch
* = Repeat what’s in between * for rest of row

THE VIDEO TUTORIALS:
All my Video Tutorials
If you haven’t yet, take a moment to subscribe to my videos on YouTube to have easy access to all my videos and playlist @meladora1 on YouTube
To Start:
Single Crochet Foundation Stitch ( SCFS ) – Do a row of 52 if you want to do your pillow bigger or smaller, the multiples are 3 + 1
If you want to chain loosely then go back and do a row of single crochets to start your pillow, then your multiples will be 3 + 2 so you would chain 53.
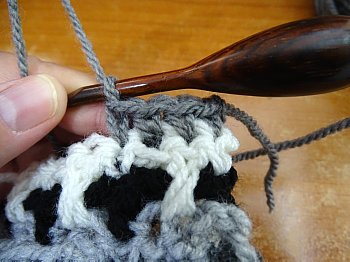
Row 1
Do a DC attachment to add your next color into first stitch. Then Ch 2 and sk 2 sts, *dc into next stitch, ch 2 and sk 2 sts * Repeat. After last stitch of row ch 1 and cut yarn, leaving some yarn to be worked in later with a tapestry needle.
Row 2
Do a sc attachment to add your next color, *Then CS using the 2 skipped stitches from last row. Sc into the top of the next DC* Repeat. Always sc into last stitch or the row. After last stitch of row ch 1 and cut yarn, leaving some yarn to be worked in later with a tapestry needle.
For help with doing the CS / Cross stitch
Row 3
You will be repeating round 1 –
Do a DC attachment to add your next color into first stitch. Then Ch 2 and sk 2 sts, *dc into next stitch, ch 2 and sk 2 sts * Repeat. After last stitch of row ch 1 and cut yarn, leaving some yarn to be worked in later with a tapestry needle.
Row 4
Do a sc attachment to add your next color, *Then CS using the 2 skipped stitches from last row. Sc into the top of the next DC* Repeat. Always sc into last stitch or the row. After last stitch of row ch 1 and cut yarn, leaving some yarn to be worked in later with a tapestry needle. This will complete your second set.
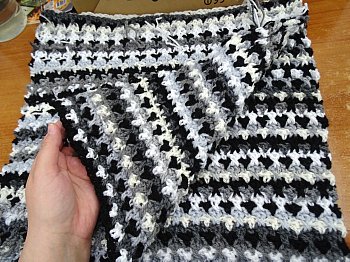
Repeat rows 3 and 4 for a total of 47 / 48 rows or until desired size.
Then make the other side of the pillow the same size.
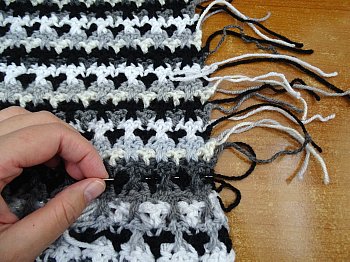
Now it’s time to hide your tails, not need to make it perfect, the inside of the pillow won’t show, just pull the tails back so they don’t show on the end. Leave the tail a bit long inside because this makes it less likely the tail will pop through the other side of the pillow later.
Once that’s done, lay your pieces Right Side Facing ( Good side’s Facing)
And grab a decent size ball of yarn because you will need it to sew all along the top, side and bottom, leaving the other side open to stuff.
I like to use the Single crochet method of sewing, so insert your hook through one stitch and then it’s equal on the other side.
Then single crochet.
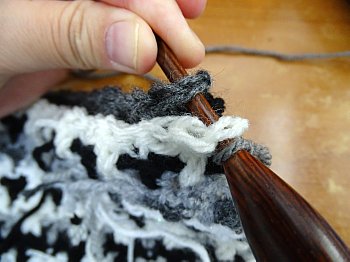
Now sew all along the top, side and bottom, leaving the other side open to stuff.
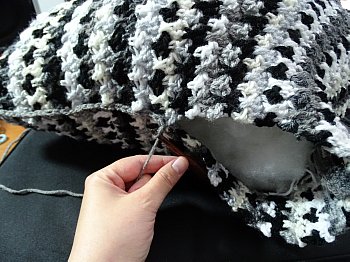
Once you have your 3 sides sewn, turn your pillow inside out so that you have the good side of your pillow showing. Now stuff your pillow. Make sure to get the stuffing in the corners. I always over stuff my pillows because in time the fiber fill with flatten and loose it’s fluffiness, so I make up for this by over stuffing the pillow at the start.
Once you get the corners and middle stuffed well, then grab up your yarn again and sewn this side half way down.
Then stuff the corner you just made and the pillow some more, then sew more until you have just a bit left open and finish stuffing this last corner as best you can. Finish sewing and ch 1, cut your yarn leaving a long enough tail to hide using a tapestry needle. I hide my tail down the single crochet row I just made by sewing.

This pattern is brought to you by www.meladorascreations.com
You can sell any item made from this pattern and link back to my page or videos, but you do not have permission to copy and paste my pattern anywhere online. ©Copyright 2024, All Rights Reserved
PLEASE READ BELOW!
If you’d like to see my channel stay and grow, please consider becoming a patron.
Or you could make a one time donation through PayPal. Thank you so much for your support! God Bless!