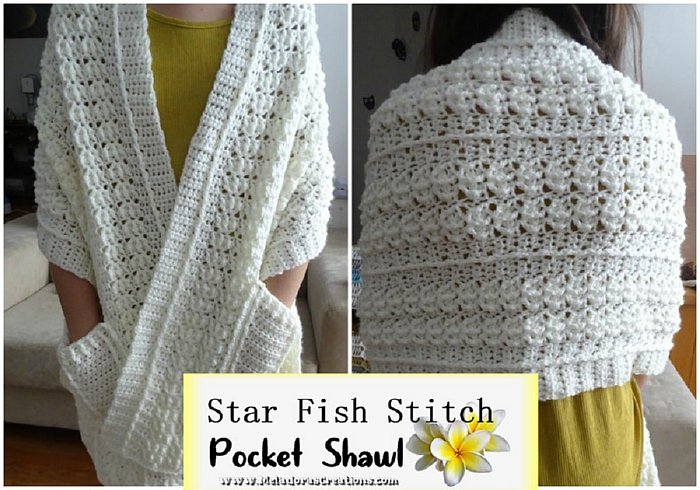
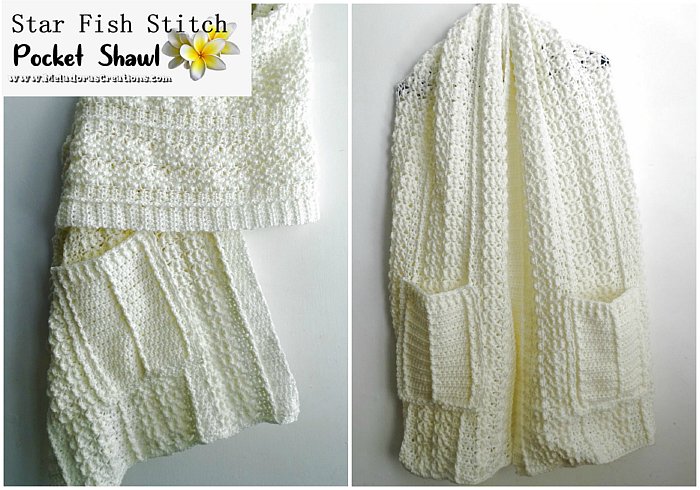
My and my daughter love the idea of the Crochet Pocket shawl! I decided to make my daughter’s Pocket Shawl with a cable style. Sorta like the one I made myself, “the Cable pocket shawl” because my daughter liked mine so much. But I decided for hers I went with more of a basic row repeat to give it more of a cable line look and feel. I really like how the Starfish stitch looks in this design! How about you?
Please take a look at the list below to see other patterns that use this stitch.
Find more patterns like this here on the category Shawls and Ponchos
Other Patterns that use this stitch:
Star Fish Pocket Shawl – Free Crochet pattern
Please don’t forget to Pin this onto your favorite crochet boards!
This page contains affiliate links

Size Of Finished shawl
This Shawl Measures – 40 cms or 16 inches in width & 169 cms or 66 Inches in length.
Gauge is 1 stich per 1 cm
For this project you will need:
- HOOK: 5 mm hook or size H hook for the US
- YARN: 5 skeins of worsted weight yarn, 4 ply US, 10 ply AU
- Tapestry Needle
100 grams / 3.5. oz
240 meters / 262 yards
ABBREVIATIONS
(click on link to find tutorials)
ch = Chain
sl st = Slip Stitch
st = Stitch
sk = Skip
beg = beginning
YO = Yarn Over
FPDC = Front Post Double Crochet
BPDC = Back Post Double Crochet
SC = Single Crochet
DC = Double Crochet
HDC = Half Double Crochet
SCFS = Single Crochet foundation stitch
Repeat what’s in between * for rest of round.
Repeat what’s in between | for amount of time # indicates
Special Stitch: Star Fish Stitch:
Row 1 of stitch –
sc in first stitch, * skip 2 sts, then DC 5 into same stitch, skip 2 sts, sc in next.
Row 2 of stitch –
sc into first stitch, then do a * FPDC into the first dc post of the shell, BPDC into next post of the shell, FPDC into the middle dc post of the shell, BPDC into next post of the shell, FPDC into the last post dc of the shell, then sc into next sc.
THE VIDEO TUTORIALS:
All my Video Tutorials
If you haven’t yet, take a moment to subscribe to my videos on YouTube to have easy access to all my videos and playlist @meladora1 on YouTube
PDF Pattern with Pictures
You can find the PDF version of my pattern with pictures on Ravlery Or my shop on Etsy. Thank you very much for all you do to support my channel.
If you’d like to make it WIDER just keep adding multiples of 12
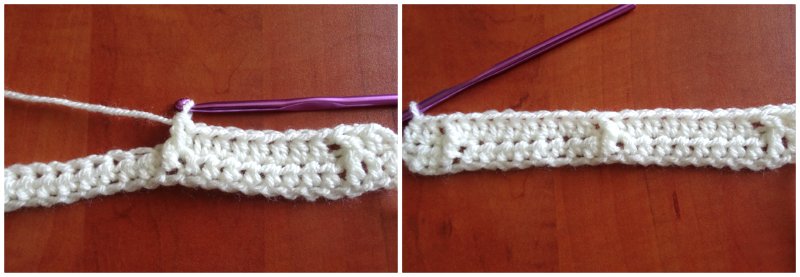
To Start
Ch 66
Row 1
HDC in 3rd ch from hook. HDC in the remaining 64 sts. The beginning ch 2 also DOES COUNT as a stitch so you should have 65 sts total for the row. CH 2 and turn.
Row 2
Ch 2 does not count as a stitch – use first stitch of row
HDC in First 5 HDC’s.
*BPDC on post of next HDC.
- TIP #1 – To make sure you have the correct post over, use the first rows posts of HDC’s and count over 5 and on the 6th post over is where you put the BPDC.
- TIP #2 – A common mistake with the BPDC is that unlike the FPDC you can clearly see that the stitch is used, but with the BPDC you can still see the stitch in front that is unused, don’t make the mistake of using this stitch, be sure to skip the stitch that the BPDC is crocheted on. Only the post should be used here.
HDC in next 2 HDC’s.
Sc in next st, sk 2 sts
DC 5 in next st. sk 2 sts
Sc in next st, sk 2 sts
DC 5 in next st. sk 2 sts
Sc in next
HDC in next 2 sts * Repeat for row
To end row: BPDC on post of next HDC. Then HDC into the last 4 HDC’s and HDC in top of ending ch 2.
Ch 2 and turn.
Row 3
Ch 2 does not count as a stitch – use first HDC of row
HDC in First 5 HDC’s.
*FPDC on post of next FPDC. Your BPDC’s now turned into FPDC because they are facing you this row
HDC in next 2 HDC’s.
Sc in next st,
You’ll be working your 5 DC’s of your shell as follows:
FPDC , BPDC , FPDC , BPDC , FPDC .
Sc in next st,
FPDC , BPDC , FPDC , BPDC , FPDC .
Sc in next
HDC in next 2 sts * Repeat for row.
To end row: FPDC on FPDC, HDC in last 5 HDC’s sts. Skip last ch 2, it does NOT count as a stitch.
Ch 2 and turn.
Row 4
Ch 2 does not count as a stitch – use first stitch of row
HDC in First 5 HDC’s.
*BPDC on post of next BPDC.
HDC in next 2 HDC’s.
*| SC in your SC
You’ll be working your 5 DC’s in the center BPDC, | so skip 2 DC’s and
DC 5 in middle BPDC the skip next 2 DC’s, | repeat 1 more time for your other shell.
SC in your SC
HDC in next 2 sts, BPDC on BPDC,
HDC in next 2 sts *Repeat for row
To end row: BPDC on BPDC, HDC in last 5 HDC’s sts. Skip last ch 2, it does NOT count as a stitch. Ch 2 and turn.
Ch 2 and turn.
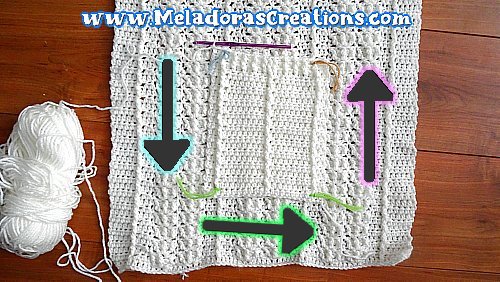
Finishing your shawl
Repeat rows 3 and 4 until you reach desired size. Make sure you’re after a repeat of row 4.
When you’re ready to finish your shawl these will be your last row 2 ROWS.
Last Row 1
HDC in First 5 HDC’s.
BPDC on BPDC,
*| HDC in next 2 sts, sc in sc, ch 2 and skip 2 sts and
sc in the middle stitch (It’s the same stitch that you were putting 5 DC’s before)
Ch 2 and skip 2 and sc in the sc. | repeat one more time for the next shell.
HDC in next 2 HDC’s,
BPDC on BPDC*
Repeat what’s between *’s 2 more times.
To end row: Repeat until the last 5 sts where you will always be putting 5 hds’s to end your row.
Ch 2 and turn.
Last Row 2
HDC in First 5 HDC’s.
FPDC on FPDC,
HDC in next 2 HDC’s
* | sc in sc, SC 2 in the ch 2 space | repeat 3 more times.
Then HDC in the next 2 HDC’s
FPDC on FPDC
Then HDC in the next 2 HDC’s *
Repeat what’s in between *’s for row.
To end row: Repeat until the last 5 sts where you will always be putting 5 hds’s to end your row.
Ch 1 and cut yarn.
Leave enough of a tail to hide it with a tapestry needle.
Making the pockets
To Start
Ch 25
Row 1
HDC in 3rd ch from hook. HDC in the rest of your chains.
At the end of your row you should have 23 sts not counting the beginning ch 2.
Ch 2 and turn
The turning Ch 2 does not count as a stitch in this pattern. So just ignore it on a row, it’s only for turning purposes.
Row 2
HDC in the first 2 sts.
FPDC on the post of the next HDC.
HDC in next 8 sts.
FPDC on the post of the next HDC.
HDC in next 8 sts.
FPDC on the post of the next HDC.
HDC in the last 2 sts.
Ch 2 and turn
Row 3
HDC in the first 2 sts.
BPDC on the post of the next HDC.
HDC in next 8 sts.
BPDC on the post of the next HDC.
HDC in next 8 sts.
BPDC on the post of the next HDC.
HDC in the last 2 sts.
Ch 2 and turn
Repeat rows 3 and 4 until you have a TOTAL of 20 rows. Also your POST stitches should be BPDC’s this row.
Row 21
HDC in first 2 sts,
BPDC on BPDC,
Then alternate. 7 times
FPDC on the post of the next HDC
BPDC on the post of the next HDC
FPDC on the post of the next HDC
BPDC on the post of the next HDC
FPDC on the post of the next HDC
BPDC on the post of the next HDC
FPDC on the post of the next HDC
-Then BPDC on the post of the next 3 HDC post’s-
That is the Middle section
Then alternate. 8 times
FPDC on the post of the next HDC
BPDC on the post of the next HDC
FPDC on the post of the next HDC
BPDC on the post of the next HDC
FPDC on the post of the next HDC
BPDC on the post of the next HDC
FPDC on the post of the next HDC
BPDC on the post of the next HDC
HDC in last 2 sts
Ch 2 and turn
Row 22
HDC in first 2 sts,
FPDC on FPDC,
Then alternate. 7 times
BPDC on the BPDC
FPDC on FPDC,
BPDC on the BPDC
FPDC on FPDC,
BPDC on the BPDC
FPDC on FPDC,
BPDC on the BPDC
-Then FPDC on the post of the next FPDC’s-
That is the Middle section
Then alternate. 8 times
BPDC on the BPDC
FPDC on FPDC,
BPDC on the BPDC
FPDC on FPDC,
BPDC on the BPDC
FPDC on FPDC,
BPDC on the BPDC
FPDC on FPDC,
HDC in last 2 sts
Ch 2 and turn
Row 23
HDC in first 2 sts,
BPDC on the BPDC
Then alternate. 7 times
FPDC on FPDC,
BPDC on the BPDC
FPDC on FPDC,
BPDC on the BPDC
FPDC on FPDC,
BPDC on the BPDC
FPDC on the FPDC
-Then BPDC on the post of the next BPDC’s-
That is the Middle section
Then alternate. 8 times
FPDC on FPDC,
BPDC on the BPDC
FPDC on FPDC,
BPDC on the BPDC
FPDC on FPDC,
BPDC on the BPDC
FPDC on FPDC,
BPDC on the BPDC
HDC in last 2 sts
Ch 1 and you’re ready to attach it to your pocket shawl now, or if you want to attach it later then leave a long enough tail to hide with a tapestry needle.
Size Of Finished Pocket
Length – 9 inches and 23 cms
Width – 2.75 Inches 7 cms
Sewing on the pockets
We need to put our pocket in place. I counted up 5 rows and set the bottom of my pocket on the 6th row.
You’ll need 4 markers. Attach them by pushing your hook into the crocheted pocket and the Shawl at the same time. Going through both pieces.
Attach your 4 markers in each corner to hold your piece in place.
Start in top left corner and work your way down the bottom then back up to the last side.
Sl st and chain 1, going slow and steady and as evenly as you can.
Ch 1 and cut yarn leaving a long enough tail to hide with a tapestry needle.
Repeat to attach other pocket.
Hide all your tails using a tapestry needle.
This pattern is brought to you by www.meladorascreations.com
You can sell any item made from this pattern and link back to my page or videos, but you do not have permission to copy and paste my pattern anywhere online. ©Copyright 2023, All Rights Reserved
PLEASE READ BELOW!
If you’d like to see my channel stay and grow, please consider becoming a patron.
Or you could make a one time donation through PayPal. Thank you so much for your support! God Bless!