I made this Teddy Bear Crochet Lovey for my nephew. I’ve been given some pictures of him with his crochet gift below if you’d like to see it. This crochet teddy bear lovey pattern is so easy to do and is sure to bring a smile to any face as they receive it!
I made the Unicorn Lovey for my Niece, but I also have a Baby Nephew so I just had to make one for him as well! This is Part 3.
Part ONE is the main CAL page and has all the additional information on what supplies you need and sizing of afghan.
If you missed the other parts:
Part 1 you can find it here
Part 2 you can find it here
Find more crochet afghans here on the category Afghans & Baby Blankets
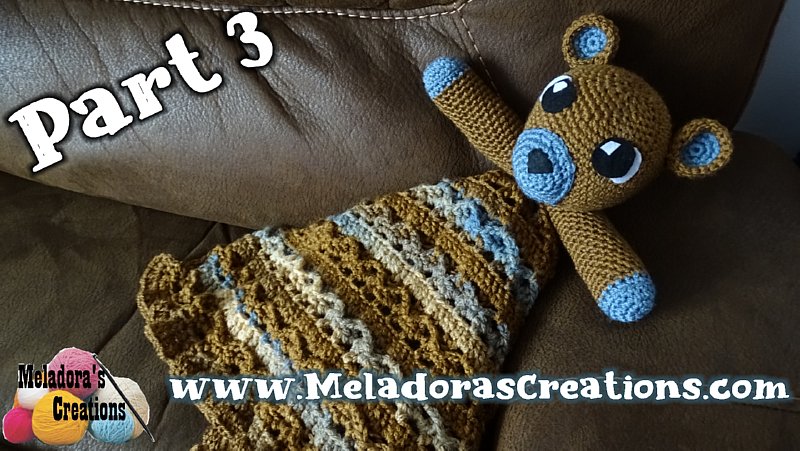
Teddy Bear Lovey (Part 3) – Free Crochet Pattern – Video Crochet tutorial
Please don’t forget to Pin this onto your favorite crochet boards!
This page contains affiliate links

PDF Pattern with Pictures
You can buy the ad free PDF version of my pattern with pictures on Ravelry or Etsy to support this channel. Either way thank you for being here and for all you do to support my channel.
For this project you’ll need:
- HOOK: you will need 2 size hooks. 3 mm \ C hook and a 5 mm \ H hook
- YARN: medium 4 worsted weight yarn \ Aran 10 ply
3 skeins of Variegated yarn – 100g / 250 meter Skeins to make the afghan portion of this pattern.
And one solid color (Coffee Brown Color)- I used only one skein – Worsted weight yarn 100 grams \ 190 meters of the
I also used a very small amount of Worsted weight yarn in blue for the feet, nose and ears.
You’ll also need:
- Tapestry Needle
- Hot Glue Gun
- Fiber Fill
- Small amount of Felt in Black and White
THE VIDEO TUTORIALS:
All my Video Tutorials
If you haven’t yet, take a moment to subscribe to my videos on YouTube to have easy access to all my videos and playlist @meladora1 on YouTube
ALL VIDEO TUTORIALS CAN BE FOUND HERE:
Right handed Video Tutorials https://www.youtube.com/playlist?list=PLlfN1EjIXcK_c02PzEaFRfliY_2-N77HE
Left Handed Video Tutorials https://www.youtube.com/playlist?list=PLlfN1EjIXcK-f_vSDAGwikWqh2XEBTPmV
Teddy Bear Crochet Lovey
The Mouth Plate
Using your 3 mm \ C hook
Rnd 1: ch 2, sc 6 in 2nd ch from hook, or do Magic ring
Rnd 2: inc, repeat 6 times (12 sts)
Rnd 3: sc 1, sc 2, repeat 6 times (18 sts)
Rnd 4: sc in next 2 sts, inc, repeat 6 times (24)
Rnd 5: sc in next 3 sts, inc, repeat 6 times (30)
Rnd 6: sc in all sts
The Ears
Using your 3 mm \ C hook
The inner blue part:
Rnd 1: ch 2, sc 6 in 2nd ch from hook, or do Magic ring
Rnd 2: inc, repeat 6 times (12 sts)
Rnd 3: sc 1, sc 2, repeat 6 times (18 sts)
Turn your ear over, where the back of your work is facing you.
Rnd 4: Attach your brown yarn and sc in all 18 sts around.
Rnd 5: SC in FLO in all 18 sts around.
Rnds 6 – 8: sc in all 18 sts.
Push the middle part inside a bit and turn your piece around. Cut your tails a bit if you need, stuff them inside the ear here. If you need to do one more row of sc’s to make this work better you can.
Rnd 9: SC dec 6 times. Then sl st to sew the ear shut.
Now that you have all your pieces crocheted, now it’s time to cut out the eyes using our felt. Use the pictures below as a guide and cut two circles out. One in black and one in white.
Grab the head, ear and the face plate to help you get the right size circles your after.
I had to cut out a few size circles until I found the size that worked best with the size of my pieces.
For the white speck in the eye I took a smaller circle and cut it in half. Then I cut the half circle in half. As you can see by the bottom left picture above.
Lay your eye pieces out and grab your glue gun and some fiber fill.
First carefully glue your eye speck on your black piece. Then making sure the white is showing the way you like, glue the white piece to the back of the black piece. Look at the photo above and you can see how I put my white speck both differently for each eye, as those there is a light source. Thick it added a lot more cuteness!
Set your eyes aside to dry and grab your face plate.
Make sure the long tail of the head is facing down. IMPORTANT!
Sew your piece about a 3rd of the way down.
When you have your piece a third of the way sewn, then start to lightly stuff your piece. Then using your ear to help you, find where the eyes would fit best.
Then glue them on. Then finish sewing your piece on.
The nose is a triangle rounded a bit on the corners. Hot glue this where it will look cute with the eyes.
Sew the ears on just like we did on the Unicorn Lovey.
Thin ways, but with the bear ears, make sure that your ear is sewn on more rounded.
Once you’ve got your Head all finished, it’s time to sew it to our afghan.
If you count ONLY 7 wave rows from the top or bottom of the afghan, the next row will be a DC row. This is the middle row. Find the middle of the middle row.

Try to sew your head using the top and bottom of this row to give it extra strength.
Once you’ve got your head sewn on, sew your arms on sideways like shown here.
You’re going to want to sewn the top part of the arm to the head, then from underneath the arm, sew it to the afghan.
This pattern is brought to you by www.meladorascreations.com
You can sell any item made from this pattern and link back to my page or videos, but you do not have permission to copy and paste my pattern anywhere online. ©Copyright 2024, All Rights Reserved
PLEASE READ BELOW!
If you’d like to see my channel stay and grow, please consider becoming a patron.
Or you could make a one time donation through PayPal. Thank you so much for your support! God Bless!