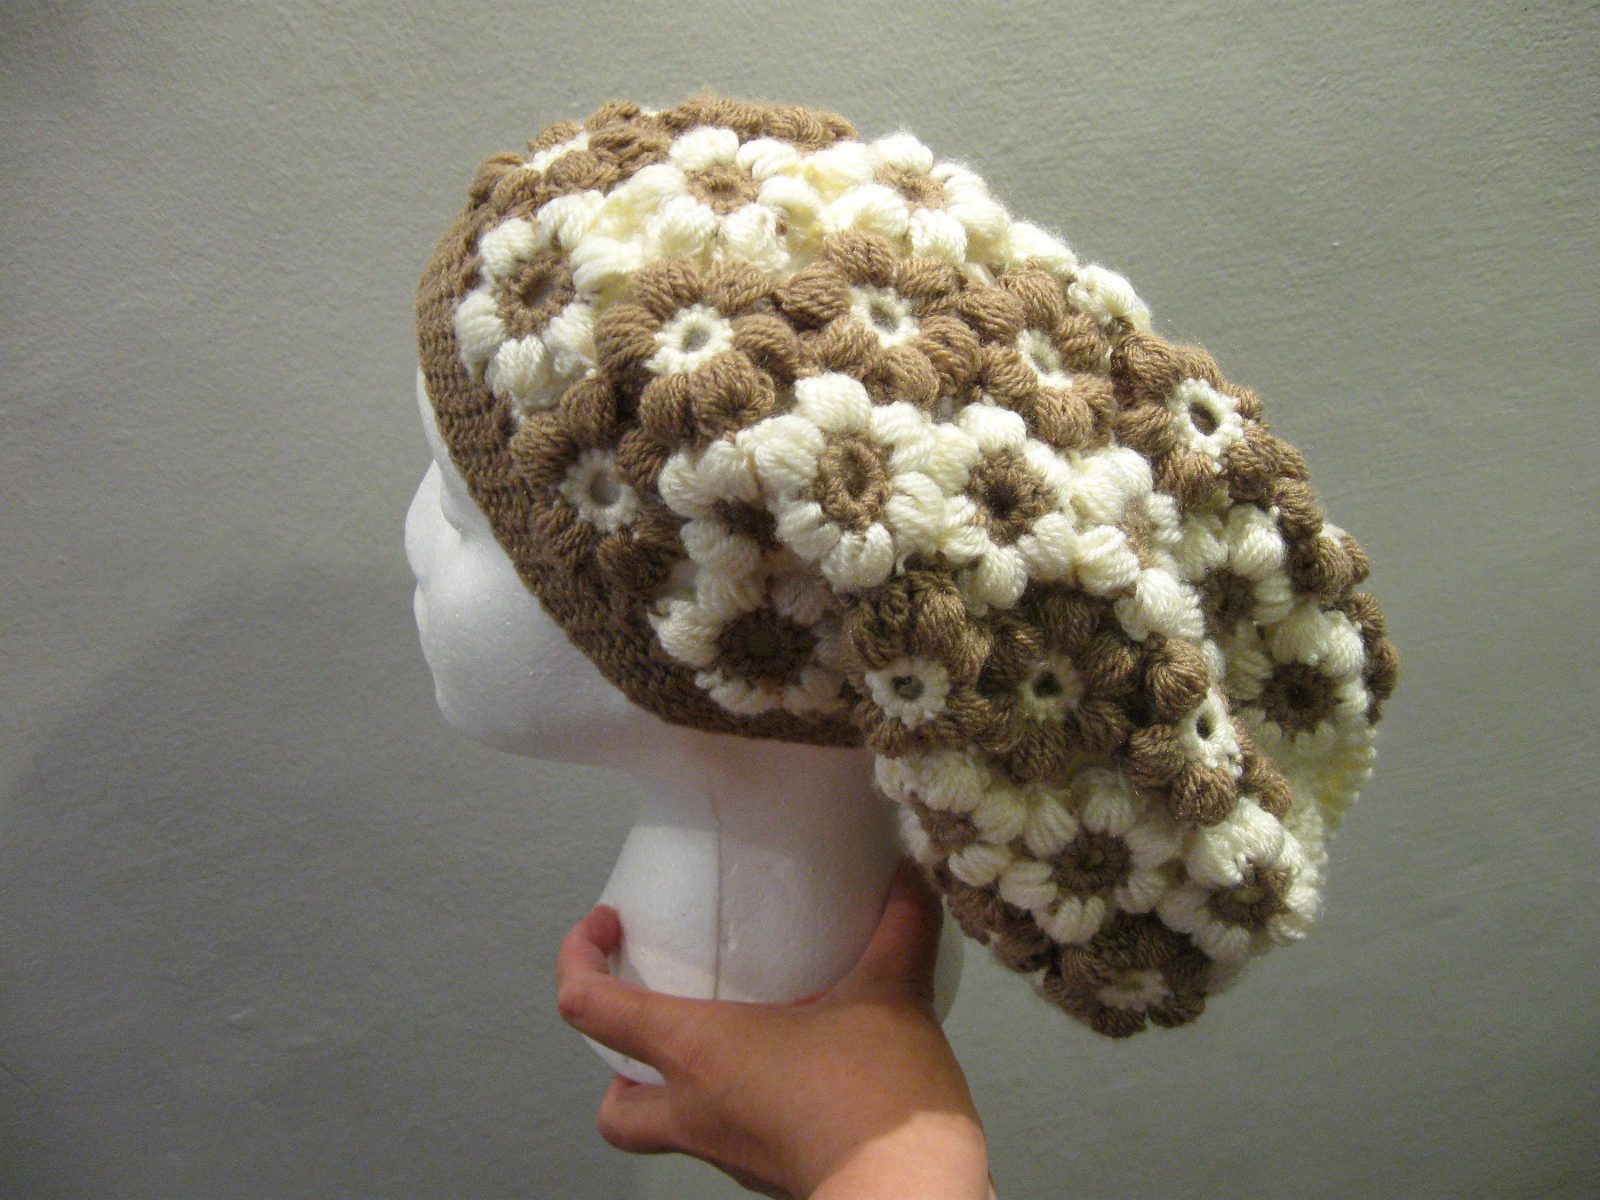
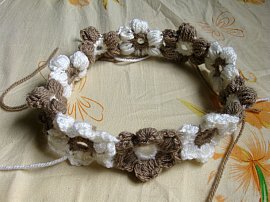
This Crochet Slouch Hat is a very unique crochet hat. The puff flower slouch hat idea came to me when I was making a crochet flower purse and I realized that you really could use these puff flowers to make anything. When I set up my first craft table to sell my goods, this was bought the first day. The lady who bought it told me she wanted it because there was nothing else out there like it. And she was right, I have never made another one. I hope you’ll give it a try, it’s easier than you think and can even be made using scrap yarn. Just imagine the color possibilities!
Find more crochet stitches here on the category Slouch Hats
You can find more projects like this in the category Flowers & Grannies
You can find more projects like this in the category Scrap Yarn Patterns
Other patterns that use this same stitch
- Flower Granny Baby Blanket
- Puff Flower Heart Motif
- Flower Table Runner
- Flower Crochet Mug Rug
- Crochet Flower Sweater
- Crochet Puff Flower Scarf
Flower Slouch Hat – Free Crochet Pattern and Video Tutorials
Please don’t forget to Pin this onto your favorite crochet boards!
This page contains affiliate links

For this project you will need:
- HOOK: a 4.5 mm G hook
- YARN: 2 skeins of white and light brown of worsted weight acrylic 4 ply US or 10 ply AU yarn.
- Tapestry needle to work in ends
- a stitch marker.
ABBREVIATIONS
(click on link to find tutorials)
ch = Chain
sl st = Slip Stitch
st = Stitch
SC = Single Crochet
DC = Double Crochet
Sc inc = Single crochet Increase
Sc dec = single crochet decrease
Puff Stitch
* = Repeat what’s in between * for rest of round.
THE VIDEO TUTORIALS:
All my Video Tutorials
If you haven’t yet, take a moment to subscribe to my videos on YouTube to have easy access to all my videos and playlist @meladora1 on YouTube
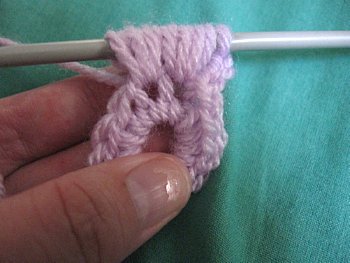
When I say ch 3 space, I mean the ch 3 to the right or left of the puff st, as the pictures show below.

Ch 3 space
When I say Top Puff St I am talking about the stitch left at the top of the puff st as picture shows below.

Top puff stitch
MAKING THE CENTERS
Choose a color and ch 4, sl st into beginning st to form a ring, ch 1 and sc 12 into ring. Do Not sl st in beginning st yet, first you want to grab your other color and put your hook through the beginning stitch and pull the yarn through the beginning st and into the loop on your hook to do the sl st and change colors at the same time.

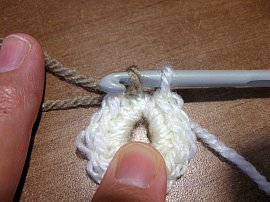

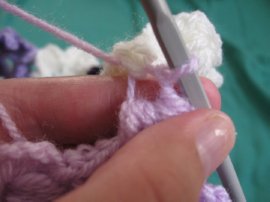
ch 3 start your puff stitch in same stitch , YO and draw up 3 times for first part of stitch (7 loops on hook)
Picture 1
then YO and draw up 3 times in next stitch (13 loops on hook)
Picture 2
pull through all 13 loops.
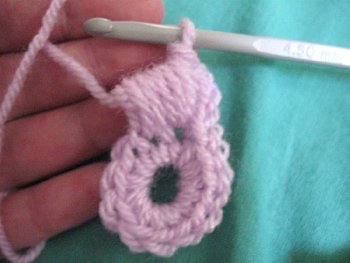
Picture 3
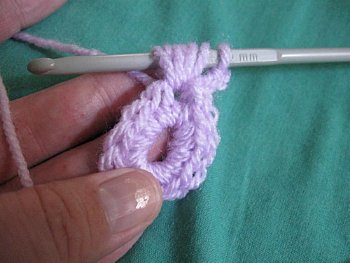
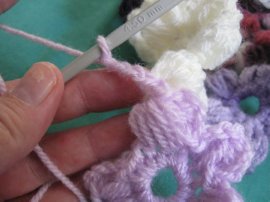
Ch 4, sl st into same st,
Picture 4
Picture 5
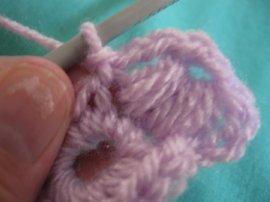
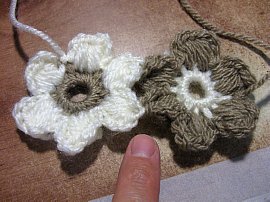
Then sl st into next stitch and repeat petals until you get to your sixth petal. When you get to your sixth petal, stop at the point of picture 3, before making your ch 4. Here you need to start another flower, complete this second flower to the 6th petal and stop as well. Now you will need to connect the first to the second like shown below. All three flowers of the first row will need to be connected once to the flower to the right.
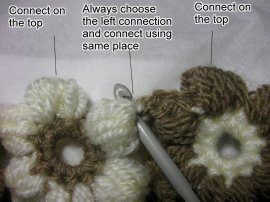
HOW TO CONNECT THE FLOWERS
To make the connection , you will use the larger of the two connections, the left one, on the top back connections of the petal.
Sl st through this loop and the one on your hook

Then ch 4 and sl st into same stitch, ch 1 and fasten off.
Then make the third flower, but complete it fully, and attach the middle flower to it by the same means as shown above. Giving you three flowers in a row for your first row.
Then you will have 2 flowers connected
You connect the next 7 flowers this same way until you have 9 total connected
When you start you 10th, you want to make one petal as normal, but then connect the next two petals to your row of flowers as shown below

then complete your next petal as normal, then the last two petals you need fold your line of flowers back to back and connect the last two petals to the last flower of the row to complete the ring.
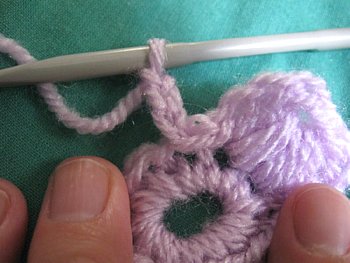
To connect your first flower of a new row you need to make 3 connections. When connecting this row you will need to favor the left flower and connect in the same place as you did the flower to it’s right.
The color flower you will be connecting is always going to be the same color. So as shown in the picture above, you would connect a brown flower to the top puff st of the brown flower petal, then connect it to the middle stitch, the the top puff st of the white flower. Next flower you will connect will be white one.
Connect the rest of the flowers of the round using 4 connections. As you can see below you will be using 3 places that were previously connected, so remember to always favor the left stitch. Also you see below what I was saying about starting your connection using the same color flower.
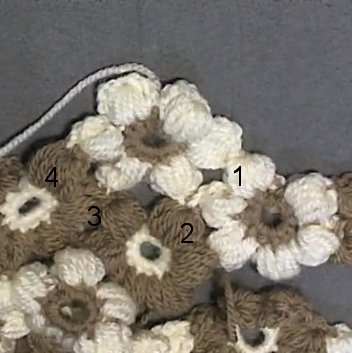
As you can see above, you will be connecting the next flower to the right of the flower you just connected. Continue this until you get to your last flower connection. You will be connecting 5 out of 6 petals. Start to the right connecting in each section and last petal you make and don’t connect it to anything.

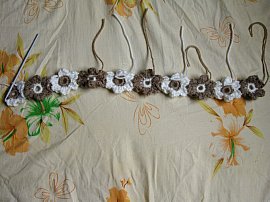
Repeat these rounds of flowers until you have a total of 7 rows
CLOSING THE HAT
Round 1
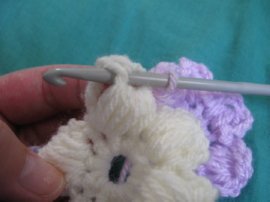
Connect your white yarn to a top petal’s right ch 3 space, this will count as the first sc, then sc in the top puff stitch, then sc into the next ch 3 space. Then dc into the next two lower petals and repeat.

This is how you will flatten out the flower’s petals to make a flat edge.
Rounds 2 and 3
sc in all sts
Round 4
Scdc, sc, repeat for round
First row of decrease you should end on a sc and have 34 sts.
Rounds 5 and 6
sc in each st around
Round 7
scdc, sc end with a sc and you should have 23 sts
Move your marker up to beginning stitch
Rounds 8 and 9
sc in all sts around, after round 9 sl st into beginning st and ch 1 cut your yarn leaving a long tail for sewing.
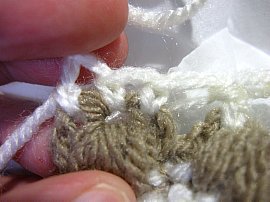
Using your tapestry needle, weave in and out of the stitches creating a pully to close the hat, go through 6 or so and pull your yarn through the stitches, repeat until you have gathered all the stitches. Pull slightly on your yarn but don’t close top of hat yet, put your needle through the hole and trun your hat inside out. Close the gap by going in through the stitches on either side of the hole and creating a loop then feed your yarn though to create a slip knot, repeat this 2 more times and then use your tapestry needle to hide the tail. Cut yarn.
MAKING THE RIM
Attach your yarn again with a sc attachment on one of the top petals ch 3 sp. Because you will be working this the same. * 1 sc in the ch 3 sp, 1 sc in the top puff stitch and 1 sc into the next ch 3 space then DC on the connected petals* and repeat. (You are evening out the row again like round 1 of closing the hat)
Rounds 2 – 6
Place marker here and sc in all sts around. Ch 1 cut your yarn leaving a tail to be worked in by a tapestry needle.
It’s REVERSIBLE – Puff side or Flat side, both sides look great!
This pattern is brought to you by www.meladorascreations.com
You can sell any item made from this pattern and link back to my page or videos, but you do not have permission to copy and paste my pattern anywhere online. ©Copyright 2023, All Rights Reserved
PLEASE READ BELOW!
If you’d like to see my channel stay and grow, please consider becoming a patron.
Or you could make a one time donation through PayPal. Thank you so much for your support! God Bless!